This post may contain affiliate links. Please read my disclosure policy.
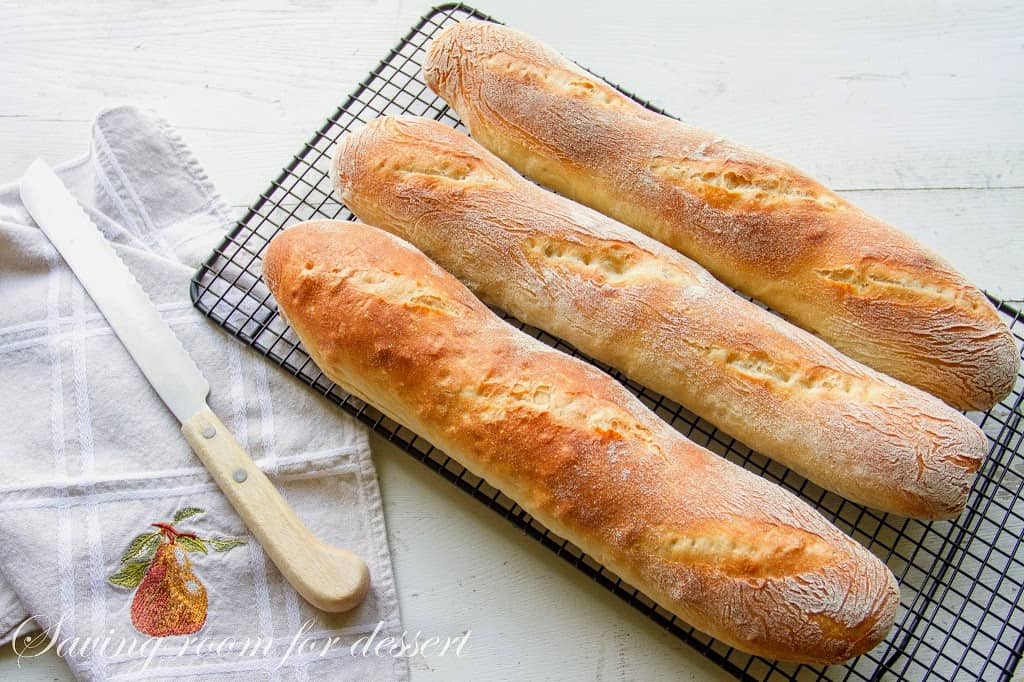
If I wasn’t already married to my husband I think he might have professed undying love to me, for a loaf of this homemade baguette. Maybe that’s a bit of an exaggeration, but only by a little. We were astounded and thrilled at the crispy exterior, fluffy soft middle and amazing flavor that only comes with yeast bread that has been allowed to fully develop and bloom.
When I grow up I want to be a baker.
I’ve often written about the satisfaction that comes with bread making. It’s truly magical for me and I hope it always stays that way. It’s such a shame I can’t eat like this everyday! We don’t buy bread in the stores and only have an occasional carb-fest treat like this. But if you’re going to load up on doughy carbs, this is the way to go.

We can make a meal out of a warm loaf of bread, a little olive oil and maybe some cheese. Gosh I’m getting all excited just thinking about it!
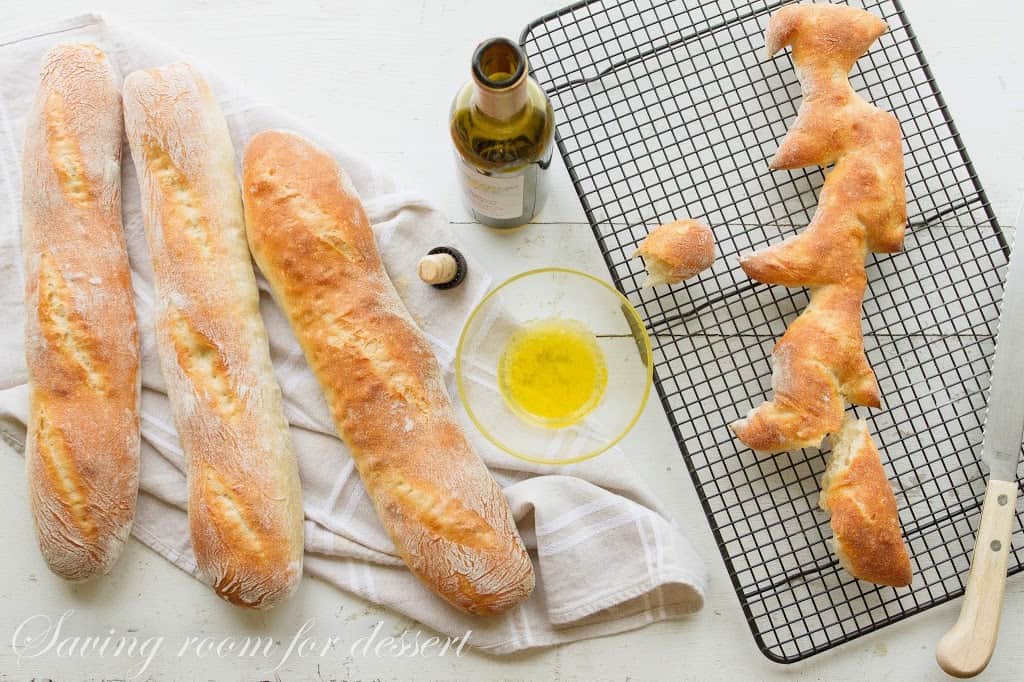
This absolutely wonderful recipe is two days in the making. It yields 4 half-pound baguettes. The recipe can also be formed into other shapes such as a wheat stalk. I totally failed at perfecting the cuts for the wheat stalk, but the little nubs of bread were great for dipping in olive oil from the Florida Olive Oil Company.
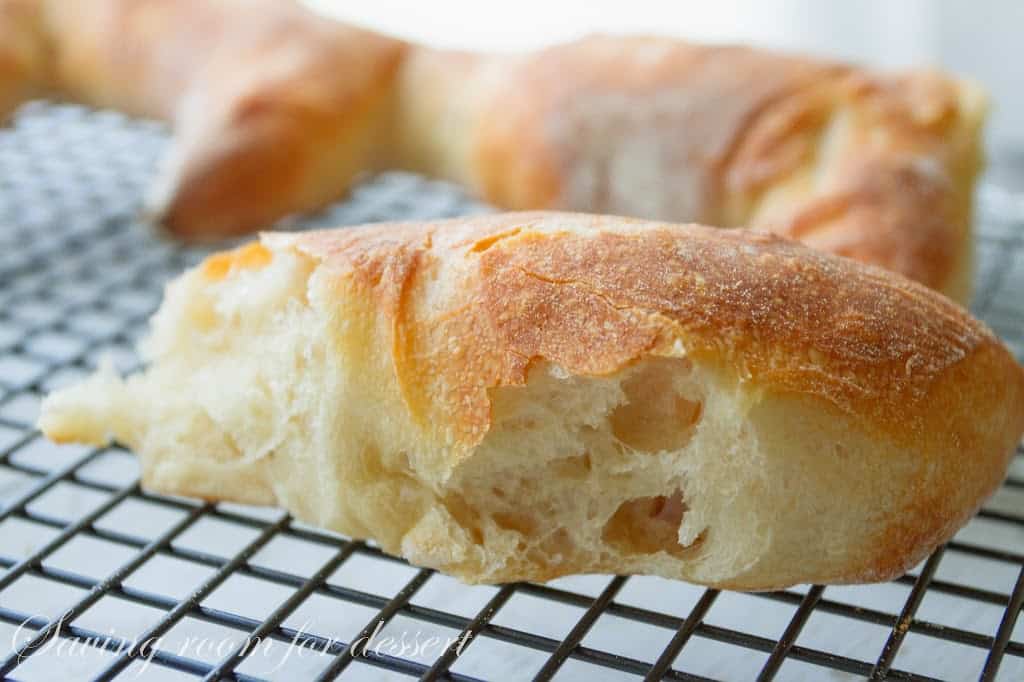
Crispy on the outside, light and fluffy on the inside.
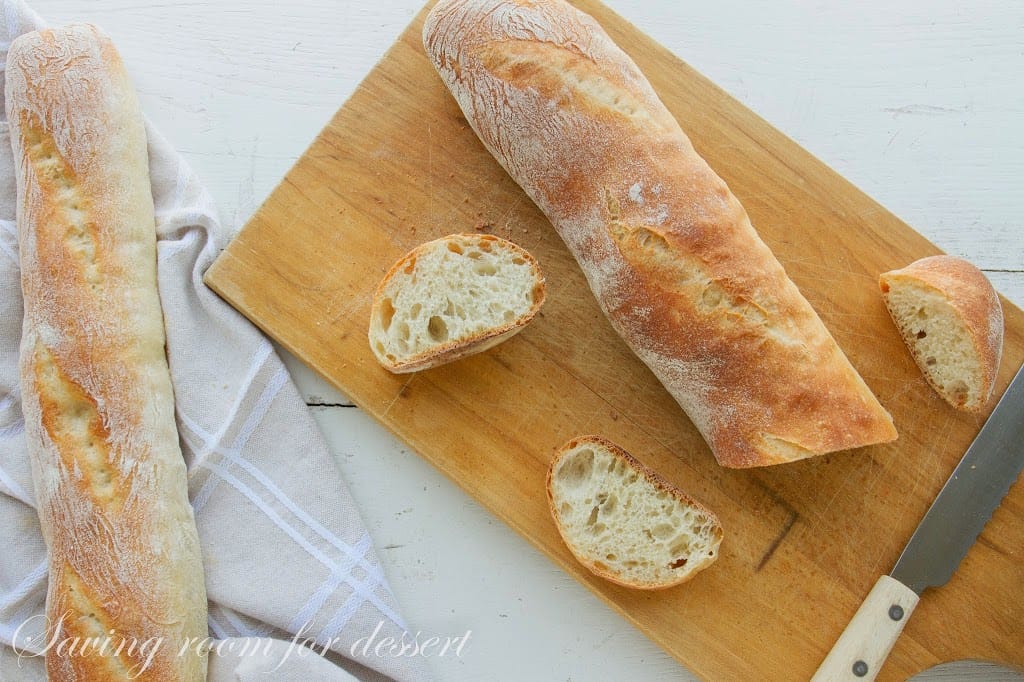
I froze a loaf which I’ll use this weekend in a strata with fresh kale from our garden. I’ll let you know how that turns out!


Homemade Baguettes
Prep Time: 1 hour
Cook Time: 20 minutes
Total Time: 1 day 13 hours 20 minutes
Yield: 20
Course: Bread
This recipe is best made over a two day period. The starter for the recipe includes a piece of fully risen dough from pizza dough or any other white-flour bread dough. Each of the steps are easy and not very time consuming, but there are many steps.
Ingredients
For the starter:
- A walnut size piece of fully risen dough from pizza dough or any other white-flour bread dough
- ¼ cup of warm water about 105°F to 115°F
- ⅔ cup all-purpose flour
For the sponge:
- The first-stage starter (from above)
- ¼ cup warm water 105°F-115°F
- ¾ cup all-purpose flour
For the final dough:
- 1 ¼ cups cool water about 78°F
- ¾ teaspoon active dry yeast
- The second-stage sponge (from above)
- 3 ⅓ cups all-purpose flour
- 1 tablespoon kosher salt
Instructions
Day 1 - Stage One “make the starter” (early morning):
- Cut the risen dough into little pieces and drop them into the warm water in a medium mixing bowl. Allow the dough to soften for about 5 minutes. Gradually add in the flour using a sturdy wooden spoon to mix. If the dough is too difficult to stir with the spoon, mix it with clean hands until all the flour is incorporated. Cover the dough with plastic wrap and put in a warm place (about 80-85 degrees) to rise for about 8 hours. The dough should become soft, sticky, bubbly and springy.
Day 1 - Stage Two - “make the sponge” (afternoon):
- Scrape the fully developed first-stage starter onto a cutting board and cut it into 4 pieces. Add the pieces to the mixing bowl and add the water. Allow the dough to soften for 5 minutes. Using a wooden spoon gradually stir in the flour until the dough comes together and the flour is fully incorporated. If it is too stiff to mix, use your hands. Cover the mixing bowl with plastic wrap and let it rest in a warm place (80 to 85 degrees) for 4 hours. The dough should double in size during this time. Refrigerate the risen sponge for at least 1 hour but no more than 8 hours.
Day 2 - "the final dough" (morning):
- Pour the water into the mixing bowl of a stand mixer. Fit the mixer with the dough hook. Sprinkle the yeast into the water and stir by hand to mix. Deflate the sponge and break it into pieces. Add the pieces to the bowl and allow it to soften for 5 minutes.
- Add the flour to the mixing bowl and turn on low. Once the flour is incorporated turn off the mixer and let the dough rest for about 10 minutes to fully absorb the water.
- Turn the mixer on low speed and sprinkle the salt onto the dough. Increase the mixer speed to medium-high and knead for 8 minutes. The dough should be very soft and moist. If it begins to rise up the dough hook, scrape down with a rubber spatula.
Third Rise:
- Transfer the dough to a clean bowl and cover it with plastic wrap. Allow the dough to rest in a warm place (80°F 85°F) for 1 ½ hours. The dough will double in size and have a network of bubbles visible.
Fourth Rise:
- Fold the dough down onto itself a few times to deflate it and redistribute the yeast. Don't punch the dough down or you may lose the open, bubbly structure. Cover with plastic wrap and let it rise for 45 minutes.
Forming the Baguettes:
- Cut the dough into 4 pieces each weighing approximately 10 ounces. Working with one piece at a time, carefully pat each piece into a rough rectangle. Fold down about a third of the dough and press it lightly in the middle of the dough with your fingertips. Fold everything down to the bottom and once again, lightly press the dough into place. Roll the dough, seam side up, back and forth under the palms of your hands to form a short sausage shaped dough. Cover the dough with a towel and let it rest for 10 minutes.
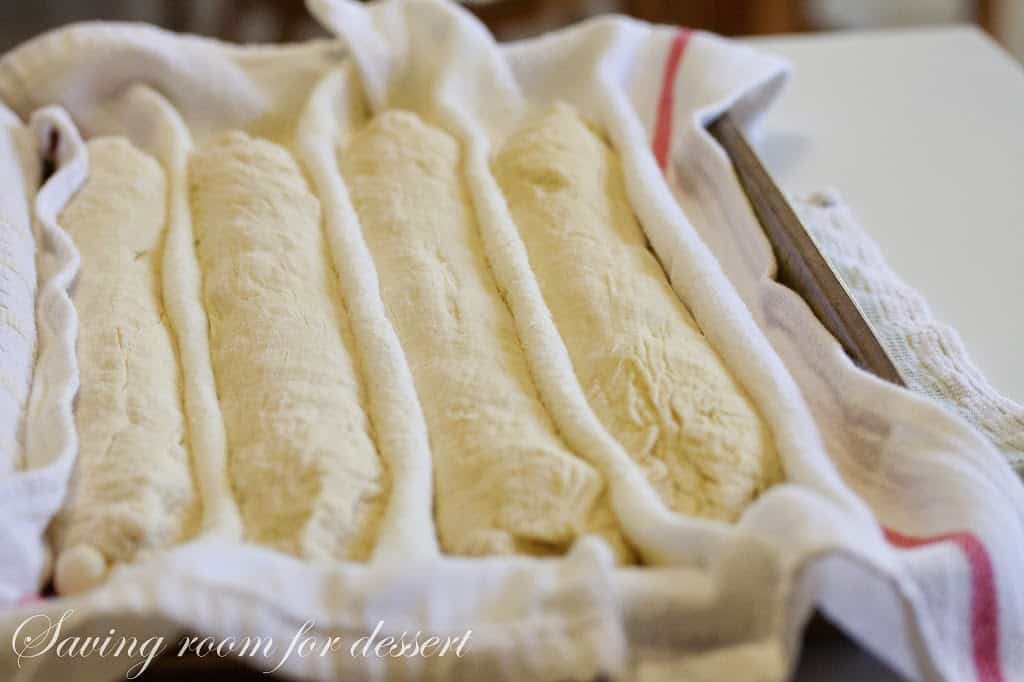
- Roll each piece of the rested dough gently under your palms to make a 15-inch long baguette with slightly tapered ends. Place each loaf seam side up on a floured towel, lifting a section of the towel up to form a pleat between each baguette. (See photo above)
Final Rise:
- Cover the loaves with a clean kitchen towel and let rise at room temperature for 1 1/2 hours.
Bake the Baguettes:
- Position a rack in the lower 1/3 of the oven and place a baking stone on the rack. Preheat the oven to 450°F. Place a cast-iron skillet on the floor of the oven. Rub a pizza peel with flour and set aside.
- Pour 1 cup of warm water into a bottle or measuring cup with a spout. About 2 minutes before baking the baguettes, open the oven door and carefully pour the water into the hot skillet. Immediately close the oven door to trap the steam.
- Roll the baguettes onto the peel, seam side down. Slash each baguette with a razor or very sharp knife making 3 deep cuts almost parallel to the bread. Quickly slide the loaves onto the hot stone and bake for about 18 minutes. To test the baguettes insert an instant read thermometer into the center of a loaf. It should read 200°F to be completely baked.
- Cool completely before cutting.
Recipe Notes
Note: This recipe is adapted from Baking with Julia - with Dorie Greenspan.
Nutrition
Calories: 110kcal | Carbohydrates: 23g | Protein: 3g | Fat: 0.3g | Saturated Fat: 0.1g | Polyunsaturated Fat: 0.1g | Monounsaturated Fat: 0.04g | Sodium: 351mg | Potassium: 36mg | Fiber: 1g | Sugar: 0.1g | Vitamin C: 0.002mg | Calcium: 5mg | Iron: 1mg
Baguettes
Note: This recipe is best made over a two day period. The starter for the recipe includes a piece of fully risen dough from pizza dough or any other white-flour bread dough. Each of the steps are easy and not very time consuming, but there are many steps. For more detail and instruction pick up a copy of Baking with Julia – with Dorie Greenspan.
Day 1 – Stage one – “the starter” – morning:
A walnut size piece of fully risen dough (from the pizza dough or any other white-flour bread dough)
1/4 cup of warm water (about 105 to 115 degrees)
2/3 cup unbleached all-purpose flour
Cut the risen dough into little pieces and drop them into the warm water in a medium mixing bowl. Allow them to soften for about 5 minutes. Gradually add in the flour using a sturdy wooden spoon to mix. If the dough is too difficult to stir with the spoon, mix it with clean hands until all the flour is incorporated. Cover the dough with plastic wrap and put in a warm place (about 80-85 degrees) to rise for about 8 hours. The dough should become soft, sticky, bubbly and springy.
Day 1 – Stage two – “making the sponge” – afternoon:
The first-stage starter (above)
1/4 cup warm water (105-115 degrees)
3/4 cup unbleached all-purpose flour
Scrape the fully developed first-stage starter onto a cutting board and cut it into 4 pieces. Add the pieces to the mixing bowl and add the water. Allow the dough to soften for 5 minutes. Using a wooden spoon, gradually stir in the flour until the dough comes together and the flour is fully incorporated. If it is too stiff to mix, use your hands. Cover the mixing bowl with plastic wrap and let it rest in a warm place (80 to 85 degrees) for 4 hours. The dough should double in size during this time. Refrigerate the risen sponge for at least 1 hour but no more than 8 hours.
Day 2 – “the final dough” – morning:
1 1/4 cups cool water (about 78 degrees)
3/4 teaspoon active dry yeast
The second-stage sponge (above)
3 1/3 cups unbleached all-purpose flour
1 tablespoon kosher salt
Pour the water into the mixing bowl of a stand mixer. Fit the mixer with the dough hook. Sprinkle the yeast into the water and stir by hand to mix. Deflate the sponge and break it into pieces. Add the pieces to the bowl and allow it to soften for 5 minutes.
Add the flour to the mixing bowl and turn on low. Once the flour is incorporated turn off the mixer and let the dough rest for about 10 minutes to fully absorb the water.
Turn the mixer on low speed and sprinkle the salt onto the dough. Increase the mixer speed to medium-high and knead for 8 minutes. The dough should be very soft and moist. If it begins to rise up the dough hook, scrape down with a rubber spatula.
Third Rise: Transfer the dough to a clean bowl and cover it with plastic wrap. Allow the dough to rest in a warm place (80 to 85 degrees) for 1 1/2 hours. The dough will double in size and have a network of bubbles visible.
Fourth Rise: Fold the dough down onto itself a few times to deflate it and redistribute the yeast. Don’t punch the dough down or you may lose the open, bubbly structure. Cover with plastic wrap and let it rise for 45 minutes.
Forming the baguettes: Cut the dough into 4 pieces each weighing approximately 10 ounces. Working with one piece at a time, carefully pat each piece into a rough rectangle. Fold down about a third of the dough and press it lightly in the middle of the dough with your fingertips. Fold everything down to the bottom and once again, lightly press the dough into place. Roll the dough, seam side up, back and forth under the palms of your hands to form a short sausage shaped dough. Cover the dough with a towel and let it rest for 10 minutes.
Roll each piece of the rested dough gently under your palms to make a 15-inch long baguette with slightly tapered ends. Place each loaf seam side up on a floured towel, lifting a section of the towel up to form a pleat between each baguette. (See photo above)
Final Rise: Cover the loaves with a clean kitchen towel and let rise at room temperature for 1 1/2 hours.
Baking the baguettes: Position a rack in the lower 1/3 of the oven and place the baking stone on the rack. Preheat the oven to 450 degrees. Place a cast-iron skillet on the floor of the oven. Rub a pizza peel with flour and set aside.
Pour 1 cup of warm water into a plastic bottle (like a water bottle). About 2 minutes before baking the baguettes, open the oven door and carefully pour the water into the hot skillet. Immediately close the oven door to trap the steam.
Roll the baguettes onto the peel, seam side down. Slash each baguette with a razor or very sharp knife making 3 deep cuts almost parallel to the bread. Quickly slide the loaves onto the hot stone and bake for about 18 minutes. To test the baguettes insert an instant read thermometer into the center of a loaf. It should read 200 degrees to be completely baked.
Cool completely before cutting.
Enjoy!
(Recipe adapted from “Baking with Julia”)
~~~~~~~~~~~~~~~~~~~~~~~~~~~~~~~~~~~~~~~~~
It probably sounds like a lot of steps but they are really quick and easy to do. This bread is worth every minute it takes to make it. We will make them again one day – guaranteed!
I have a nice dessert planned for this weekend so be sure to check back on Monday. Thank you so much for stopping by. Have a wonderful weekend!
Tricia


Ashley
Homemade bread is the absolute best! I have wanted to make baguettes for the longest time – I just need to do it!
Jessica Holmes
Oh I just love baking bread, these baguettes look amazing! Lovely crunchy crust!
SavoringTime in the Kitchen
Your baguettes look absolutely perfect! Definitely will be trying these – thank you!
scrambledhenfruit
These days, if I'm going to eat bread it's got to be good bread. This fits the bill perfectly! 🙂
Pam
There's nothing like the aroma of freshly baked bread and these baguette's look delicious! I love to bake bread and this is a good one to try. Thanks!
Angie Schneider
They come out bakery-perfect, Tricia!
belleau kitchen
They look amazing and I agree totally with your sentiments about bread but I just don't have the patience for a 2 day bread bake… I'll just have to lust after yours…
Elzbieta Hester
Marvelous, Gina! I can go crazy for a good baguette too! Heaven!<br /><br />ela h.<br />Gray Apron
Monica
My goodness – making baguettes at home sounds like an impossibility but you managed it brilliantly, Tricia! It looks wonderful, particularly that wonderful crust and the fluffy center. It's hard to believe you can do that home. It looks better than the loaf I picked up at the farmer's market last Sunday! I'm so glad I've worked with yeast a few times now to know what you are
Cheri Savory Spoon
Hi Tricia, These look just like the ones you buy from a great bakery. I have been wanting to make my own for some time now, but the process seemed overwhelming, you make it sound like it can be done. Pinned, will give it a go.
Mary
Wow these look absolutely amazing!! I can almost taste them!!<br />Mary
Abbe@This is How I Cook
I'm with you-I love baking bread. I've always wanted to open an old fashioned bakery! I guess that will be in my next life, unless you want to move here? These are gorgeous, Tricia and I bet they taste scrumptiously delicious!
June
Looks amazing! I love homemade bread, but I've never had success with baguettes. Well, I tried them once and it didn't work out. But this will motivate me to try again. 🙂
Big Dude
They look terrific Tricia and I'm making sure the family baker sees this.
Sue/the view from great island
These are absolutely stunning! Pinning… sharing… drooling!