
This post may contain affiliate links. Please read my disclosure policy.

I had so much fun playing with these cookies. I may never use a glass bowl to serve dessert, ever again! Simple, delicious, crispy, and light, tuiles are a versatile cookie with endless possibilities. While sitting at work this week all I could think about was rushing home to make another batch. Ideas kept popping in my head and for those of you who are uber-creative, I bet you could elevate these to a thing of beauty!
Tuile is the French word for tile. Tuile cookies are often shaped like a pringle potato chip. Think “clay roofing tiles” … in French of course. Somewhere, someone decided these would be terrific shaped in a bowl and used to serve creamy desserts. Brilliant idea! Tuiles taste a little like the Pepperidge Farm Pirouette Wafer Cookies.
 When you’re ready to make tuiles, one of the most important steps is to prepare a work surface. You’ll need bowls and other objects to shape the cookies. I’ve made several batches and decided to try small bowls and cone shapes. I didn’t end up making a tube or curl shaped cookie, but will next time. As you can see, I used different sized bowls. To make sure the cookie is big enough, measure the bowl while inverted from one side to the other. The larger bowls in the picture were about 8 inches. My first batch of cookies were 6 inches in diameter. Think about what you will serve in the cup or bowl and go from there.
 To make the batter, combine flour, confectioners’ sugar, and a dash of salt. Whisk until combined. Add cooled, melted butter and one egg white, lightly beaten. That’s it! Don’t over beat the batter, just whisk until blended.
 To make a 6 inch cup, I used a heaping tablespoon of batter. Spread the batter as evenly as possible on a large cookie sheet lined with parchment paper. The cookies do not spread so use a ruler to ensure the size is right. Make sure there are no thin spots because they will brown the fastest.
 Using a large flat spatula, immediately remove the cookie and drape over the bowl or cup. Since the cookies are very hot, I covered the cookie with a clean paper towel and used my hands to press the sides down around the bowl. Allow the cookie to rest a few minutes and remove to a rack to cool completely.
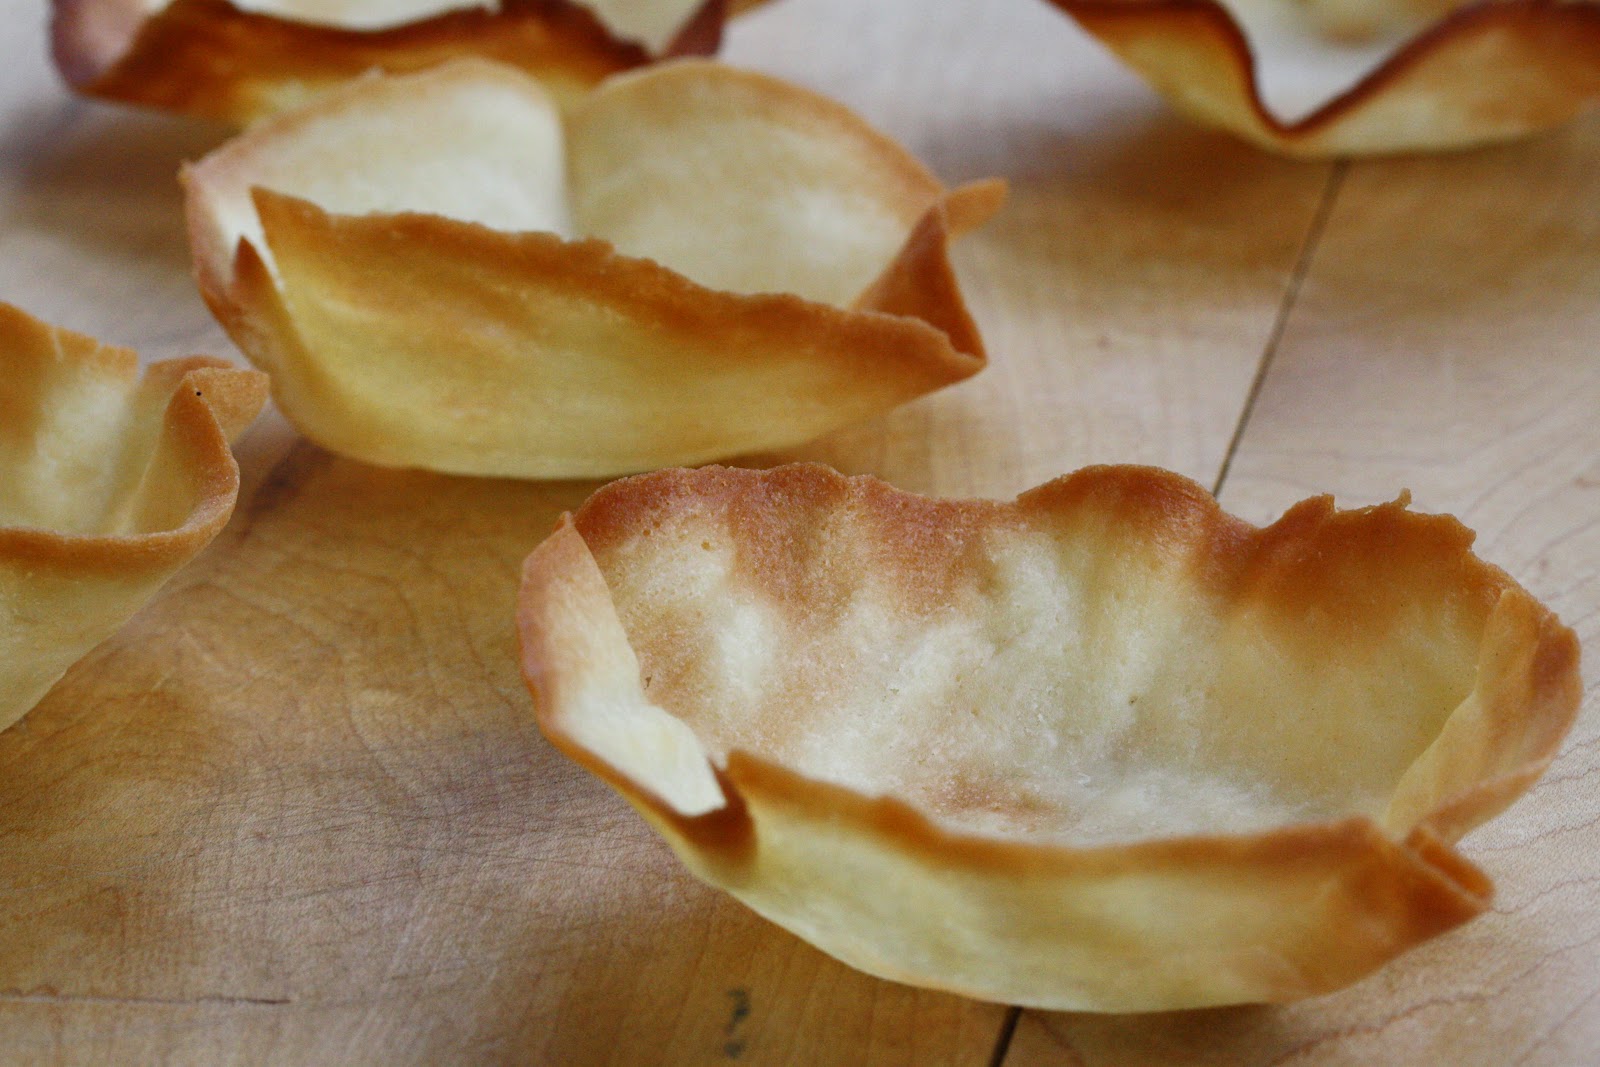 I ended up using three different cookie sheets until I found the one that browned the cookies evenly and not too quickly. I tried a Silpat mat as well as parchment paper. I prefer the results from the parchment paper.
 I tried multiple forms and found I like the bowl that flares out more, forming a wider shallow cup.
 Once I was happy with the bowl size, the right pan (I love my Pampered Chef stoneware), and parchment paper, I started making two at a time.
 I took a couple of tablespoons of the batter and placed it in a small bowl. I added 1/2 teaspoon cocoa powder and put the mixture in a decorator bag with a small tip. Pipe various designs on top and bake.
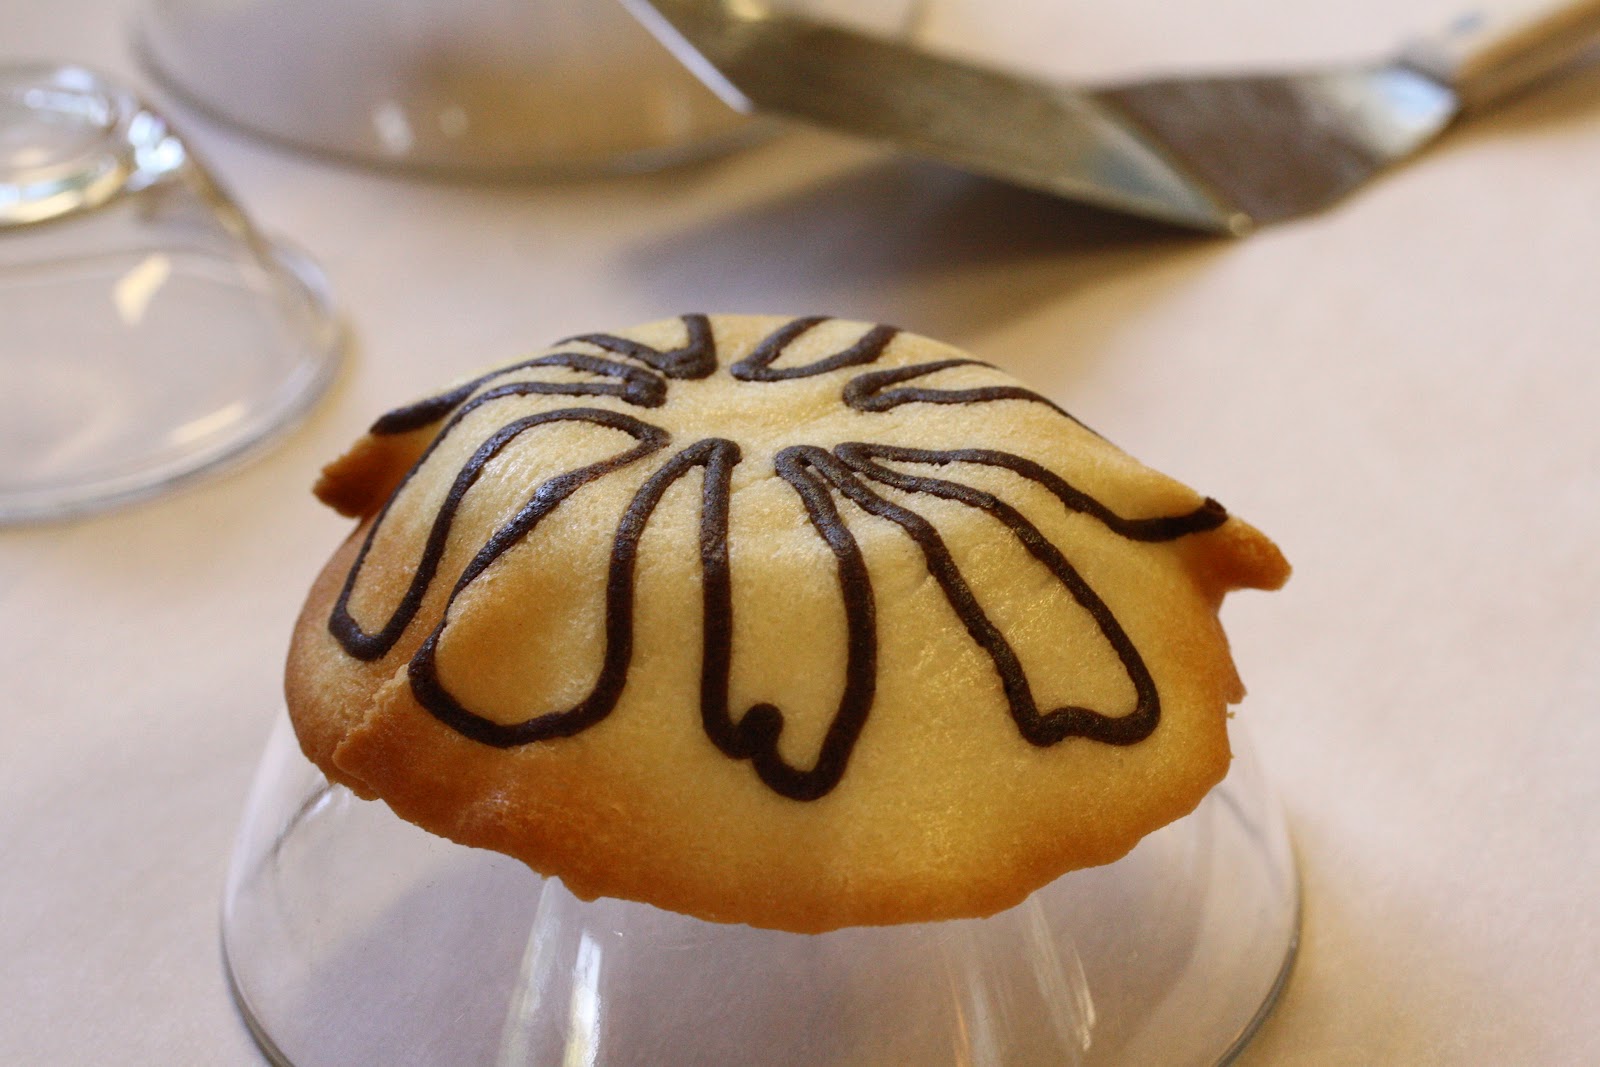 I put the design on top (bottom of the bowl) when forming the cup but may try the opposite. I guess it depends how you will use them.
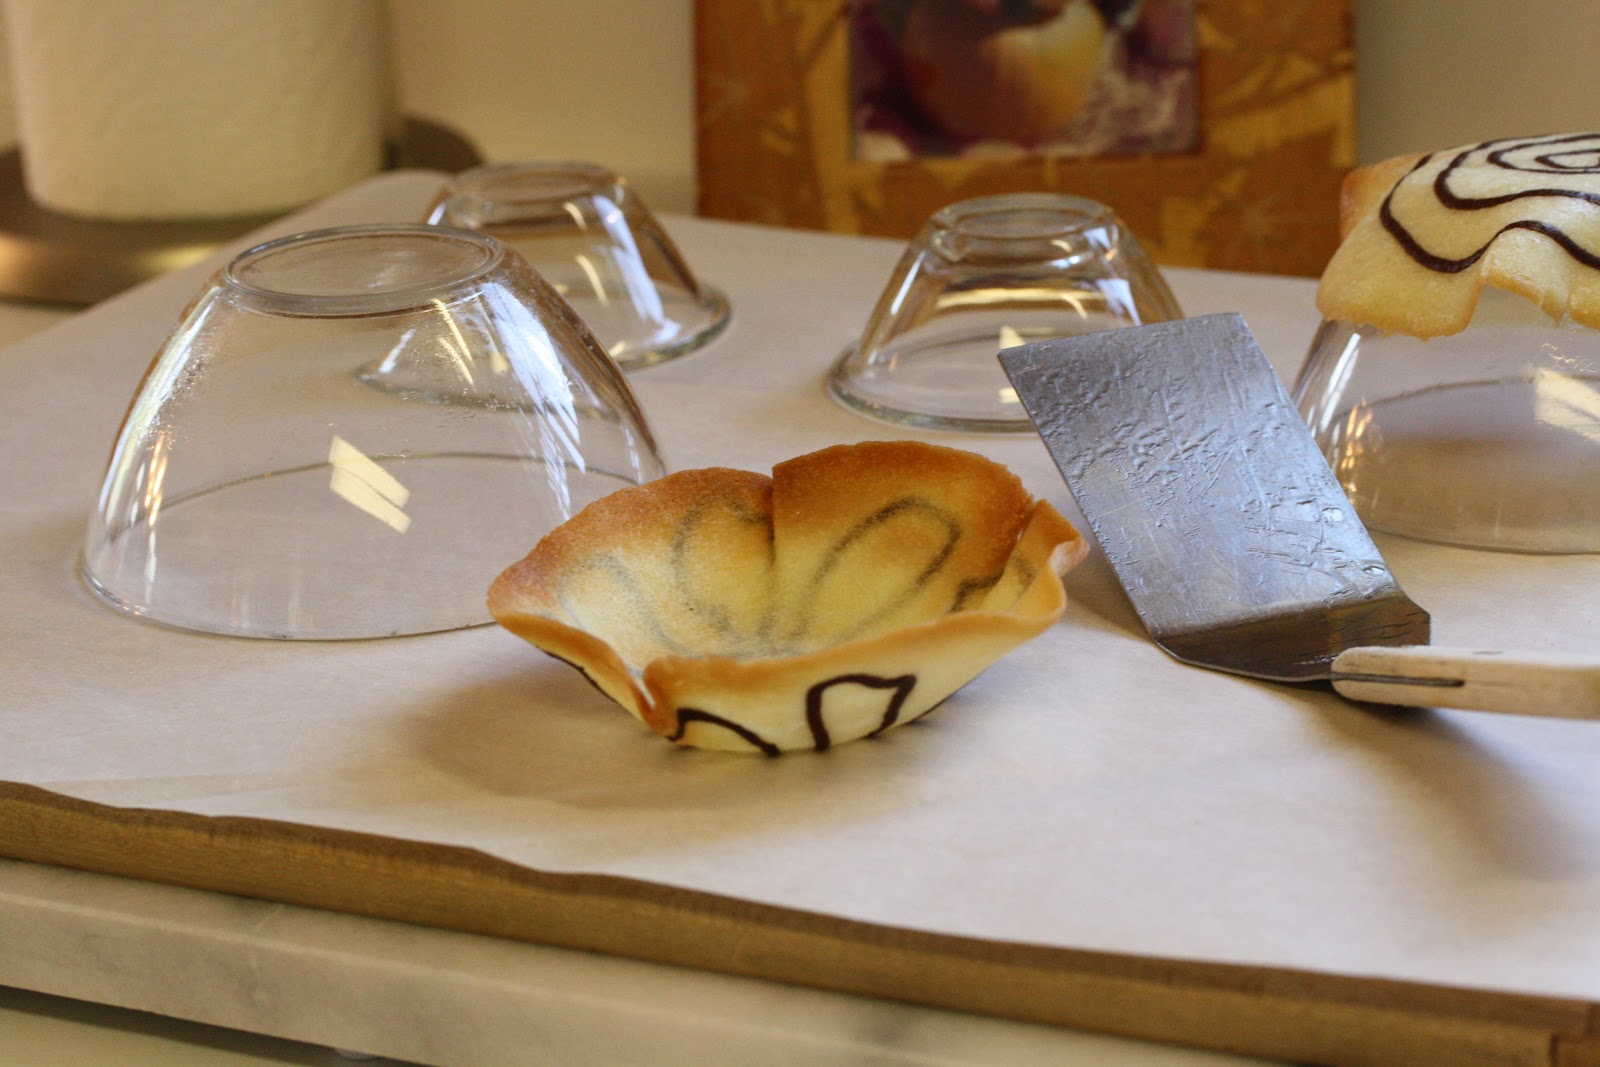 They don’t have to be perfect – just have fun.
 When you go to make the next batch, use a clean piece of parchment paper on a cool counter top. Don’t put it in the hot cookie pan because the batter will start to bake before you get it spread properly. By using a cool surface, you will have more time to play. Trust me on this 🙂
 I cut one of the cookies in half while hot and tried making cones. I didn’t master this form … yet 🙂 The hole in the bottom is too big, but I can will again sometime.
 Having fun playing with food! I can’t think of a better way to spend a few hours after sitting at a desk all day.
 I used the left over chocolate mixture to make a small bowl. Wouldn’t that be great filled with a piped peanut butter mousse? Add a little shaved chocolate on top – so elegant! I dipped the edges of one bowl in melted chocolate. I think I’ll try using a pastry brush next time for a more even presentation.
 I can’t wait to see what you come up with!
Tuile Cups
Course: Cookie, Dessert
A simple vanilla wafer cookie that can be molded into shapes, bowls, cones and tubes. Have fun and enjoy!
Ingredients
- 4 ½ tablespoons unsalted butter, melted and cooled
- ⅓ cup plus 1 tablespoon all-purpose flour
- ⅓ cup plus 1 tablespoon powdered sugar
- dash of fine sea salt
- 1 large egg white, lightly beaten
- Dutch Process Cocoa Powder and melted chocolate, optional
Instructions
- Preheat oven to 350°F. Line a large baking sheet with parchment paper. Arrange a work surface with several 1-cup bowls placed upside down.
- In a medium mixing bowl, whisk together the flour, sugar and salt. Add the melted and cooled butter and the lightly beaten egg white. Whisk until blended and smooth. Drop batter by heaping tablespoons onto the baking sheet. Using the back of a small spoon, spread the batter until it forms a 6-inch circle. The batter will be very thin but make sure it is even.
- Bake the tuiles until lightly browned, 8 - 10 minutes. Working quickly remove the tuile from the pan using a large wide metal spatula and lift the cookie over the inverted bowl. Drape a clean paper towel over the tuile and press the sides down around the bowl to mold. Cool until the cookie is set. Remove to a wire rack to cool completely. When making the next batch, do not place the dough on a hot cookie sheet. Work on a cool surface lined with parchment paper and carefully lift the paper onto the cookie sheet when ready to bake.
- Garnish as desired. Store in an airtight container at room temperature until ready to serve. May be made up to two days in advance.
Recipe Notes
Adapted from a recipe on LaCucina Italiana, June 2010
Nutrition information is calculated using an ingredient database and should be considered an estimate. When multiple ingredient alternatives are given, the first listed is calculated for nutrition. Garnishes and optional ingredients are not included.
Nutrition
Calories: 775kcal | Carbohydrates: 72g | Protein: 8g | Fat: 52g | Saturated Fat: 32g | Polyunsaturated Fat: 2g | Monounsaturated Fat: 13g | Trans Fat: 2g | Cholesterol: 135mg | Sodium: 58mg | Potassium: 109mg | Fiber: 1g | Sugar: 39g | Vitamin A: 1574IU | Calcium: 24mg | Iron: 2mg
I hope you have a wonderful long Labor Day weekend. We’re in full wedding mode with our son getting married in 44 days! People will come, (name that movie) oh people will definitely come! We have tons of out of town guests scheduled to appear and guess WHO doesn’t even have a dress yet? Shopping is on my list of things to do – right now!

Callie & Patrick
Thanks so much for stopping by!
Tricia

Electromelle
It is delicious and pretty easy to make. If you want it to taste vanilla, you have to add some like I did (since there is no mention of it in the ingredients).
Andrea
Hi there. Approximately how many smallish bowls does this recipe make? Thanks!
Tricia Buice
Hi Andrea – about 10-12 depending on the size of the bowl. Since the batter is so easy to make, you can always make a second batch in no time if more are needed. These are such a treat – hope you enjoy!
Cristina
I luv how you used these tuiles for the chocolate gelato post. Great post and tutorial!
Shiloh Barkley
Those suckers are impressive!<br /><br />www.shilohstaste.com
Maureen
I love these cups! Hope you found the perfect dress for the wedding!
Donalyn
How yummy those look – I love the chocolate swirls!
Anna and Liz Recipes
These look like alot of fun to make! great ideas too and love the new design of your website! great job!! and Congrats on your son's engagement!! We too have been very busy, we moved to Charleston, SC, and our daughter just had her 2nd child, born on August 3rd, our little granddaughter named "Valentina." God bless you all! Anna
Tanna at The Brick Street Bungalow
Okay, Tricia. You are just getting so fancy you are going to have to get your own cooking show. LOVE the photo of Callie and Patrick!! I'm excited for all of you. I've been missing out while on my "break"!! blessings and hugs ~ tanna<br />ps love the new look!! i'm telling you, so fancy!!
Angie's Recipes
These tuile cups look fantastic, Tricia. Thumbs up for you, my dear. <br />Have fun shopping weekend!<br />Angie
The Café Sucré Farine
Tricia, these are amazing. You are so much like me, you start playing in the kitchen and end up having so much fun! I will be trying these for sure! <br />Love the picture of your son and his bride to be. That's a wonderful shot of them. We've had two weddings so I totally understand where you're at. I know you'll find the perfect dress, have fun!
The Slow Roasted Italian
These are fabulous Tricia! I could definitely see having an awesome dessert served in these fun cups.
Cooking on a Dime
Oh how neat are these!? Beautiful.
Mary
These are absolutely gorgeous, Tricia! Happy shopping this weekend. The countdown is most definitely on!
Mary
How perfect! You did an incredible job with these. They look like they were turned by a professional hand. I'm envious. Have a great day. Blessings…Mary
Kari Lindsay
Congratulations on your son's up coming marriage, so exciting! 44 days will fly by.<br />The tuile cups are adorable, and who doesn't love an edible bowl?