This post may contain affiliate links. Please read my disclosure policy.
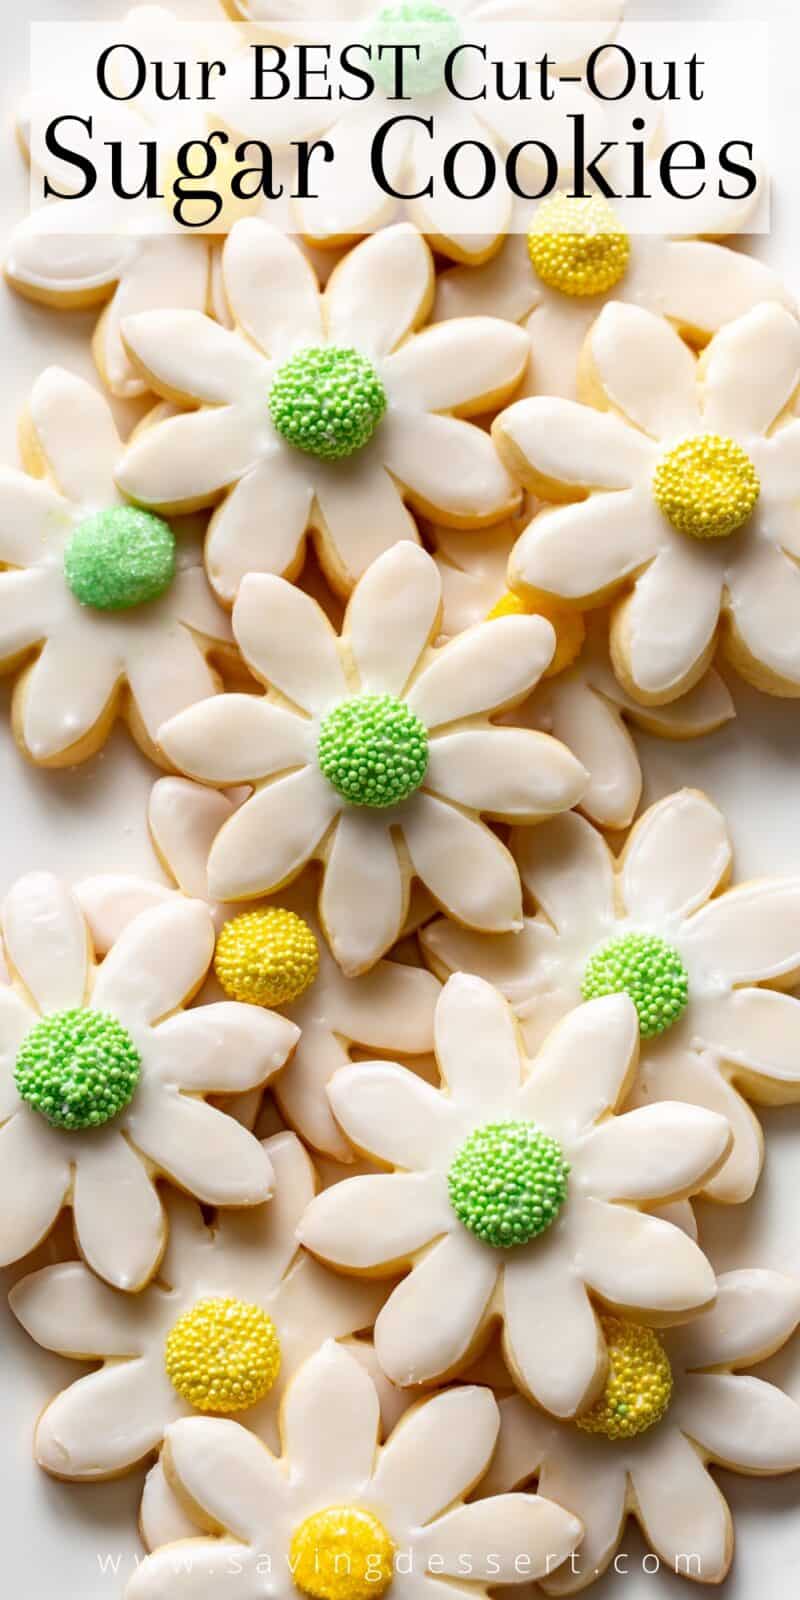
Our BEST Cut-Out Sugar Cookie Recipe!
These sugar cookies are easy to make, taste fantastic and hold their shape when baked.
I took my mom’s old sugar cookie recipe and tweaked it into the BEST fool-proof sugar cookie recipe ever. Once you try this great recipe you’ll trust it always.
These cookies can be cut into any shape you need and still hold an intricate design. They’re freezable, absolutely delicious and always a hit at events, parties and holidays.

I may not be an expert cookie decorator, but I am an expert cut-out sugar cookie maker.

What makes a good sugar cookie recipe?
- A good sugar cookie recipe is one that you can depend on each and every time you make it. No matter which cookie cutter you use, these sugar cookies will hold their shape. You don’t have to worry if the design is intricate or detailed, you’re going to love the results.
- Also, the cookie should taste rich and buttery, not too sweet, bland or flavorless. Our sugar cookie recipe uses includes both vanilla and almond extracts. This simple combination elevates the flavor making it interesting and memorable.
- If desired, substitute the almond extract with peppermint, coconut, or even lemon extract. Be sure to use plenty of vanilla, too!
- In addition to the rich creamy butter, our recipe calls for one ounce of cream cheese. This adds a nice tang to the flavor and helps create the perfect texture of our sugar cookies.
- Finally, the best test for a good sugar cookie is to taste before decorating or icing. These cookies are great eaten plain and unadorned.
Can this cookie dough be made ahead?
This cookie dough requires at least 8 hours of refrigeration before being rolled out. However, once mixed the cook dough can be refrigerated for up to three days before being cut and baked.
Can you freeze this cut-out sugar cookie recipe?
Cut and baked sugar cookies freeze beautifully! Seal the undecorated cookies in an airtight container and freeze for up to 3 months. Thaw at room temperature and decorate as desired.
How long will these cookie last once decorated?
Undecorated cookies will keep at room temperature for at least a week. Cookies decorated with a simple water glaze also keep well at room temperature for a week.
Cookies glazed with a milk or cream based icing should be kept in the refrigerator, but also stay fresh for about a week.
If the icing is allowed to set completely before packing, these cookie ship well, too. That makes these a great holiday gift for loved ones!

Overview: How to make Sugar Cookies
You’ll need the following ingredients to make these cookies:
- unsalted butter, room temperature
- cream cheese, softened
- granulated sugar
- 1 large egg
- vanilla extract
- almond extract
- all-purpose flour
- baking powder
- salt
The cookie dough comes together in minutes:
- Using a stand mixer or hand mixer, beat together the room temperature butter and cream cheese in a large bowl. Add the sugar, then the egg and extracts.
- In a second bowl whisk together the dry ingredients: flour, baking powder and salt.
- Add half the flour mixture to the butter and sugar. Once blended, add the remaining flour mixture.
- Divide the dough in half or thirds and form each into a thick round. Seal in plastic wrap and refrigerate for at least 8 hours and up to 3 days.
- Once you’ve chilled the dough, roll one disk to the desired thickness.
- Cut out shapes using a sharp cookie cutter and place on baking sheets lined with parchment paper.
- Bake, cool and decorate with your favorite sugar cookie icing!
I always loved my moms sugar cookie recipe, but they spread just a little more than I wanted.

These sugar cookies aren’t stiff or hard to eat, and don’t soften too much after they’re decorated.
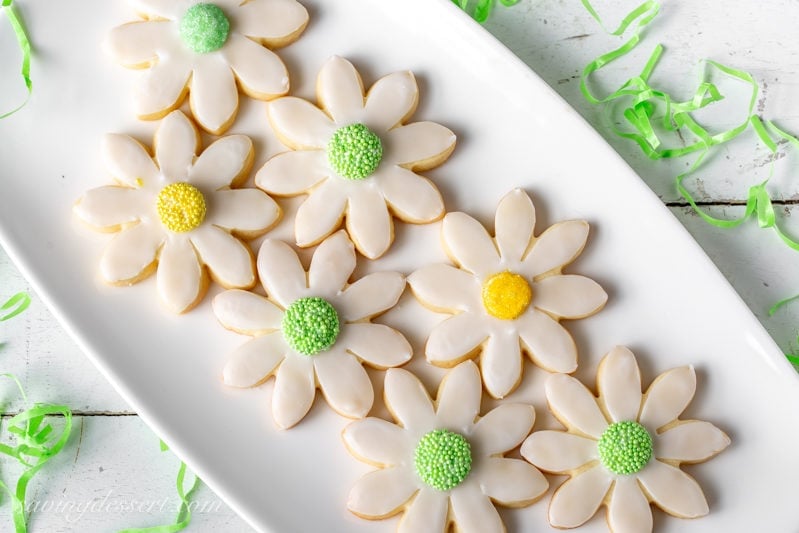
One of our granddaughters loves to decorate cookies during Christmas. Since she loved it so much I thought it’d be fun to make cookies with her for her 3rd birthday. Then, I got an idea to create a cookie bouquet with the cookie flowers.
I took some of the decorated cookies and “glued” cake ball sticks on the back with a little royal icing. Next I added florist style styrofoam blocks to a watering can for stability, and a little Easter basket grass to cover.
Jayden wasn’t sure about eating cookies that came on a stick. But, once I removed the center of the flower and the stick, she was happy to eat the cookie. 🙂
These cookies are the perfect consistency for creating your own cookie bouquet!

We use a simple powdered sugar glaze to decorate.
Make the icing in small batches
I usually make this glaze in very small batches adding more sugar if needed to thicken, or boiling water too thin. Once the desired consistency is reached, pipe a thicker line around the edges of the cookie to create an outline. The remaining glaze is thinned slightly with hot water, then pipped to fill in the decoration.
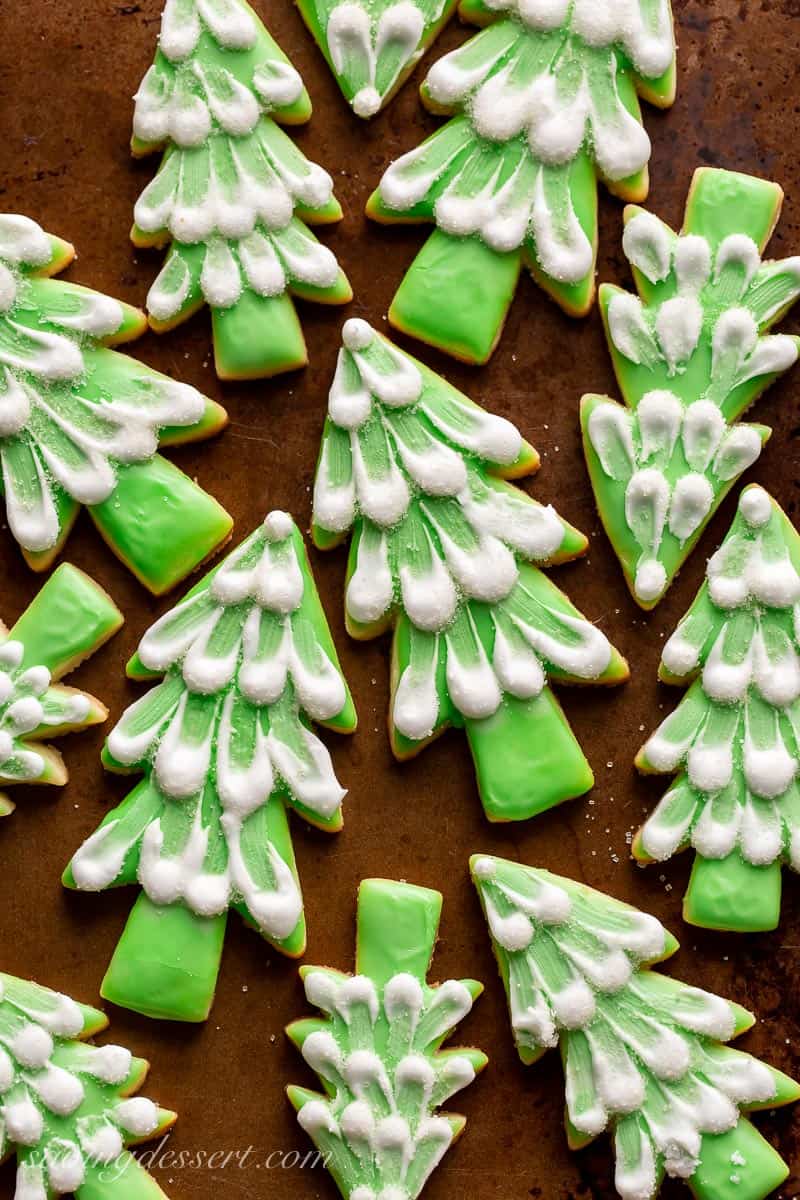
Another method is to dip the tops of the cookies into a bowl of glaze and allow the excess to drip back into the bowl. That’s the method used for the Christmas trees shown above. The snow decorations were made with Royal Icing smeared with a small food-safe paint brush then sprinkled with coarse sugar for a little shimmer.
During the holidays when I make these cookies for the kids to decorate, I make the glaze a little thicker and spread it on with a knife. The iced cookies are handed off to the kids to be sprinkled. The thicker glaze is a little less messy.
Our family loves this simple glaze icing because it adds the right amount of sweetness without being thick and overpowering. It also dries beautifully preserving the decoration – bonus! This is the perfect solution for those that don’t care for Royal Icing.
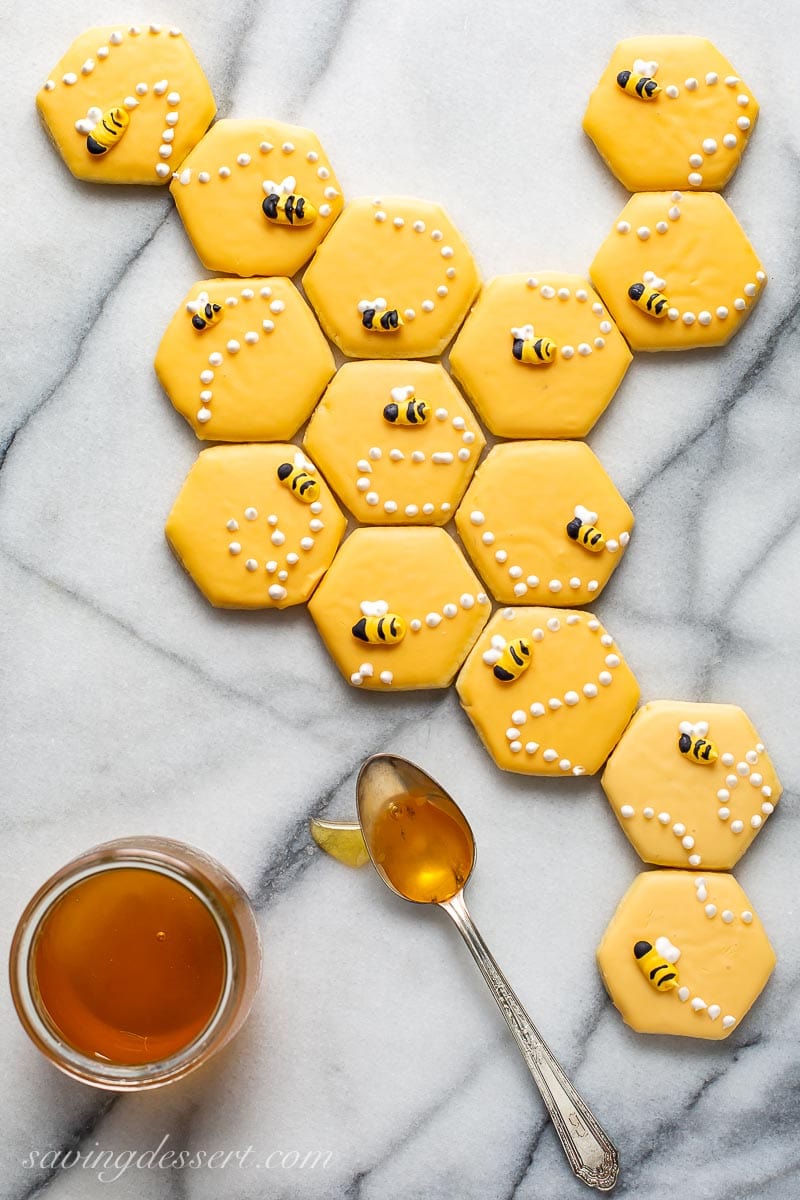
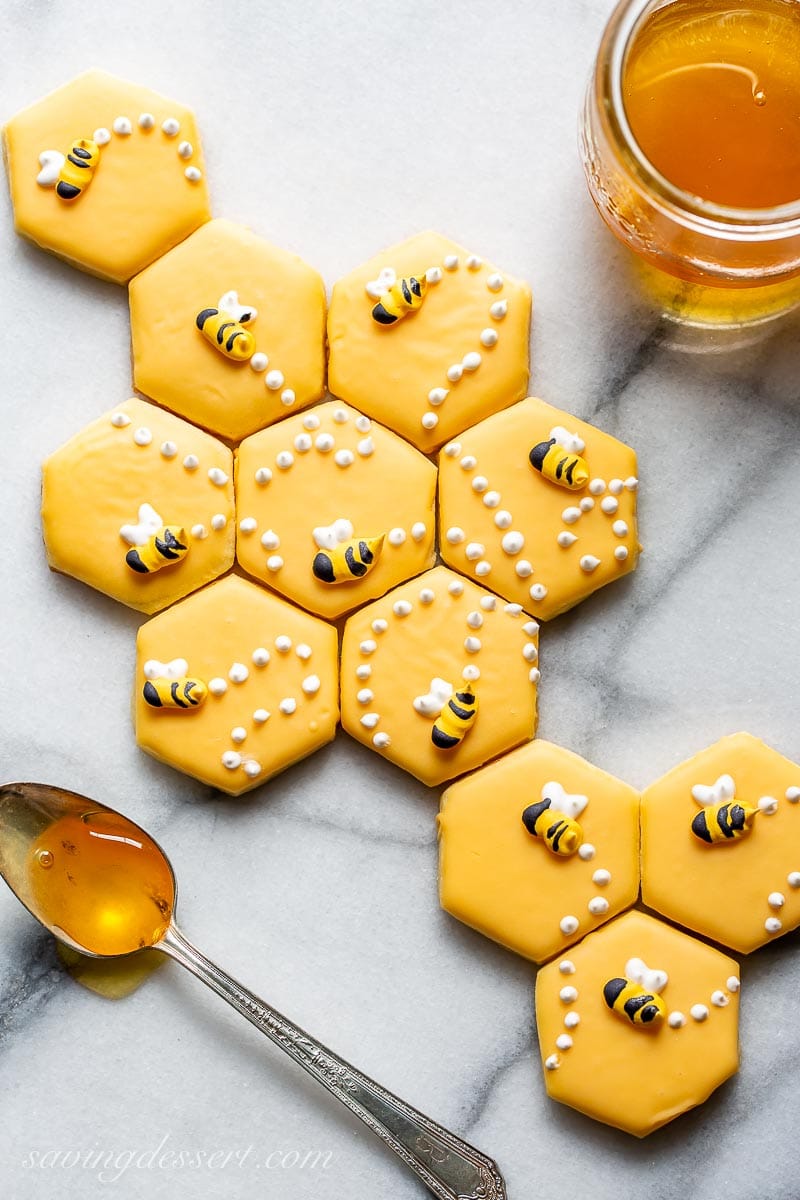
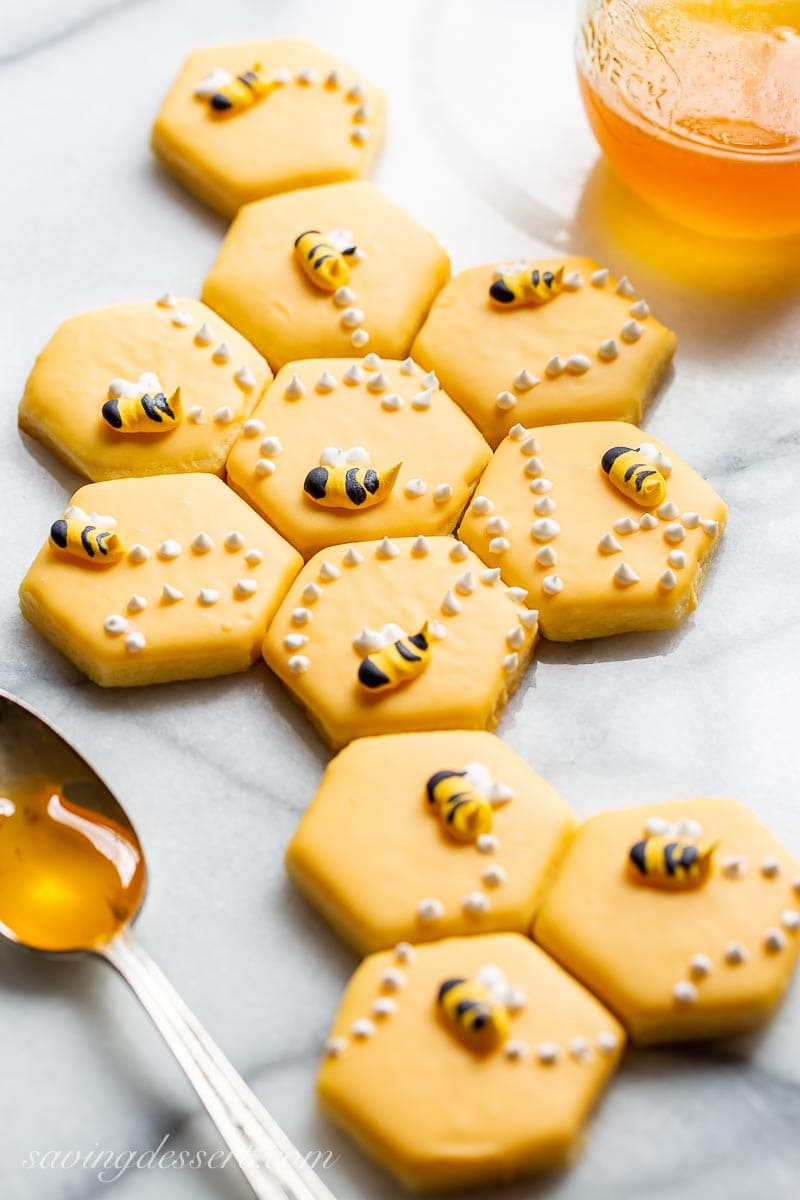
For the honey bee cookies we used a dip-able glaze.
The tops of the cookies were dipped into a glaze made with powdered sugar, milk, and food color just like the Christmas trees above.
Beat together powdered sugar and a little milk or cream to create a dip-able icing. Hold the cookie with two fingers on the edges, top facing down. Dip the entire cookie top into the bowl of icing, then allow the excess to drip back in the bowl. If the icing is too thick, add more milk, if it is too thin, add more sugar.
Place the cookie icing side up on a wire rack and allow it to set completely before decorating. Or, if adding sprinkles, decorate while the glaze is still wet.
How thick should the dough be for a good sized cookie?
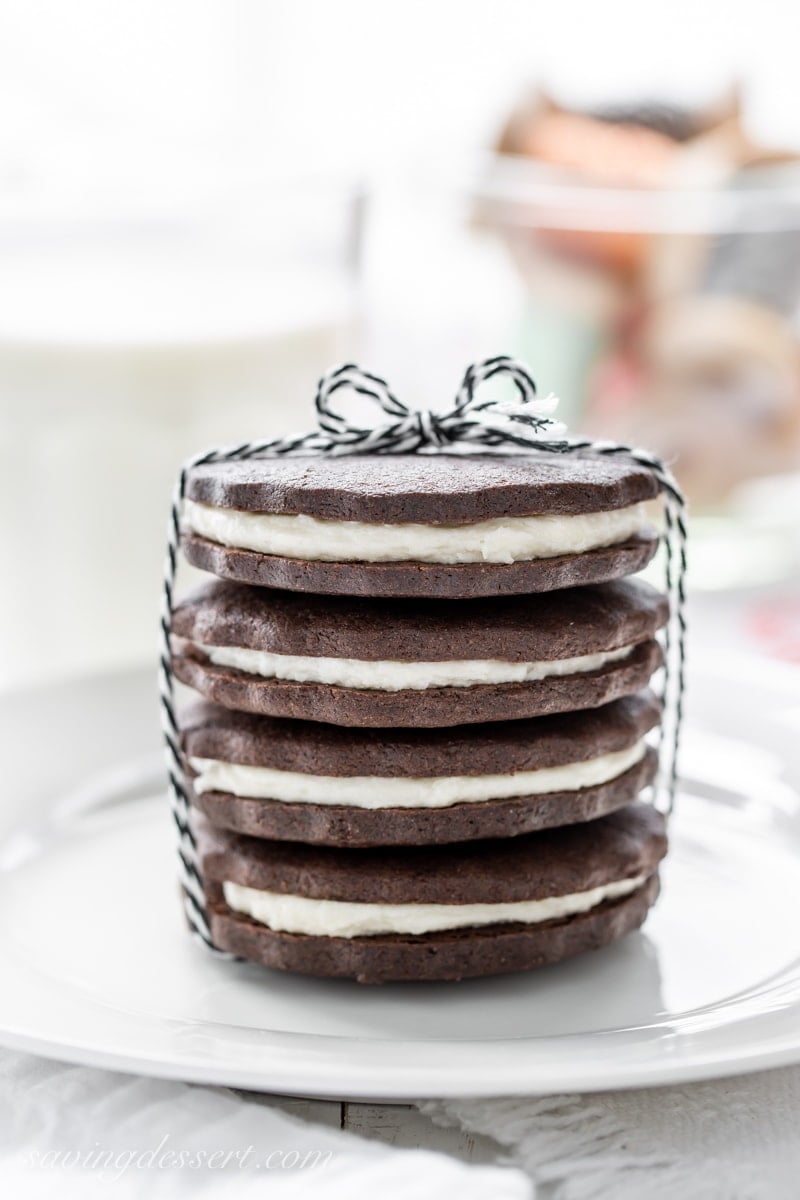
Looking for a chocolate sugar cookie recipe?
We’ve got one of those too! We took this terrific recipe and turned it into rich, chocolate sugar cookie. These cookies are perfect for sandwiching with a layer of fluffy white vanilla cream frosting.
While softer than an Oreo, these chocolate sandwich cookies are so much better. No fake tasting cream in the middle!
We’ve also got a great recipe for Halloween Cookies that don’t require using a rolling pin.

TIPS and suggestions for Cut-Out Sugar Cookie Recipe success:
- Substitute additional vanilla for the almond extract if desired. Vanilla beans or vanilla bean paste is also great in these cookies.
- Use good quality butter, softened at room temperature.
- If the sugar cookie dough starts to split or crack when rolling out, it’s just a little too cold. Let it rest another minute to warm and try again.
- We like to roll the cookie dough to 1/4-inch thick. For evenly rolled out dough, try using an adjustable rolling pin with removable rings.
- After rolling scraps a few times, the extras may become a little too soft to use. Place the dough scraps on a plate in the refrigerator for a few minutes before rolling again.
- Really soft dough won’t hold it’s shape as well as cold dough. Take your time and chill the scraps as needed.
Don’t over-bake!
- The bottom of the cookie should be lightly browned and just starting to show color around the edges.
- Don’t put unbaked cookies on a hot cookie sheet until ready to bake. It will cause them to spread too much.
- Baking time will vary depending on the size, thickness and width of the cookies. Test a few cookies for proper baking times before making an entire pan.
- Baked, cooled cookies can be frozen for up to 3 months. You can even thaw and then refreeze plain, unfrosted cookies with good results.
Glaze and decorate:
- For a simple icing or glaze we use a mixture of powdered sugar, vanilla and boiling water, milk or cream. Mix until smooth and spread on the baked, cooled cookies. You can also dip the tops of the cookies into the icing for a smoother coat.
- Add more sugar or water as needed for desired consistency. Make icing in small batches as it dries quickly.
- You can easily double the recipe and cut out different shapes for the current and the next upcoming holidays. Make Christmas cookies and Valentine’s hearts at the same time. Freeze the hearts for later!
Thanks for PINNING!

Cut-Out Sugar Cookie Recipe
Ingredients
- 1 cup unsalted butter room temperature (226g)
- 1 ounce cream cheese room temperature
- 1 cup granulated sugar (222g)
- 1 large egg room temperature
- 1 teaspoon vanilla extract
- ½ teaspoon almond extract (optional)
- 3 cups all-purpose flour (378g)
- 1 ½ teaspoons baking powder
- 1 teaspoon salt
Instructions
- In a large mixing bowl beat butter and cream cheese together with an electric mixer until well blended. Add the sugar and beat until light and fluffy. Add the egg, vanilla and almond extract and beat until combined.
- In a small bowl whisk together 2 ¾ cups flour, baking powder and salt. Add half the flour mixture to the butter and sugar and blend on low until incorporated. Add the final half of the flour mixture and beat until a soft dough forms. Add up to 1/4 cup additional flour if needed, 1-tablespoon at a time until the dough is soft and no longer sticky. For best results, do not exceed a total of 3 cups of flour.
- Gather the dough into a ball and cut in half. Press one half of the dough into a thick round and wrap in a large piece of plastic wrap. Repeat with the remaining half of the dough. Refrigerate the two discs for at least 8 hours, or up to two days.
- When ready to bake, remove one disc of cookie dough from the refrigerator and allow it rest at room temperature for 15-20 minutes for easier rolling. Preheat oven to 350°F. Line 2 baking sheets with parchment paper and set aside.
- Roll out the dough on a well floured, clean work surface to ¼-inch thick. Using a cookie cutter, cut the dough into the desired shapes and place the cookies 2-inches apart on a cool baking pan. Repeat until the pan is full. Bake for 8 to 12 minutes (depending on the size and thickness of the cookies) or until very lightly browned around the edges and bottom. For best results, do not over-bake! Cool on the pan for 3-4 minutes then remove to a wire rack to cool completely.
- Frost the cookies with your favorite glaze, royal icing or buttercream.
Recipe Notes
- Substitute additional vanilla for the almond extract if desired. Vanilla bean paste is also a great option for these cookies.
- When rolling out the cookie dough if it starts to split or crack, it’s just a little too cold. Let it rest another minute and try again.
- After rolling scraps a few times, the extras may become a little too soft to use. Place the scraps of dough in the refrigerator for a few minutes before rolling again.
- Do not put unbaked cookies on a hot cookie sheet until ready to bake. It will cause them to spread.
- If your cookies are spreading more than they should or you're making large cut-outs, freeze the unbaked cookies on a baking sheet for 15 to 20 minutes before putting in the oven for best results.
- DO NOT OVER-BAKE! The bottoms should be very lightly browned and just starting to show color around the edges. Baking time will vary depending on the size and width of the cookies.
- Baked, cooled cookies can be frozen for up to 3 months. I’ve even thawed and refrozen plain unfrosted cookies with good results.
- GLAZE: For a simple glaze we use powdered sugar, a drop or two of vanilla and boiling water, milk or cream. Mix until smooth and spread on cooled cookies. Add more sugar or liquid as needed for desired thickness. I make this in small batches as it dries quickly.
- To decorate the cookies I use a small batch of Royal Icing. Wilton makes a good meringue powder with instructions for Royal Icing on the container that is very easy. No egg whites needed!
Nutrition
Originally published March 2011, updated October 2021
For historical purposes – here’s Mom’s original sugar cookie recipe:
- 1 pound butter, room temperature
- 2 cups granulated sugar
- 3 eggs
- 1 tablespoon baking powder
- 1 tablespoon vanilla extract
- 5 cups all-purpose flour

Carolyn
I love the look of the honeycomb cookies. I’m wondering if somewhere in the recipe honey could be added to merge to look and taste? Thanks
Tricia Buice
Hi Carolyn. I haven’t tested this but if I did, I would substitute part of the sugar for honey. Since sugar becomes liquid anyway, this might work well. Let us know if you give it a go and how it turns out. Thanks for the fantastic idea and question.
Janice
Hi, these look lovely! Question, what size cookie cutter did you use? Could I substitute 1 ounce sour cream in place of the cream cheese?
Tricia Buice
Hi Janice. Are you asking about the flower cookie cutters? If so it is 3-inches wide. Let me know if you have any other questions!
Jan
Can I freeze decorated sugar cookies for a week? I’m trying your recipe today!!
Tricia Buice
Hi Jan. I recommend freezing them without decoration. I’m decorating these cookies today after thawing for just a few hours. I think the cookies might be okay frozen with decoration but that might depend on the decorations. I prefer decorating after the cookies have thawed. Enjoy!
Elena
❤
Stacia Livingston
I made your cut out sugar cookie recipe and love the flavor and taste. Mine did spread some with 378g of flour. Should I omit the baking powder to see if this helps. I make cut out cookies with royal icing and need them to keep their shape. Any advice, would be great! Thank you for sharing this recipe.
Tricia Buice
I haven’t tested these without baking powder but you’re welcome to try. As you can see from our photos I have not had any trouble with them spreading. Make sure your pan is cold and if your house is warm you can refrigerate the pan of unbaked cookies for 10 to 15 before baking. That might help. Good luck and thanks for the feedback.
Ellen
I noticed that your mom’s original recipe calls for a lb of butter – Yours calls for a cup of butter (which is 1/2 a lb.) and 1 oz of cream cheese. Is it really 1 oz of cream cheese?
Tricia Buice
Hi Ellen. I cut my mom’s recipe in half so it now only calls for 1/2 pound of butter. I also added just 1 ounce of cream cheese. The recipe is correct as written. Hope you’ll give it a try!
Fortune
Oh my goodness these are heavenly. I am not much of a baker so the fact that they came out amazing says a lot. Thank you for my new holiday cookie recipe.
Do you happen to have a chocolate chip cookie recipe you love?
Tricia Buice
Hi Fortune! So glad you enjoyed these cookies. It’s been our favorite forever. We love all kinds of chocolate chip cookies. If you like thick and chewy try these Chocolate Chunk Cookies. For a nice variation on the same old recipe, try these Browned Butter Chocolate Chip Cookies too. Enjoy!
Maura
Perfect cookies! Taste was amazing! No spread at all. Dough was so easy to work with and they maintain med their shape perfectly. I followed the recipe exact. The texture and flavor are spot on. Not too sweet but sweet enough. The balance of the vanilla and almond flavors combine to make this cookie taste phenomenal. I had 3 people try them and they all said it was so good! I will be using this recipe from now on. Thank you so much for sharing!!
Tricia Buice
This comment makes me so happy Maura! This is such a great cookie recipe. I’m thrilled you love them too and appreciate you taking the time to comment. Bravo!
Charlotte
These look beautiful!! Just a quick question – if I don’t have time to chill them for the recommended minimum of 8 hours, can I shorten it? I may only have 2-3 hours to spare to chill it, as I wanted to make these cookies tomorrow for a family party and underestimated the chill time lol. What do you suggest? Should I try the freezer? Let me know what you think as soon as you can – I’d love to make these!
Thank you!!
Charlotte
Tricia Buice
Hi Charlotte. If you want to speed up the chilling time, form the dough into small flat disks, like 8-inches in diameter, cover in plastic wrap and refrigerate. If you have trouble with the dough sticking while rolling out, put a piece of parchment under and on top as you roll. Don’t add to much flour though. Leave any remaining dough disks in the refrigerator until ready to roll. Good luck and enjoy!