This post may contain affiliate links. Please read my disclosure policy.
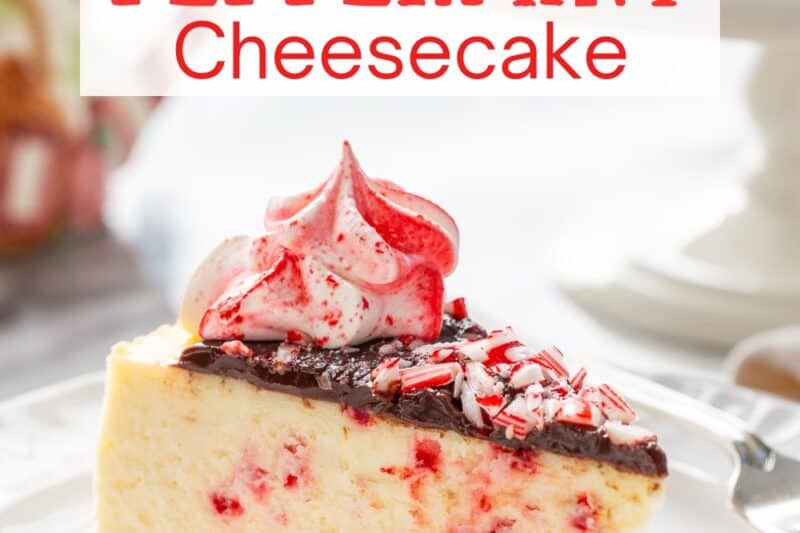
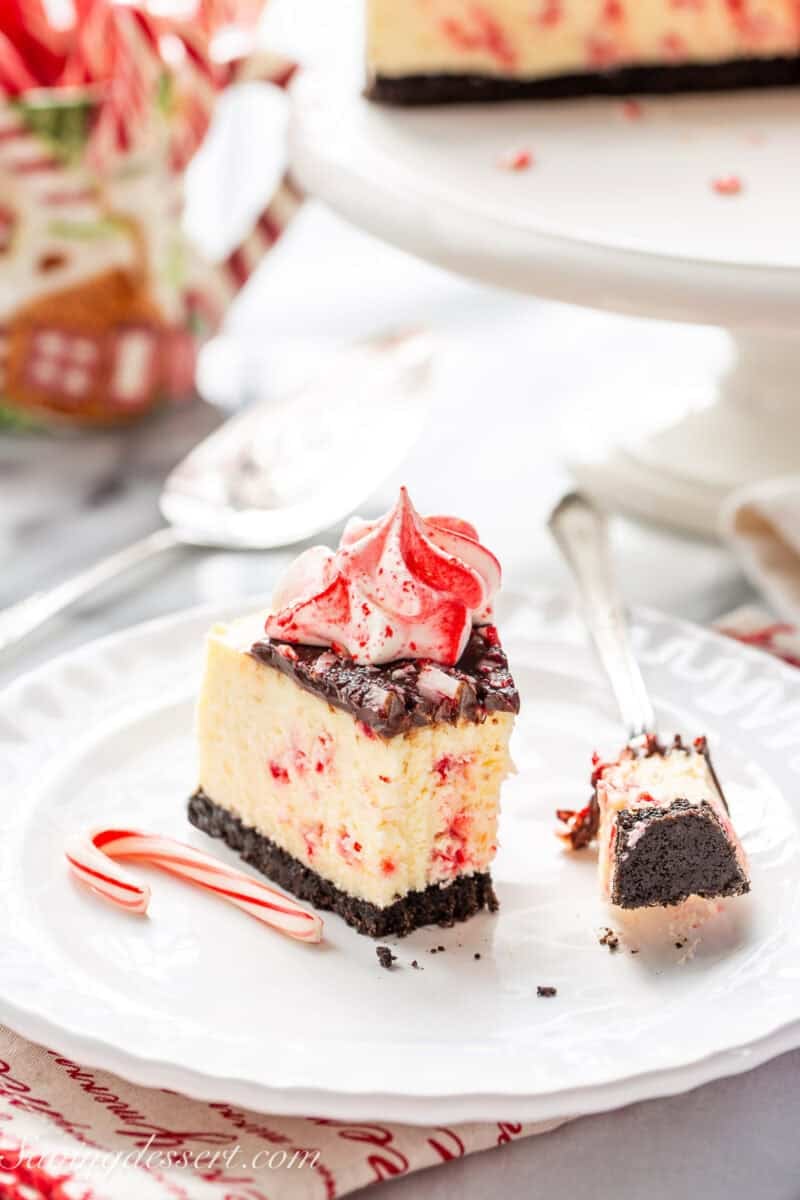
Enjoy this creamy, bright, fun and festive Peppermint Cheesecake on your holiday table! This stunning showstopper tastes just like Christmas should. 🎄
Peppermint Cheesecake
After years of (tasty) testing to create the perfect Peppermint Cheesecake recipe, I’m thrilled to share our “most wonderful dessert of the season!” This creamy treat is all about holiday cheer. It’s bright and festive and really very easy to make with just a few simple steps.
Don’t spend days searching for places to order and buy an expensive cheesecake like this. Now you can make your own at home and use that extra money to buy yourself something wonderful!
Here’s what you need to know…
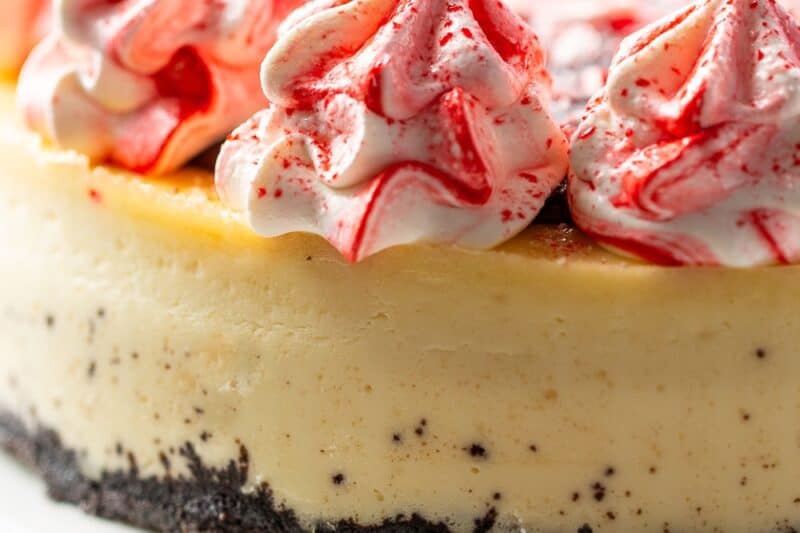
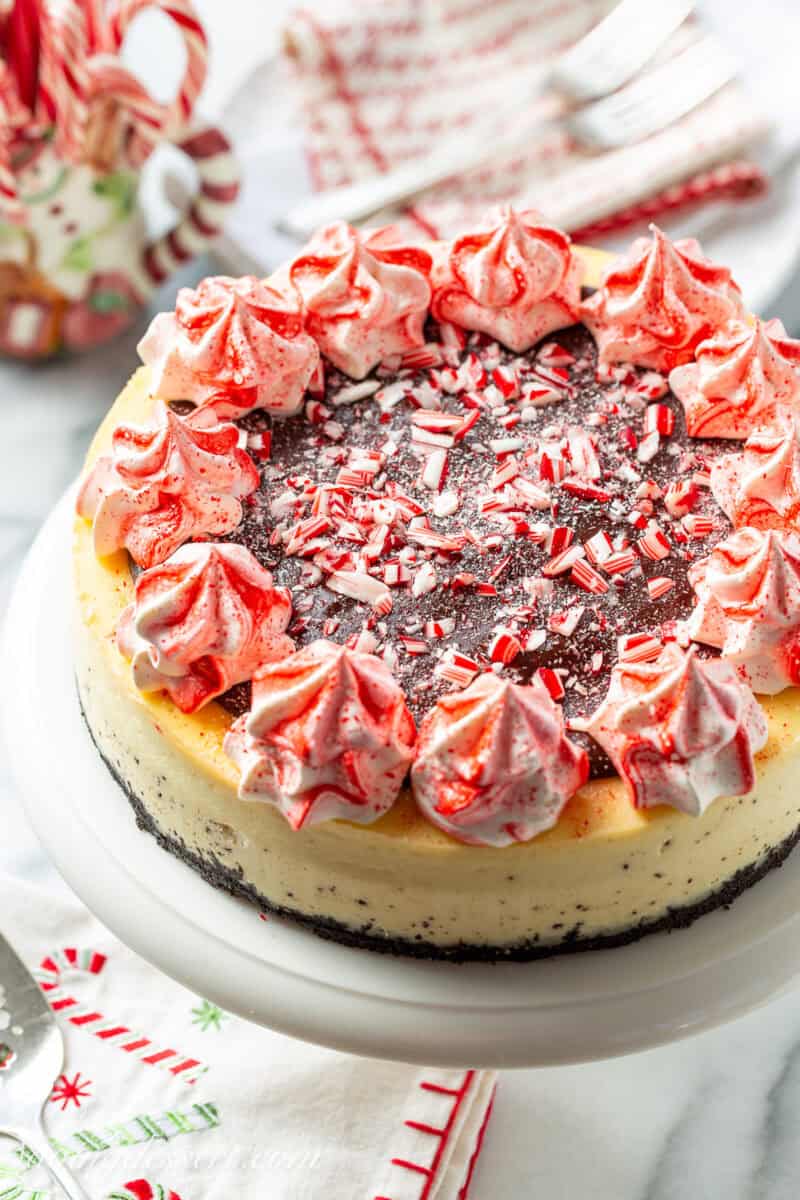
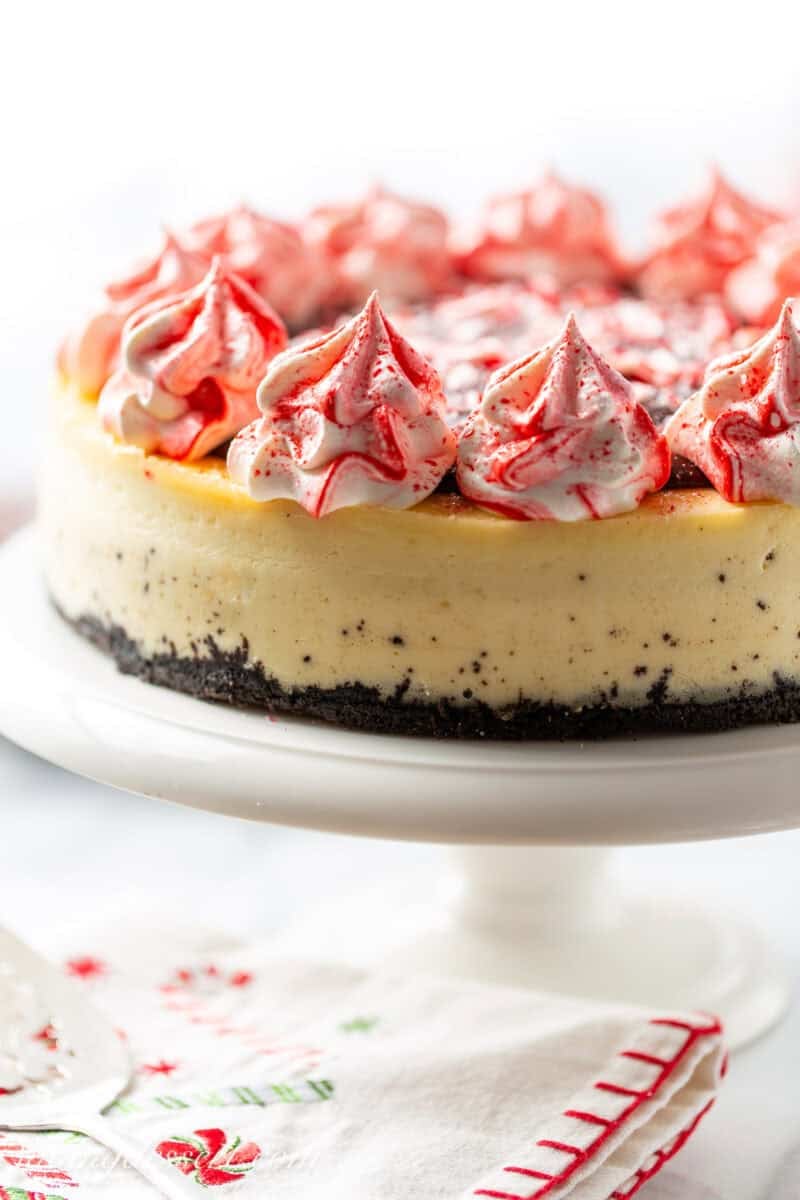
Our cheesecake recipe is made in 3 or 4 layers.
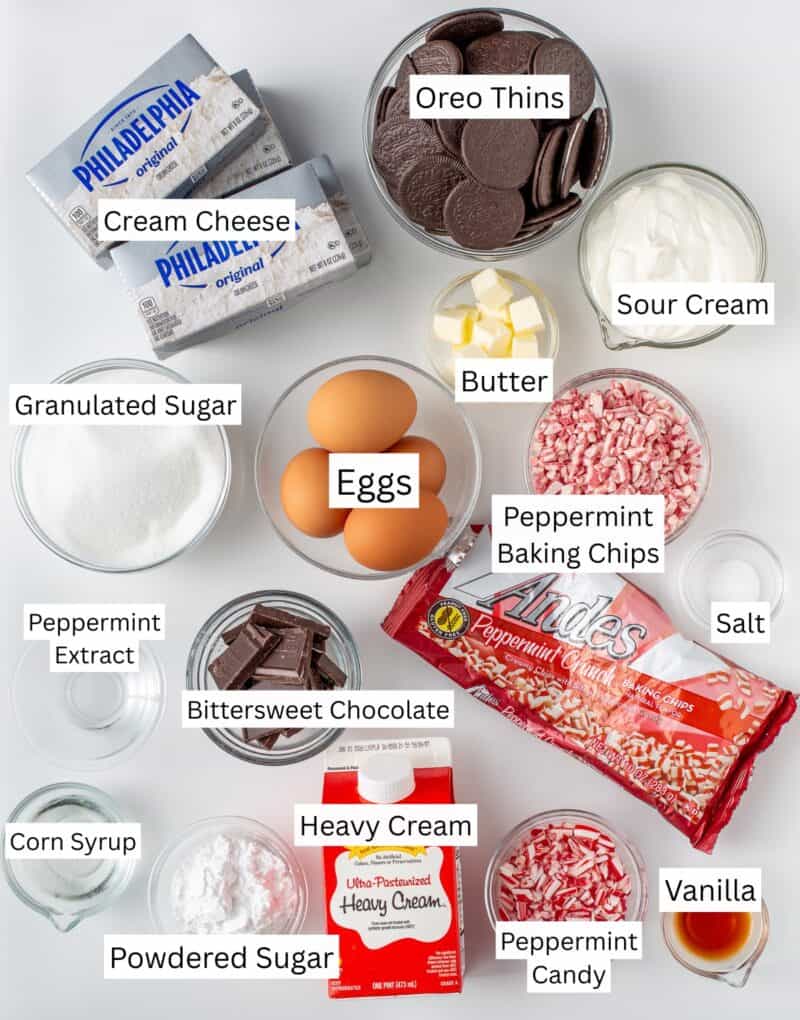
1. Chocolate Cookie Crust:
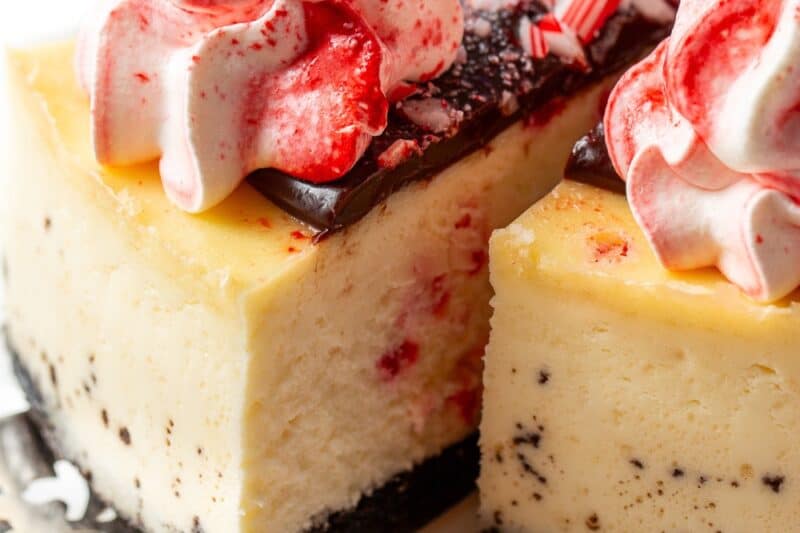
First, the crust is made with Oreo Thins, melted butter and a tablespoon of granulated sugar. If you use regular Oreo cookies you’ll only need about 24 cookies. Personally I really prefer less of the creamy middle and more cookie for a dryer crust.
2. Cheesecake Filling:
Next, the filling is made next with sugar, cream cheese, eggs, salt, vanilla, peppermint extract (not spearmint), sour cream and Andes Peppermint Baking Chips (see below for more information).
3. Chocolate Ganache:
For the topping you’ll need high quality bittersweet chocolate, light corn syrup and heavy cream.
4. (Optional) Whipped Cream Swirls and Garnish:
Finally, you’ll need heavy whipping cream, powdered sugar, vanilla and crushed peppermint candies or candy canes for the optional topping.


How to Make Peppermint Cheesecake
- Start by making and baking the Oreo crust in the prepared springform pan. Once cooled wrap the pan in multiple layers of heavy duty foil to seal. Place the pan inside a large roasting pan for the hot water bath. A hot water bath helps prevent the cheesecake from forming cracks or splitting.
- Mix all the filling ingredients together and pour into the baked crust. Add enough hot tap water to the outer roasting pan to come halfway up the sides of the springform pan. Bake.
- Once baked turn the oven off and prop the door open slightly with a pot holder or wooden spoon. Allow the cheesecake to cool in the hot water bath for 1 hour.
- Transfer the cheesecake to a wire rack and remove the foil. Cool completely before refrigerating overnight or up to 24 hours.
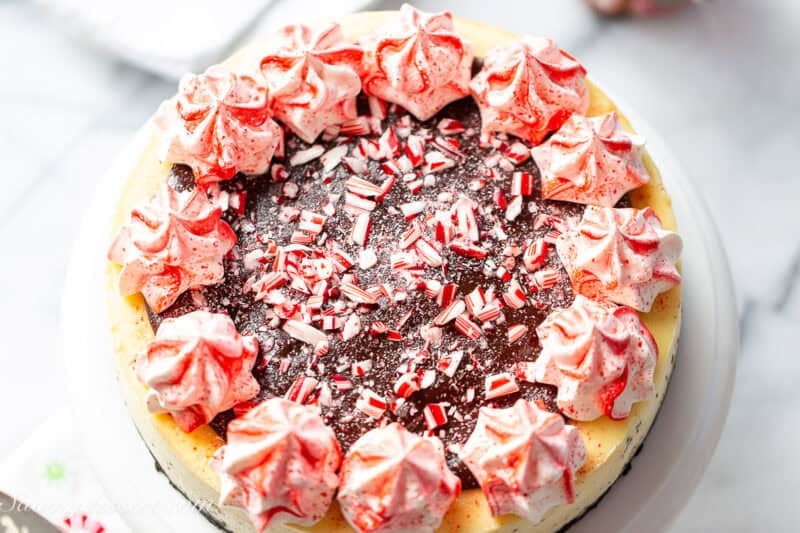
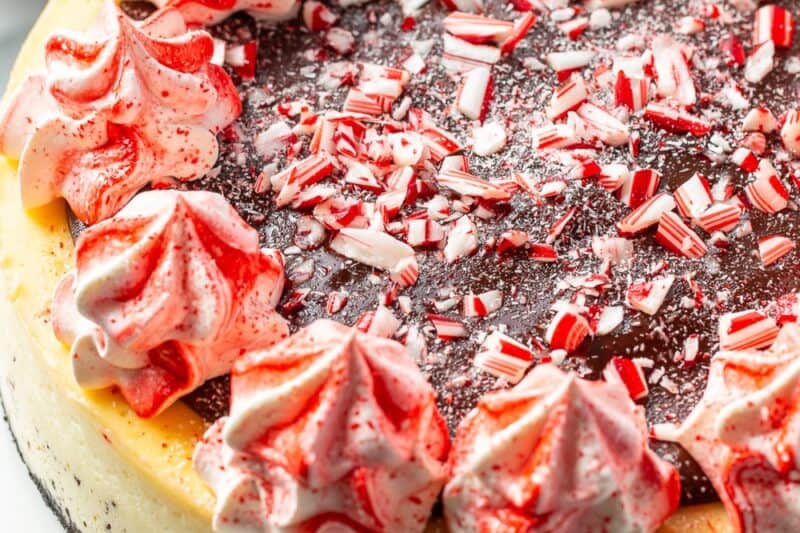
- Make the ganache then spread on top of the cheesecake. Store in the fridge while preparing the whipped topping.
- Make the whipped cream topping then dollop or pipe the cream on top of the cheesecake in a decorative fashion. To make the red striped swirls, paint the inside of a piping bag with three or four thin strips of red food color. Use a skewer or food safe paint brush for this. Add the whipped cream to the bag and pipe using whatever decorating tip you desire. Serve immediately.
Andes Peppermint Baking Chips
Andes Peppermint Baking Chips can be found at Target or ordered online from Walmart and Amazon. (Hint: Target has the best price and they’re available in the stores during the holidays)
This recipe has been tested several times with crushed peppermint candies however we were not happy with the results. Peppermint Candy melts and becomes syrupy making the crust wet and the filling gooey.
These baking chips are made with a combination of white chocolate and peppermint candy. They melt beautifully in the cheesecake but don’t become wet, syrupy or sticky. I love the pop of red in the filling!

Options and Variations
- Decorate with peppermint bark instead of the ganache and crushed peppermint candy.
- Use white chocolate chips or York Dark Chocolate Chips in place on the Andes Peppermint Baking Chips if needed.
- Add up to 1/2 teaspoon more of peppermint extract for a more intense flavor profile.

Tricia’s Tips:
- Don’t add the peppermint candy and whipped cream topping until close to the time you plan to serve. The peppermint candy will “weep or melt” after several days making it a bit gooey. If you don’t plan to serve all the cheesecake at once, you can add crushed peppermint to each slice when served.
- Whipped cream can lose its shape after several days. To avoid this you can make a more stablized whipped cream or use my favorite shortcut, Extra-Creamy Cool Whip. While it doesn’t taste as good as “real” whipped cream, it holds its’ shape for days.
- Make sure the cheesecake is completely cool before covering and refrigerating. If you cover the cheesecake while still warm, condensation will form and make the top of the cheesecake wet.

Freezing and Storing Peppermint Cheesecake
To freeze the entire cheesecake, leave it in the springform pan and wrap tightly in plastic wrap then aluminum foil. Freeze before adding the ganache and whipped cream decorations. This cheesecake will keep in the freezer for about 30 days. Thaw overnight in the refrigerator before decorating and serving.
You can also freeze individual slices already decorated. Place the slices on a baking pan and freeze until firm. Place the frozen slices in an airtight container and freeze until needed.
Store the cheesecake in the refrigerator for up to 5 or 6 days.

Peppermint Cheesecake
Equipment
- 9-inch springform pan
- Heavy Duty Aluminum Foil
- Large Roasting Pan
Ingredients
Cookie crust:
- 46 Oreo Thins (one 11.78oz or 334g package)
- 3 tablespoons unsalted butter melted (1oz or 28gP
- 1 tablespoon granulated sugar
Cheesecake filling:
- 1 ¼ cups granulated sugar (270g)
- 32 ounces block cream cheese room temperature
- 4 large eggs room temperature
- ¼ teaspoon salt
- 1 teaspoon vanilla extract
- 1 teaspoon peppermint extract (not spearmint)
- 1 cup sour cream (8oz or 227g)
- 1 cup Andes Peppermint Baking Chips (150g or 5 and 1/4oz)
Chocolate ganache:
- 3 ounces bittersweet chocolate chopped or semisweet or white chocolate
- 1 ½ tablespoons light corn syrup
- ⅓ cup heavy cream or heavy whipping cream
Optional Topping:
- 1 cup heavy whipping cream (8oz)
- 3 tablespoons powdered sugar
- ½ teaspoon vanilla extract
- ½ cup crushed peppermint candies or candy canes for garnish
Instructions
To prepare the cookie crust:
- Preheat oven to 350℉. Lightly grease the sides and bottom of a 9-inch springform pan. Line the bottom with a round of parchment paper and set aside.
- In the bowl of a food processor pulse the cookies and sugar to fine even crumbs. Add the melted butter and process again until the mixture is evenly moist and resembles wet sand.
- Transfer the mixture to the prepared pan. Using the bottom of a dry measure cup press the crumbs evenly in the bottom of the pan. Don’t press too hard, slightly firm is good. Bake until set and fragrant, about 18 to 20 minutes. Remove to a wire rack to cool while preparing the filling.
- NOTE: Reduce the oven temperature to 325℉.
- Once cooled, wrap the bottom and sides of the pan in a double or triple layer of heavy-duty aluminum foil. Position the springform pan in a large roasting pan and set aside.
Prepare the cheesecake filling:
- In a large mixing bowl beat the cream cheese until smooth and creamy. Scrape down the sides and bottom of the bowl.
- With the mixer running on medium-low, slowly add the sugar. Beat until the mixture is smooth scraping down the sides and bottom of the bowl as needed.
- On medium speed add the eggs, one at a time, beating just until the yolk disappears before adding the next. Scape the sides and bottom of the bowl and blend again. Don’t over-beat.
- Add the salt, vanilla, peppermint extract and sour cream. Blend on low until incorporated. Scrape the bowl and blend again for a few seconds. Pour 1/3 of the batter into the prepared pan. Add the peppermint baking chips to the remaining batter and fold together with a spatula until blended. Pour all batter into the prepared pan.
- Fill the outer coating pan with enough hot tap water to come halfway up the sides of the springform pan.
- Bake at 325℉ until the center jiggles slightly, the sides start to puff and the surface appears dry, about 95 to 105 minutes.
- Turn off the oven and prop the door open using a pot holder or wooden spoon. Allow the cheesecake to cool in the hot water bath for 1 hour. Transfer the cheesecake to a wire rack and remove the foil. Slide a small thin knife around the inside edge of the pan to loosen the sides of the cheesecake. Leave the cheesecake in the pan and cool to room temperature, about 3 hours.
- Once completely cool, cover tightly with plastic wrap and refrigerate overnight, or up to 24 hours.
Make the Chocolate Ganache:
- Heat the cream and corn syrup in a small saucepan over medium heat until it comes to a simmer. Remove from the heat and add the chopped chocolate. Stir and cover with a lid. Set aside for 5 minutes. Whisk gently until smooth.
- Spread on top of the cheesecake leaving a one-inch border around the edge. Chill while preparing the whipped topping.
Prepare the optional whipped topping
- In a cold medium bowl, beat the whipping cream with an electric mixer on medium speed until soft peaks form. Add the powdered sugar and vanilla and beat on high until firm peaks form.
- Dollop or pipe the whipped cream on top of the cheesecake in a decorative pattern. For colorful swirls add 3 or 4 thin strips of red food color to the piping bag before adding the whipped cream.
- Sprinkle crushed peppermints over the top as desired.
To serve:
- Run a large, thin knife under hot water. Carefully dry the knife and slice the cheesecake. Repeat the process between slices for best results.
Recipe Notes
- Make sure the cheesecake is completely cool before covering in plastic wrap to avoid condensation forming on the surface.
- ONLY use heavy duty aluminum foil, not regular foil.
- To freeze cheesecake: Leave the fully chilled cheesecake in the springform pan and wrap tightly in plastic wrap then aluminum foil. Freeze before adding the ganache and whipped cream.
- Freeze individual slices of cheesecake well sealed in an airtight container. Thaw overnight in the refrigerator. Cheesecake will keep for 5 or 6 days well sealed and stored in the refrigerator.
Nutrition
More great holiday desserts!
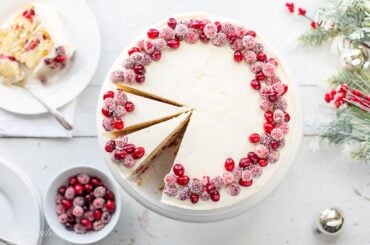
Cranberry Christmas Cake
A fabulously festive Cranberry Christmas Cake made with tart cranberries and bright orange zest in a moist sour cream batter.
View this Recipe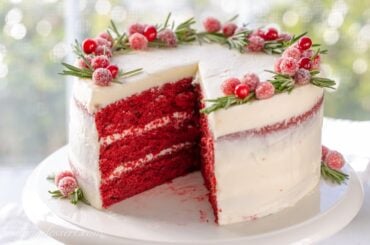
Red Velvet Cake Recipe
With a delicious tang from the buttermilk, hints of cocoa and a moist, light crumb. Don’t forget the best cream cheese icing on this earth!
View this Recipe

Candy Cane Cookies
A fun and delicious baking project for the holidays. Have your best little helpers on hand and make quick work of these rolled cookies.
View this Recipe
Leave a Comment