This post may contain affiliate links. Please read my disclosure policy.
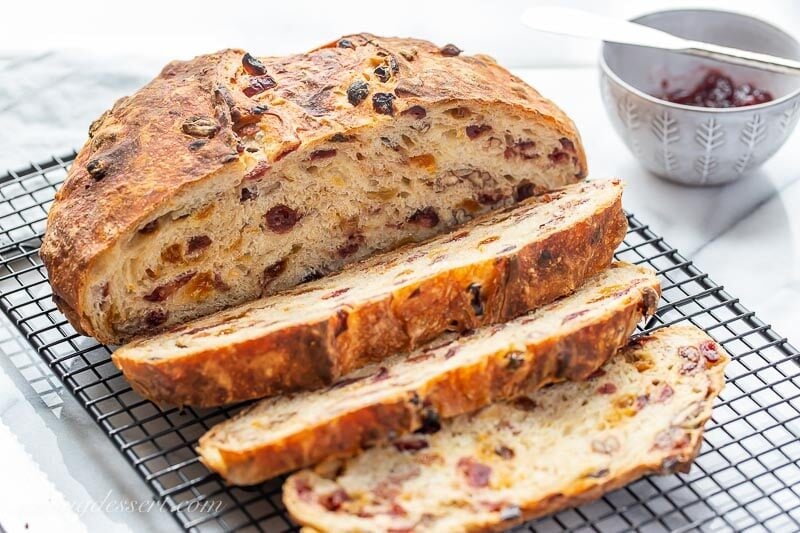
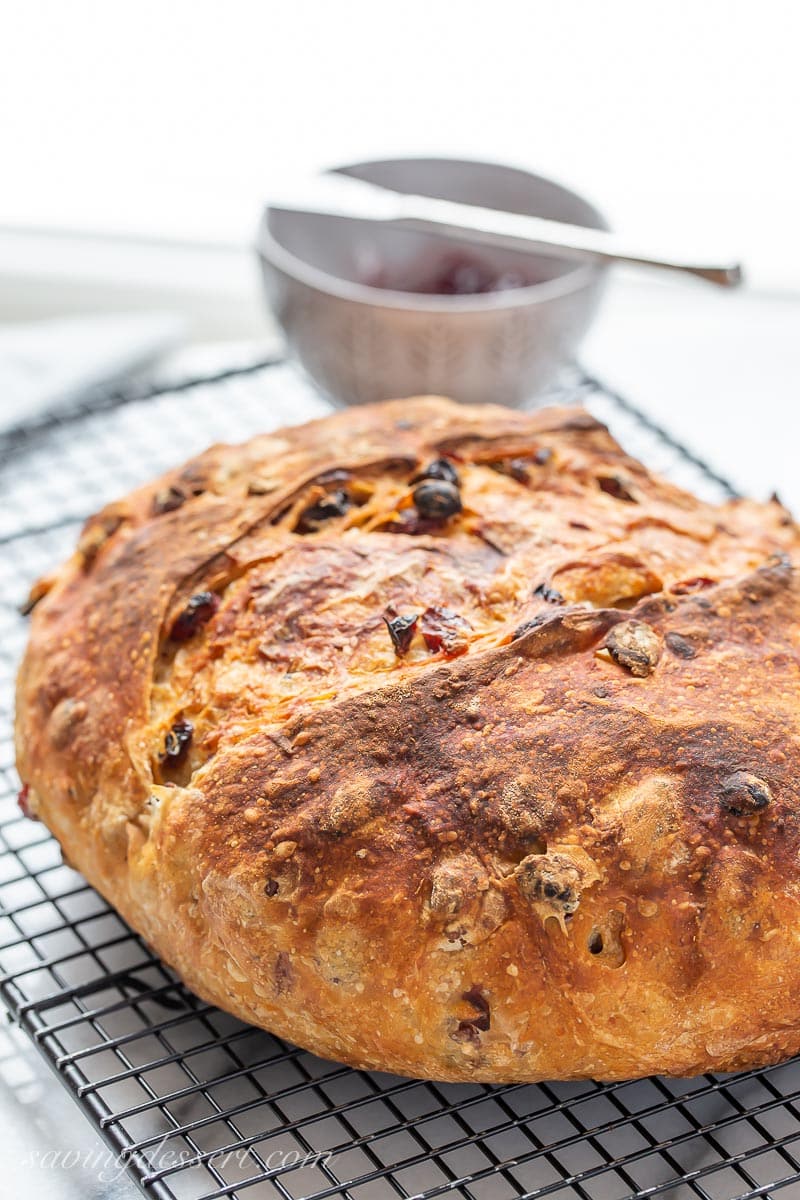
Homemade Harvest Bread is loaded with flavor from the dried cranberries, nuts, golden raisins, orange juice and orange zest. It’s not a sweet bread but you’ll enjoy little pops of chewy sweetness from the cranberries and raisins in every bite.
Fruit and nut filled (almost no-knead) Harvest Bread
Our Harvest Bread is one of the easiest bread recipes you’ll ever make! There’s no mixer required and very little kneading. It comes out of the oven golden brown and crusty on the outside with a soft and chewy middle, and so incredibly delicious!
Ingredients needed to make Harvest Bread:
- dried cranberries
- golden raisins
- zest and juice from 1 large orange
- all-purpose flour – or bread flour works well too
- table salt
- instant or rapid-rise yeast
- pecans or walnuts – occasionally walnuts can cause the bread to have a slight purple hue. This does not affect the flavor of the loaf.
- water – tepid or room temperature
- vegetable cooking spray
Equipment needed:
- large Dutch oven with lid, or a clay baker
- firm spatula or wooden spoon
- parchment paper
- plastic wrap
- large mixing bowl
- instant-read thermometer
We participate in the Amazon Services LLC Associates Program, an affiliate advertising program designed to provide a means for us to earn fees by linking to Amazon.com and affiliated sites
How to make easy homemade Harvest Bread:
This is a two day project with very little hands on time.
Day one:
- First, combine the cranberries, raisins and fresh orange juice in a small bowl. Cover and microwave then set aside to soften for 15 minutes.
- Drain the fruit, reserving the soaking liquid. Add enough tepid water to make 1 1/2 cups.
- Whisk together the flour and salt. TIP: You can actually kill yeast by mixing it directly with salt. That’s why I always mix the flour and salt together first, then add the yeast. Adding yeast directly to salt may cause it to deactivate or at the very least slow the rise time. Dilute salt by mixing with flour first!
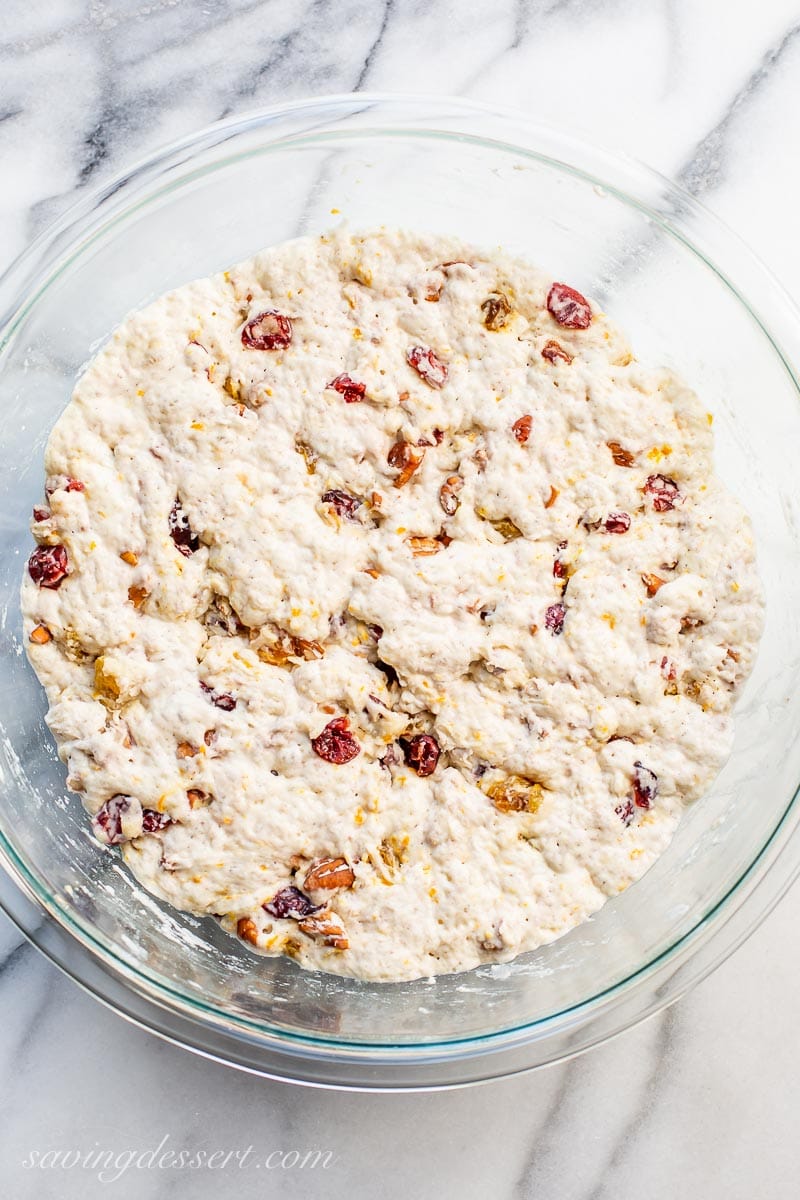
- Next add the yeast, orange zest, nuts and drained fruit. Stir to combine. Add the water mixture and stir with a wooden spoon or firm spatula until all flour is incorporated. Cover the bowl with plastic wrap and leave at room temperature (about 70 degrees F is best) for at least 12 hours or up to 20 hours.
Day 2 – Ready to bake:
- Cut a piece of parchment paper to a 12 inch square. Lay the parchment on a countertop and lightly coat with vegetable cooking spray.
- Turn the dough out onto a well floured, clean work surface. Sprinkle the top of the dough with more flour. Stretch a portion of the dough skyward, then fold over the top of the remaining dough. Turn the dough and repeat a few times, but take care to not over-work.
- Gently shape the dough into a ball by pulling the edges toward the middle and pinch together to seal. Transfer the dough, seam side down, to the prepared parchment. Lightly coat the surface of the dough with vegetable cooking spray.
- Cover the dough with plastic wrap and transfer to a warm, draft-free location. Let the dough rise until doubled in size, about 2 hours.
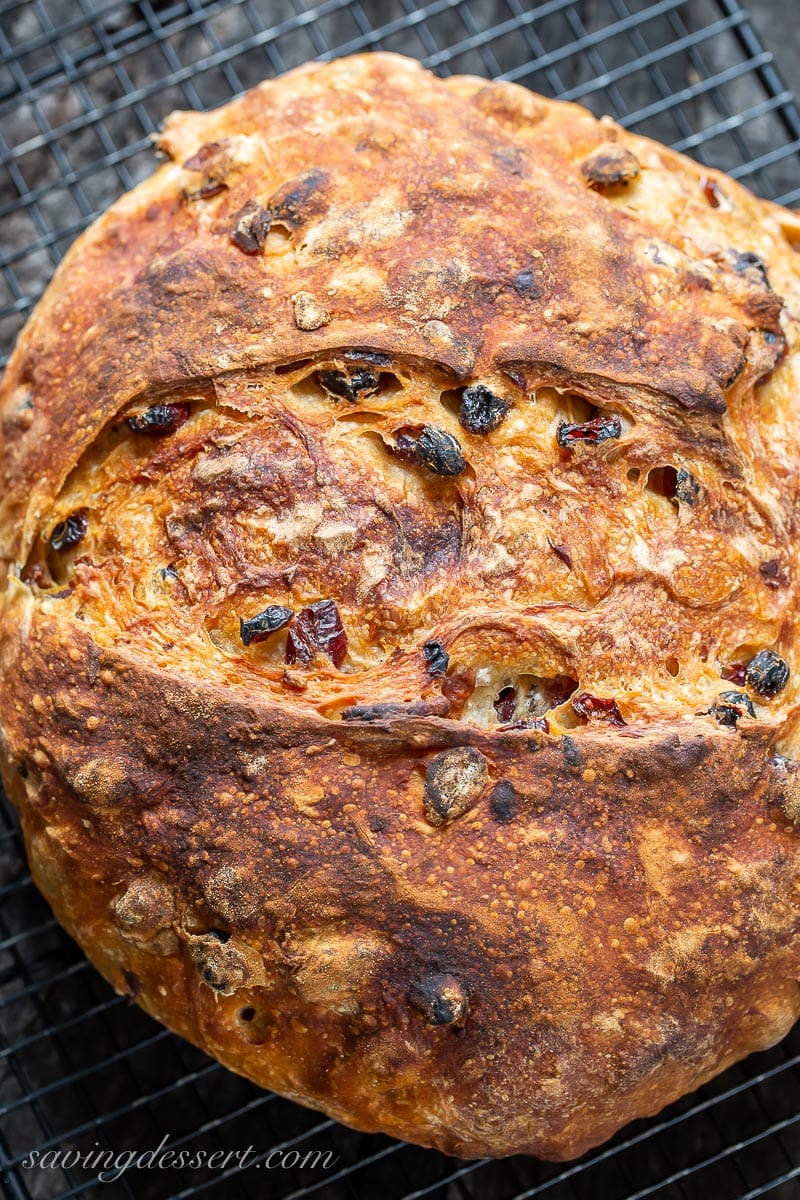
- Transfer the dough to a large Dutch oven. Place the lid on top and put in a cold oven. Turn the oven on to 425F and bake for 30 minutes. Remove the lid and continue baking until the bread is dark golden brown and the internal temperature reaches 205 to 210 F on an instant-read thermometer.
- Allow the bread to cool on a wire rack before slicing.
TIP: For a good rise, place the dough in a warm location, especially for the second rise. My house is cold in the winter so I use my microwave as a proofing oven. The bread is not exposed to cold drafts and will rise a bit easier. If your house is cold, like mine, you may need a longer second rise.
Making Harvest Bread without a Dutch oven
Using a covered Dutch oven to bake this bread is key to achieving a crispy crust. This method traps moisture from the dough and creates steam. It may seem counterintuitive, but steam is what creates that amazing crust.
However, if you don’t have a covered Dutch oven or clay-style baker, you can still make this bread with great results. Form the bread and place on a good quality, heavy weight, light-colored baking pan. Preheat the oven to 450F for at least 30-minutes. Place a pie pan with 1-inch of hot water on the bottom of the oven just before baking the bread.
Bake the bread uncovered until golden brown and done all the way through. The loaf should sound hollow when tapped on the bottom. If it’s browning too quickly, tent with foil.
Freezing Harvest Bread
Harvest Bread freezes well for up to 30 days. Thaw at room temperature or overnight in the refrigerator.
While Harvest Bread is best eaten the day it’s made, it keeps well at room temperature for up to 3 days sealed in an airtight container.
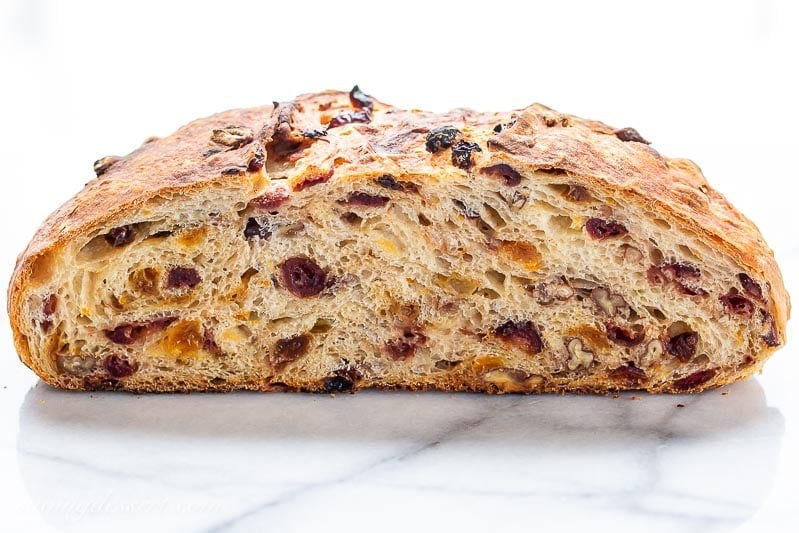
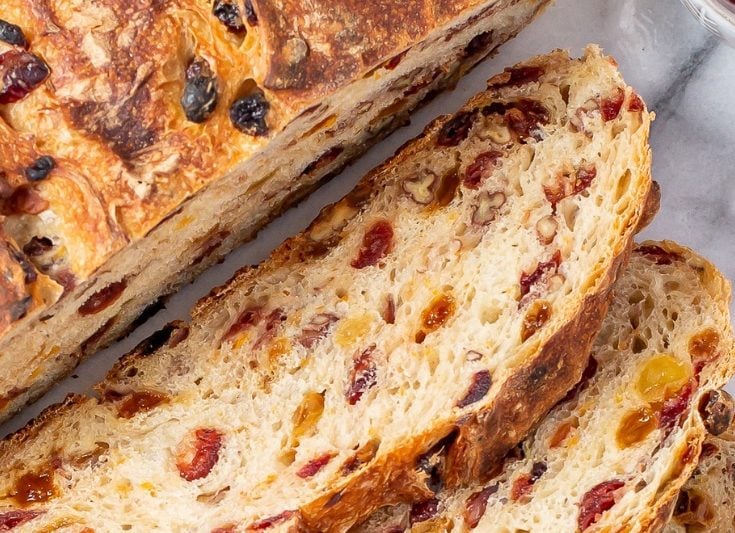
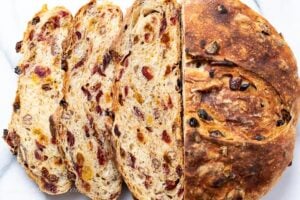
Check out that amazing hole-filled structure!
Bread nerds are happy to tell you how important it is to have a lot of webbing and irregular sized holes in the structure of the bread. It’s also essential to have a crispy crust that’s been baked to dark golden brown perfection.
With very little effort, this loaf achieves all that and delivers amazing flavor, too!
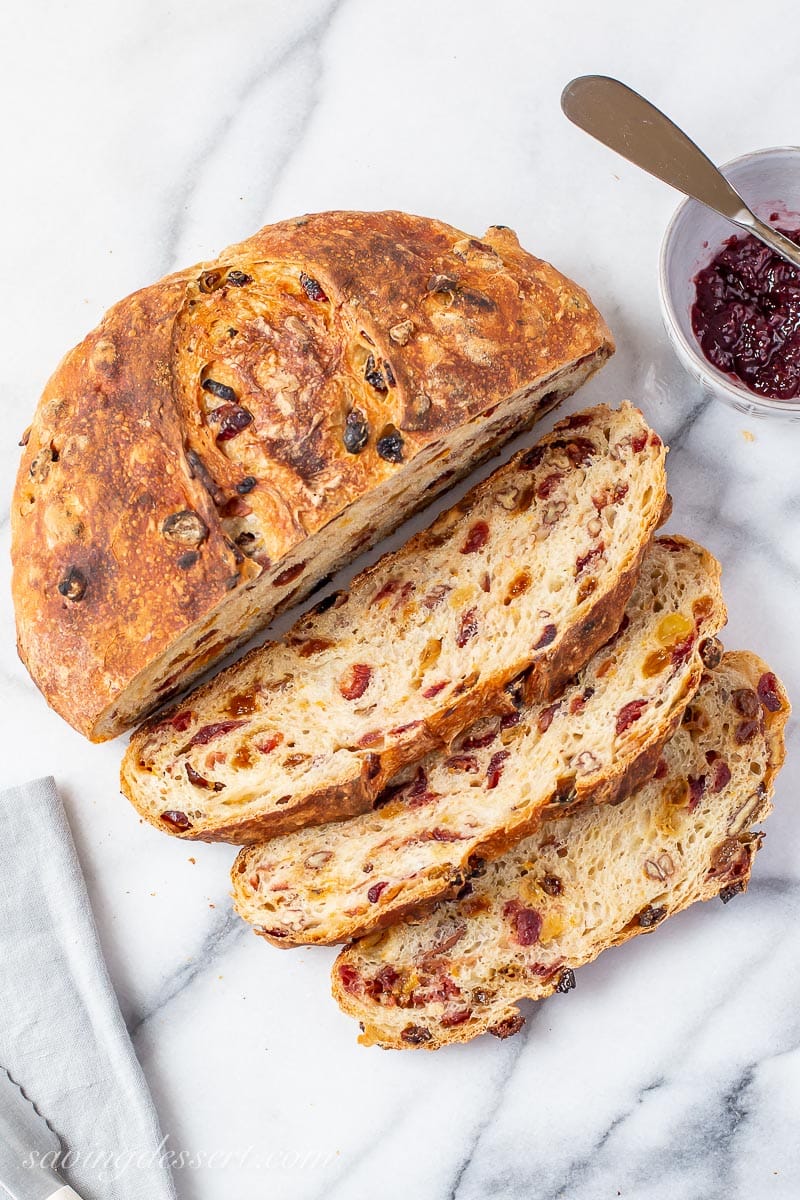
Our favorite ways to serve this terrific Harvest Bread
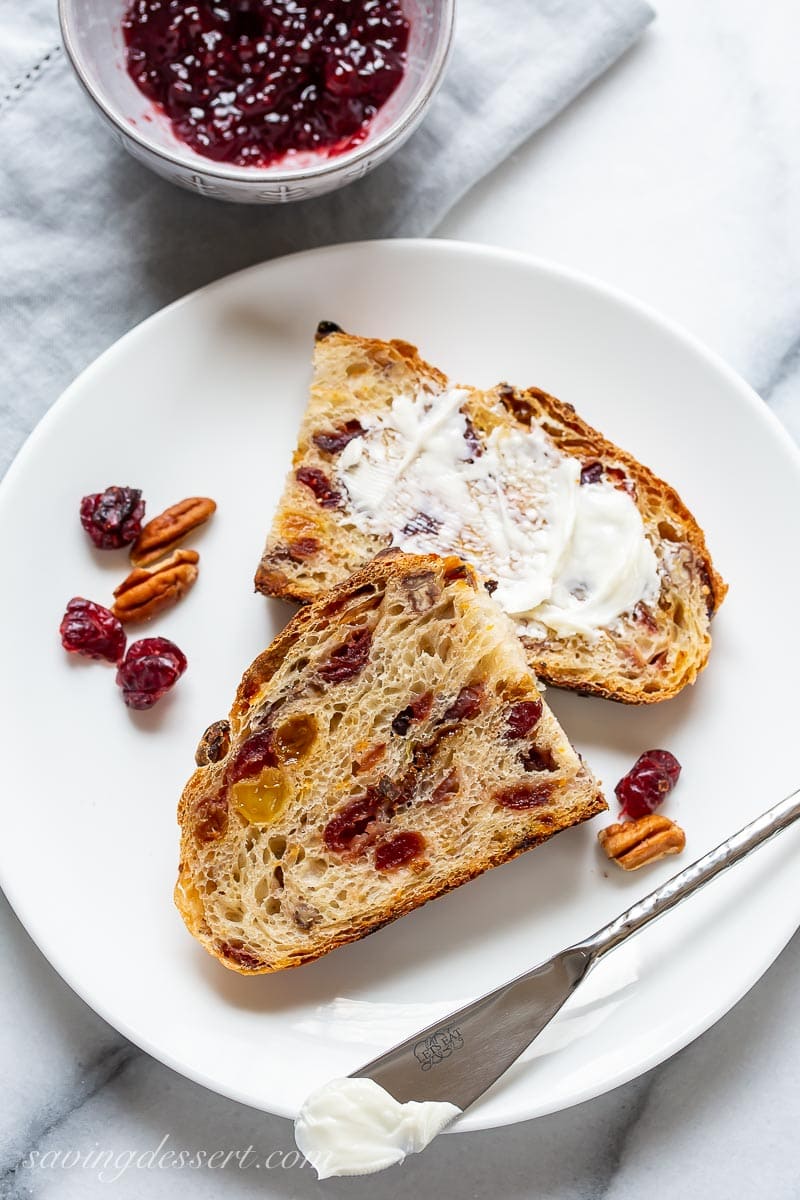
- Thick sliced and slathered with sweet, creamy butter is a perfect.
- Smear on a little jam or honey and serve with a cup of tea.
- This bread also toasts very well. Brown one side or two, under the broiler or in the toaster, it’s all good!
- Use Harvest Bread to make the best grilled cheese sandwich, ever!
- Our absolute favorite way to enjoy Harvest Bread is with sliced turkey, cheese, lettuce and tomato. Smear a little mayo or honey mustard on the bread to glue it all together. This is a fantastic sandwich you’ll want to make again and again.
- And finally, another terrific sandwich combo includes thin sliced apples, deli turkey, cheese and hot pepper jelly. Brown in a skillet like a grilled cheese, or press like a Panini and serve. Wow!
Harvest Bread
Equipment
- Covered large Dutch oven
Ingredients
- 1 cup dried cranberries (4 1/2 oz or 130g)
- ¾ cup golden raisins (4oz or 100g)
- zest and juice from 1 orange
- 3 ⅓ cups all-purpose flour, or bread flour (445g)
- 1 ½ teaspoons salt
- ½ teaspoon instant or rapid-rise yeast
- ½ cup chopped pecans or walnuts (50g)
- tepid water
Instructions
- Combine the cranberries, raisins and orange juice in a small bowl. Cover and microwave until steaming, about 1 minute. Set aside until softened, about 15 minutes. Drain the cranberries reserving the orange juice. Add enough room temperature water to the soaking liquid to measure 1 ½ cups.
- In a large bowl whisk together the flour and salt. Add the yeast, orange zest, cranberries, raisins and nuts. Stir to combine. Add the water and stir with a firm spatula or wooden spoon until all flour is incorporated.
- Cover the bowl with plastic wrap and leave at room temperature (about 70°F) for at least 12 or up to 20 hours. The dough is ready when it’s well risen and the surface is a little bubbly.
- Cut a piece of parchment paper to a 12 by 12 square. Lay the parchment on a countertop and lightly coat with vegetable cooking spray.
- Turn the dough out onto a well floured, clean work surface. Sprinkle the top of the dough with more flour. Stretch the dough skyward and fold it over a few times. Don’t overwork the dough.
- Gently shape the dough into a ball by pulling the edges toward the middle. Transfer the dough, seam side down, to the middle of the prepared parchment. Lightly coat the surface of the dough with vegetable cooking spray.
- Lift the dough using the four corners of the parchment and lower it into a large Dutch oven. Cover lightly with plastic wrap and let rise in a warm location until the dough has doubled in size, about 2 hours. Test by gently pressing a finger or knuckle into the dough. If a slight indentation remains, it’s ready.
- Adjust the oven rack to the middle position. Remove the plastic wrap and discard. Lightly dust the top of the dough with flour. Cut a 6-inch long, ½-inch deep slit along the top of the dough. Place the lid on the Dutch oven and put in the cold oven.
- Heat the oven to 450°F and bake the bread for 30 minutes. Start the timer as soon as you put the dough in the cold oven.
- Remove the lid and continue baking for 25 to 35 minutes longer or until the bread is deep golden brown and the internal temperature registers 205° to 210°F on an instant-read thermometer. Tent with foil if needed to prevent over-browning.
- Remove from the pot and transfer to a wire rack. Cool completely before slicing.
Recipe Notes
- Bread is best eaten the day it’s made but will keep at room temperature for several days, well wrapped. Freeze for longer storage.
Nutrition
More great bread recipes

Artisan Bread (no-knead!)
Soft in the middle with a chewy exterior. Great for dipping in olive oil or a hot bowl of soup. This may the easiest no-knead bread you'll ever make!
View this Recipe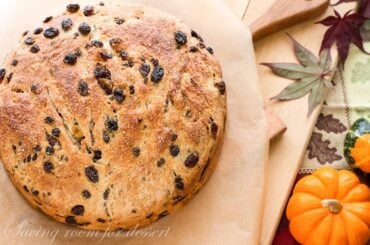
Barm Brack – Irish Halloween Bread
A traditional Irish recipe served around Halloween. A little sweeter than sandwich bread, but not as rich as cake.
View this Recipe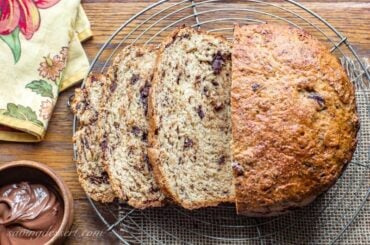
Chocolate Hazelnut Bread
A simple yeasted loaf of fluffy sweet bread, loaded with chunks of bittersweet chocolate and toasted hazelnuts. Serve with a slathering of Nutella for a wonderful treat!
View this Recipe
Nancy
Says heat oven to 450, but then says start timer when put into cold oven, please clarify
Tricia Buice
Hi Nancy. Great question. Put the bread in a cold oven and turn it on to 450 degrees. Immediately start the timer and set it for 30 minutes. The 30 minute baking time includes preheating so the total on your timer is 30 minutes. Remove the lid and continue baking as directed. Hope that helps!
Megan
This recipe is amazing! I love it. I decided to purchase an enameled cast iron bread oven. Do you recommend the same baking instructions with a bread oven? (Specifically, 30 min with the lid on and 20-30 min with the lid off?). Thank you!!
Tricia Buice
Thank you Megan! I’m so glad you enjoyed this Harvest loaf. Yes I think a cast iron bread oven will be great. Be sure to use a piece of parchment paper in the bottom and enjoy!
Gabi
Sounds delicious! I don’t have a Dutch oven, could I use a slow cooker? If so, for how long would I bake it?
Tricia Buice
Hi Gabi. I don’t think a slow cooker will work because it cannot get hot enough. You can bake this loaf on a sheet pan or in a cake pan. I would use parchment paper for both. Let us know how it turns out for you!
Alison
I found something to cure my withdrawal cravings for Costco’s fruit and nut bread that is seasonal. I’ve made this 5 times and find it more delicious. I’ve shared it and the recipe with several friends.
Tricia Buice
Thank you Alison! I’m so happy you enjoyed this recipe and truly appreciate the feedback. Bravo!
Carol
Can I make this delicious sounding bread with a gluten free bread flour? There are a few new GF flours for bread that I want to try.Artisan breads with fruits and nut are what I miss the most.
Tricia Buice
Hi Carol. If you’ve found a great gluten free flour for bread then I say give it a go! I’m so anxious to hear how it goes. Thanks for the great question.
Cheryl
This bread is so good. I am trying to use more whole The wheat flour in my breads. Could I use some whole wheat and some white flour. If so how much of each would you recommend
Thanks
Tricia Buice
Hi Cheryl. Thanks for the kind words! You can substitute anywhere from 25% to 50% of the white flour with whole wheat. I would start out small and sub more next time to ensure you like it. Thank you for commenting and for trying our recipe.
Carol lundstrom
This bread is delicious. My digital thermometer wasn’t working correctly so my bread got a bit overdone on the bottom with some of the fruit burning so I cut off the bottom crust and it was fine.
Tricia Buice
Thanks Carol! We truly appreciate the feedback.
Debbie
I’m just starting to experiment with yeast and tackled this recipe. The bread came out so delicious however, the bottom of my bread was burned. When you take the cover off of the Dutch oven and bake the remaining 30 minutes is the oven temperature supposed to be turned down? I baked on convection, does that make a difference?
Tricia Buice
Hi Debbie. If baking in convection mode you need to reduce the baking time. It sounds like the bread was just over-baked. Do not reduce the heat during the final 30 minutes. I would try again and use a regular oven setting in place of the convection mode. Thanks for the great question!
heather
Hi, this recipe sounds delicious. I especially like the idea of adding orange juice to soaking liquid & bread. Do you think I could use sourdough starter instead of instant yeast, & if so how much should I use?
Tricia Buice
Hi Heather. I wish I had the answer for your question. However, I’m not a sour dough expert but I wish I was! Since this recipe is loaded with fruit I’d think you will need a little more sour dough starter than a plain bread recipe. Perhaps you could search for sour dough fruit bread recipes and see what they recommend. Enjoy!
Michelle
The harvest bread was absolutely delicious. It also freezes well. Thank you so much for the recipe. 👏
Tricia Buice
Thank you Michelle! I’m thrilled you enjoyed it. I love baking bread this time of year and can’t wait to make it again. Enjoy
Anna
How do you keep the outside of the bread crusty?
Tricia Buice
Hi Anna. Store the bread is a cool, dry location wrapped lightly in a clean dish towel or cloth. Enjoy!
Leslie
What size Dutch oven
Tricia Buice
Hi Leslie. I use a 6 quart Dutch oven. Enjoy!
EvieV
Helloooo!
Started this bread last night and we are just enjoying a slice now… SO DARN GOOD!
I have made other versions of this before- but this is just the best flavored one yet! I think the step where you juice an orange-(I used a Clementine)- then quickly soak & mic the raisins & crans, before adding the leftover juices to the water portion of this recipe, really amps up the flavor/moisture.
THANK YOU for sharing this and happy baking everyone!
Tricia Buice
Thank you Evie! We appreciate you taking the time to comment and thank you for trying our recipe.
Jeng
It was very good. I can eat the whole bread all by myself! Thank you for an awesome bread. I used bread flour and pecan nuts.
Tricia Buice
Thank you Jeng. So happy you enjoyed this bread!
Tina W
Ok first time making this. The dough smelled warm and yeasty but boy was it super sticky!! I didn’t have raisins ( they seem to be in short supply in stores which is strange) so I used dried cranberries and dried apricots cut up into small pieces. Soaked the cranberries but not the apricots in the oj, the apricots we’re plump enough. Used chopped pecans and sliced almonds. Dough did not rise much after 22hrs so I gave up and moved on. It was then I realized I didn’t have any pots that could go into that hot of an oven as they were either non-stick or I was unsure of the handles being a material that could take that high a heat. I finally split the dough in 2 and put them in earthenware lined with parchment, covered in HD foil and laid a lg cookie sheet on top. Because of the smaller size and not wanting it to burn I only left it for 23 mins covered and then put it down to 425° for 20 more minutes and checked it’s interior temp then but it wasn’t quite to 200° so I did 5min more and another 5 after that till it got to 205°. They tapped hollow and we’re definitely crusty. Let them cool for about an hour then tasted a slice. VERY tasty and dense! I can’t wait for breakfast in the morning!! I’m going to have a few slices toasted since they’re only slightly bigger than a biscotti 😉😋
Tricia Buice
Thanks for the great details Tina. Glad it all worked out. We truly appreciate the feedback.
Linda
Can this bread be made with a shorter rise time – 2-3 hours?
Tricia Buice
Hi Linda. If you want a shorter rise time you will need to add a lot of yeast. I would add at least 2 teaspoons. Let us know how it turns out!
Gwen
CanI use my Kitchenaid mixer to mix the dough? I think I would need to mix the rehydrated fruits in at the end, but I would be using more yeast. It would save me needing to knead the ough by hand and shorten the raising time. I would bake in my cast iron crockpot.
Tricia Buice
Sounds like a plan Gwen. Let us know how it turns out for you. LOVE this bread!
Jaime
Delicious toasted and buttered! I live in FL, so it didn’t turn out perfect. I don’t have temperature of 70°F, 75°F is the lowest temp we can tolerate. I only let it rise for 12 hours, fearful that the room temp was too warm. Would that change how rises the 2nd time? It was the 2nd rise that didn’t really rise, even though I gave it an extra hour. It certainly didn’t double in size. The dough didn’t stretch much “skyward” and broke apart. Maybe my surface had too much flour on it? When dough was in cast iron dutch oven (SO HEAVY!), am I to lightly cover the oven, or just the bread in the oven? When cooked, it took a LONG time to get to 205°F, so the bottom was black, parchment stuck to bread, and the top was very dark brown and pretty hard. I’ve only made bread once before about 40 years ago, so perhaps that is why it didn’t turn out looking like your photos. It ended up being about 2 1/2″ tall – is that normal? The inside was cooked on the top half, but the bottom half was kind of not fully cooked. It is VERY dense & crunchy, but when toasted it’s delicious. Any tips for me? Maybe I should only make it in the winter? Next time I will put it in the microwave for it’s 2nd rise, maybe that would help. Our room temp in kitchen is about 78°F. Is that warm enough for the 2nd rise?
Tricia Buice
Hi Jaime. This dough is not very tall, but should rise properly in a warm location. Do the knuckle test and if the dough does not spring back immediately, it’s ready. The temperature will affect rising, but as long as it’s warm, you’re good to go. It may not take as long if your house is very warm. After the dough rises in the Dutch oven, remove and discard the plastic wrap. Place the lid on the pot and then bake. Place the bread Dutch oven in a COLD oven, then turn it on. Start the timer as soon as you place it in the oven and bake with the lid on for 30 minutes. Remove the lid and bake for 20 to 30 minutes more, or until it’s well browned. Make sure your oven rack is in the middle position. As you can see from the photos, the bread is not as tall as sandwich breads due to the added fruit. Perhaps your Dutch oven is not enameled cast iron? Good luck and thanks so much for the feedback. We love it toasted too but the bread should be somewhat soft when sliced.
Samuel S.
What is you don’t have a Dutch oven? I’m 21 and I have never even heard of one.
Tricia Buice
Hi Samuel. It’s okay if you don’t have a Dutch Oven. These large cast iron pots are great to use for soups on the stove-top, or for stews, roasting and making bread in the oven. The better quality pots can be expensive. However, these essential kitchen tools last forever so it’s usually a lifetime purchase. If you don’t have something like that, try using a deep cast iron skillet or other oven-proof skillet. You can also form the bread into a round and bake on a flat pan. Enjoy!
b
Going to make this for the second time.
First time turned out great!
Love it toasted for breakfast with butter.
Going to try as chicken sandwich.
Love it!
Tricia Buice
Thanks so much B! My husband is absolutely nuts for this bread. We make it often and especially love it as a base for sandwiches. Enjoy!
George
Hi I’m confused on the amount of water to use
Tricia Buice
Hi George. Sorry if the recipe was confusing. In STEP 1 warm the fruit in the orange juice in the microwave. Set the fruit aside for 15 minutes to plump. Next you drain the fruit reserving the orange juice in a measuring cup. Add enough water to the orange juice to measure 1 and 1/2 cups total liquid. Hope that helps!
Val
Just made this bread,,,omg so delicious,,I have some fruit peel left from Christmas so added that in ,in place of the cranberries very nice and easy recipe
Thanks for sharing
Tricia Buice
That’s terrific Val! So glad you tried this recipe. Leftover fruit peel is a terrific substitution for the cranberries. I hope you’ll try this as a sandwich bread, too. What a fantastic lunch!
J E
Is it possible to omit the nuts as I am not suppose to eat any nuts or seeds?
Tricia Buice
Hi Jenn. Yes you can skip the nuts and no other adjustments are needed. If you want, you can add a few more raisins or cranberries. Enjoy!
angiesrecipes
My husband loves bread loaded with nuts and fruits…this is a perfect one for him. Love that golden crust!
angiesrecipes
http://angiesrecipes.blogspot.com
Tricia Buice
Thank you Angie. Hope he loves it as much as we do 🙂