This post may contain affiliate links. Please read my disclosure policy.
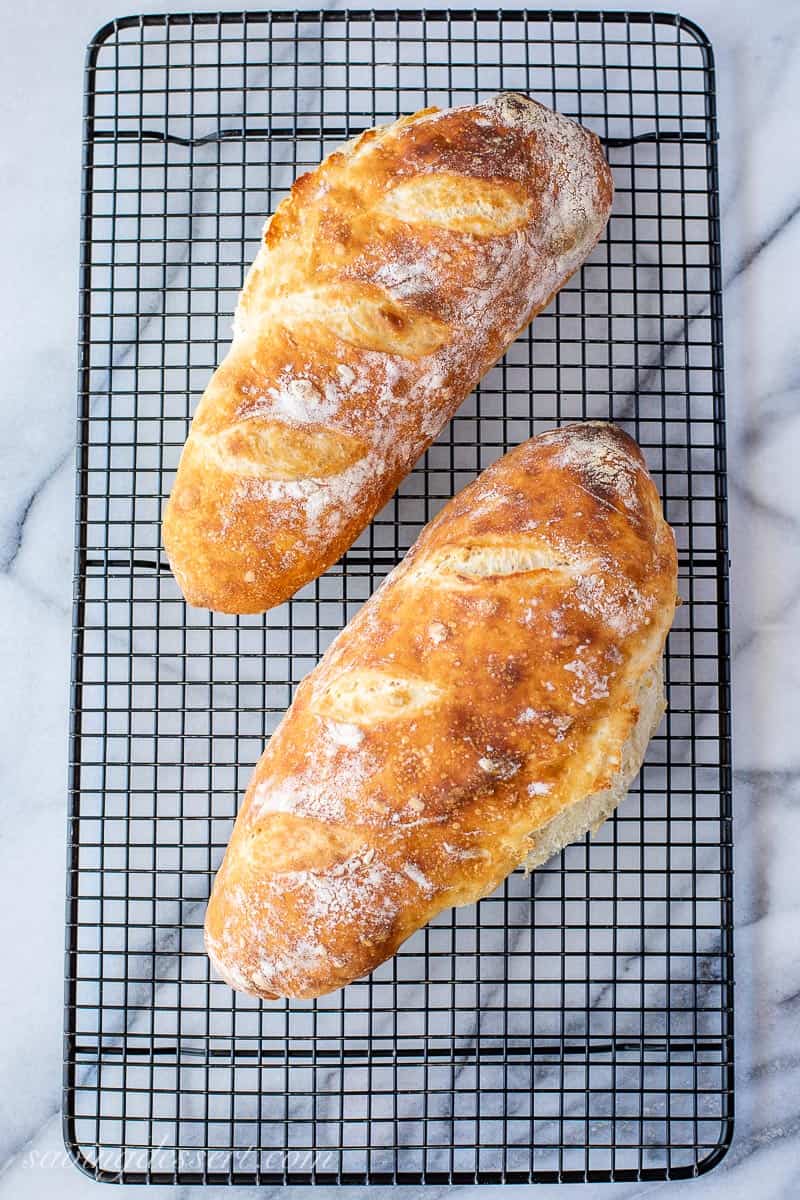
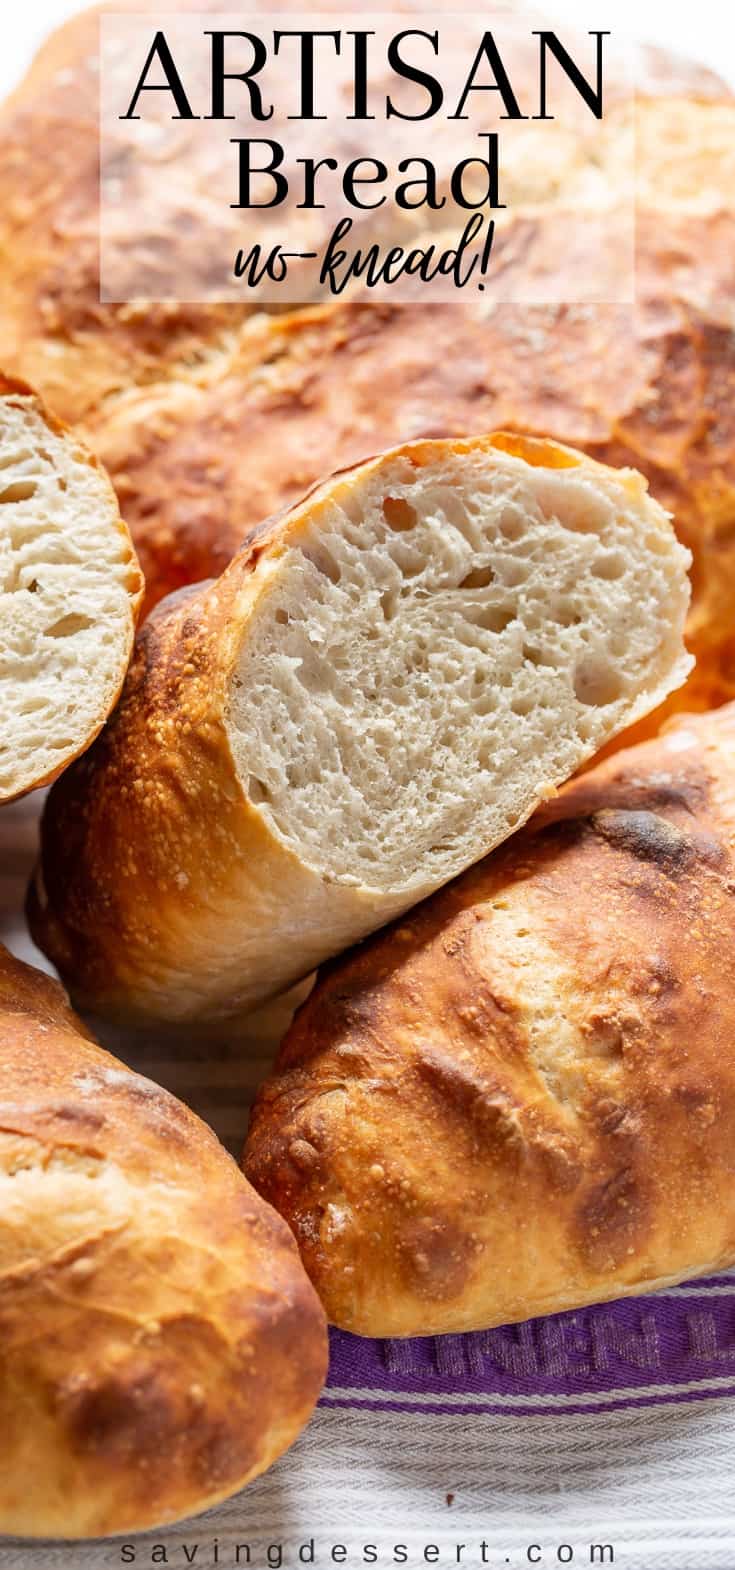
Crusty soft chewy and flavorful no-knead Artisan Bread!
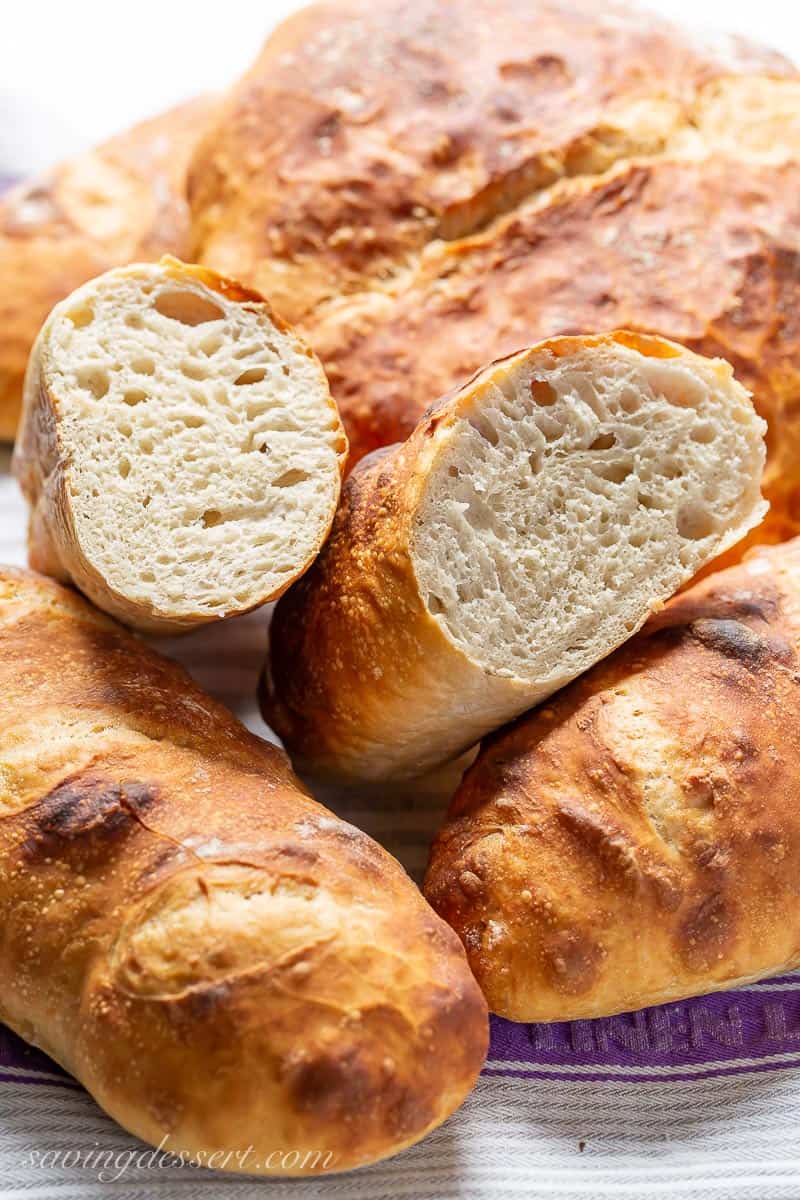
This simple bakery-style Artisan Bread recipe has been our go-to favorite for more than a decade.
Many years ago easy homemade “Artisan Bread” was all the rage. A popular cookbook titled Artisan Bread in Five Minutes a Day is said to have revolutionized home baking.
The idea that anybody can make simple and delicious bread at home was a game changer. I’m sure there are many home bakers that had been successfully making bread for decades. However, this book inspired non-bakers, newbie bread makers and those who thought traditional bread making was too much work.
Now, the term “no-knead bread” seems to be the latest and greatest name for this flavorful, easy to make rustic, crusty loaf.
What is Artisan Bread?
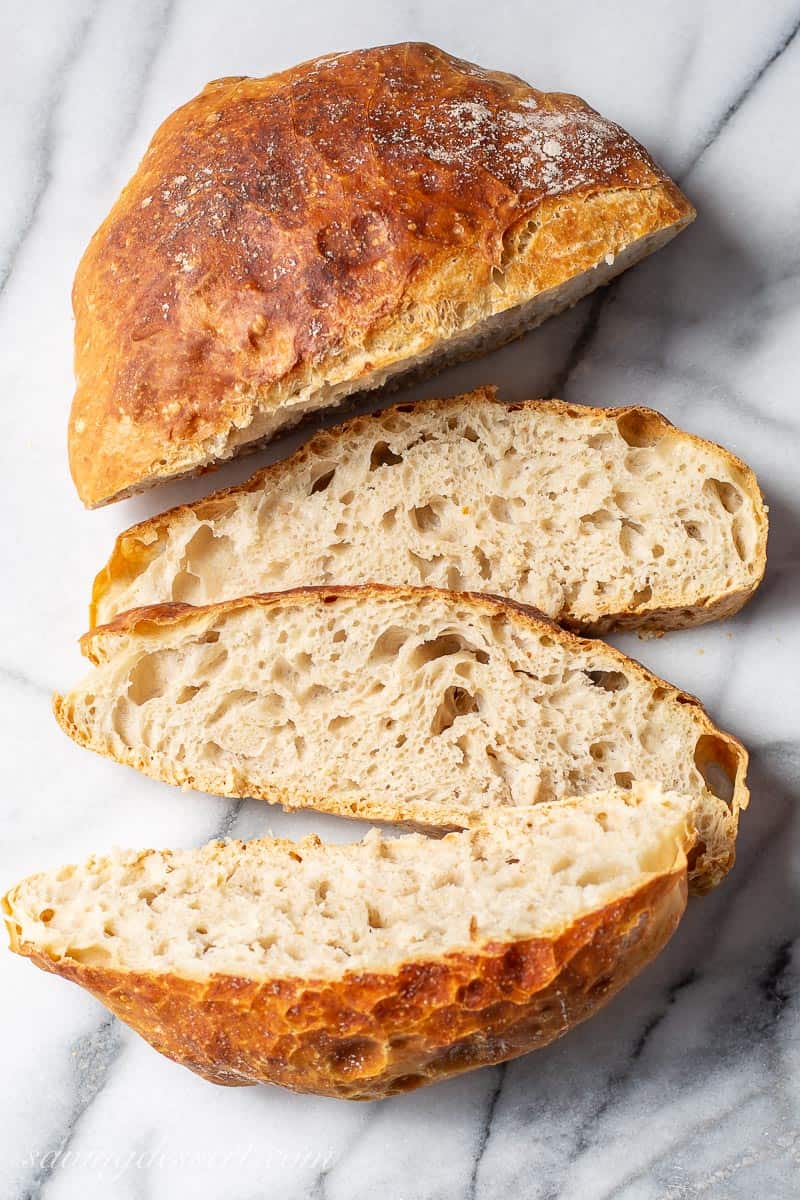
Artisan Bread is not just one kind of bread. It’s a term used to describe any bread you make by hand using traditional methods. Rustic breads like these come in all shapes and sizes. For this recipe we often alternate between making a boule or two long loaves, and sometimes both.
This particular Artisan Bread recipe just happens to be a no-knead bread, too. Like our recipe, most Artisan Breads are made with just four ingredients: water, flour, yeast and salt. A loaf made with no chemical additives is a true Artisan bread.
How to make Artisan Bread:
Ingredients you’ll need for two loaves or one boule of Artisan Bread:
- bread flour – we love King Arthur bread flour for this recipe. Flours with a higher protein content create loftier breads.
- instant or rapid rise yeast – our favorite is red SAF instant yeast. Gold SAF yeast is great for sweet breads.
- salt – regular table salt works well here
- tepid water – room temperature, not cold
First prepare the dough:
Preparing the dough is very easy and only takes about 5 minutes.
- In a large mixing bowl whisk together the flour and yeast. Add the salt and whisk again.
I don’t like to add salt and yeast at the same time as I’m afraid the salt may deactivate the yeast. This may be an old wives tale and most likely will not happen. But this process works every time so I keep doing it that way.
- Next add the tepid water and stir until you get a shaggy, wet dough.
- Cover the dough tightly with plastic wrap and set aside for at least 12 and up to 20 hours.
To make two loaves of Artisan Bread:
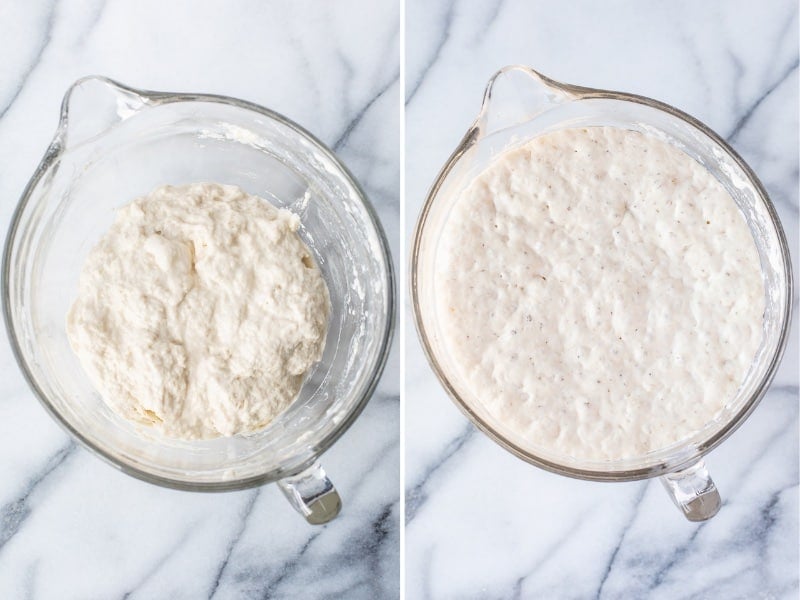
- Once risen the dough will be swollen, bubbly, shaggy and sticky.
- Line a large baking sheet with parchment paper or sprinkle with cornmeal. Set aside.
- Lightly sprinkle flour on a clean work surface. Turn the dough out onto the counter and sprinkle the top with a little more flour.
- Using floured hands or a bench scraper, stretch one side of the dough up and over onto itself. Rotate the dough a quarter turn and repeat. Do this two more times, taking care you don’t overwork the dough or add any more flour.
- Cut the dough in half. Working with one half at a time, dust your hands with flour and shape the dough into a loaf about 9 to 10 inches long.
- Pull the sides of the dough up to the middle and pinch together to seal. Turn the loaf seam-side-down on the prepared baking sheet and tuck the ends under if needed.
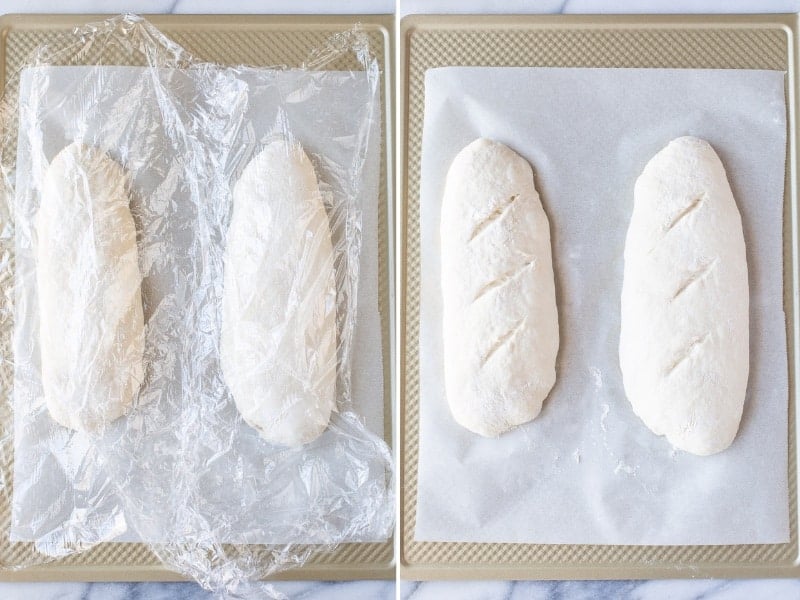
- Repeat with remaining dough ball. Sprinkle the top of the loaves with flour then cover lightly with plastic wrap. Let the loaves rise for 30-45 minutes or until the dough doesn’t spring back right away when poked.
While the dough is rising, preheat the oven to 475 degrees F.
- Place a cast iron skillet or baking pan on the bottom rack of the oven. Pour boiling water into the pan and quickly close the oven. This creates steam which gives the bread a gorgeous crust.
- Add the water pan to the oven at least 15 minutes before adding the bread dough. Don’t skip this step!
- Once risen, cut three deep, angled slashes into the top of the loaves. The cuts will start to open up and expand if the dough is properly risen.
- Slide the loaves into the hot, humid oven and quickly close the door. Bake until deep golden brown, about 20 to 25 minutes.
What causes bread to split while baking?
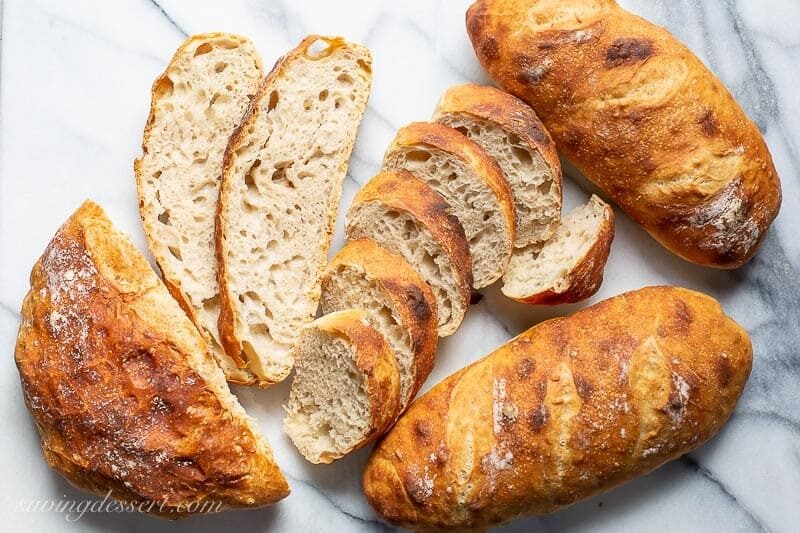
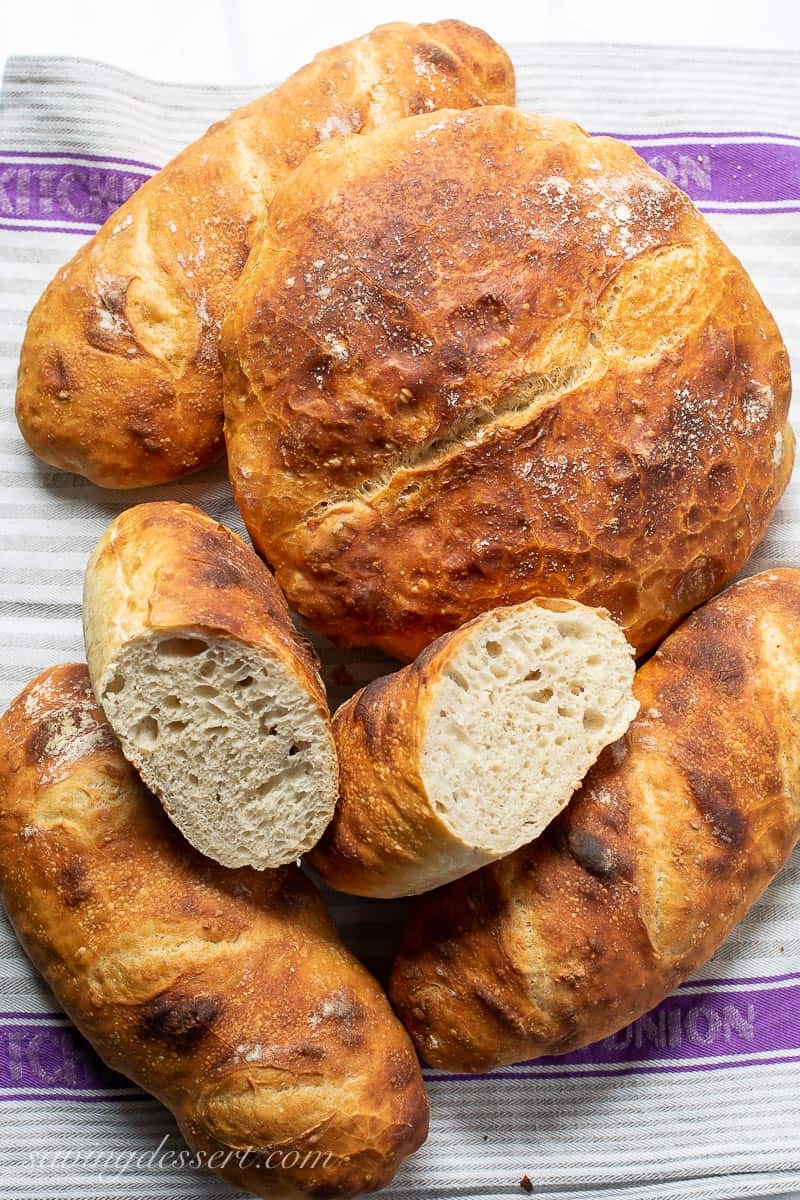
The photo above shows what this bread looks like if it splits while baking. The sides may bulge out and the loaves look lop-sided. There are many reasons this can happen, but honestly it’s just a visual thing and doesn’t affect the taste at all.
It’s really not a big deal unless you want perfectly shaped loaves. Yes I want perfectly shaped loaves too, so I always make sure to do the following:
To prevent loaves from splitting, follow these guidelines:
There are several reasons bread may split while baking.
First, a hard crust forms too quickly before the bread is fully baked and risen. This can happen if there’s not enough moisture in the oven. Once the hard crust is formed, the expanding bread has to go somewhere.
When baking loaves like these make sure you put the pan of boiling water in the oven 15 minutes before baking the bread. The water should be bubbling slightly and steaming.
It seems counterintuitive but you need moisture to form a crispy crust, but only after the bread reaches it’s full potential. Weird I know.
Another reason this can happen is if you don’t score the bread properly. The slashes cut in the top of the bread provide a designated place for the dough to expand. If the cut is not deep enough, the bread will find somewhere else to go.
Finally, if you don’t firmly seal the seams on the bottom of the loaf they can open up as the bread bakes.
The loaves pictures above were put in the oven before there was enough steam and the slashes were not deep enough. Some experts say the slashes should be done on the diagonal instead of straight down, too.
Whichever way you do it, make sure the cuts are pretty deep and start spreading open immediately.
To make Artisan Bread in a Dutch oven
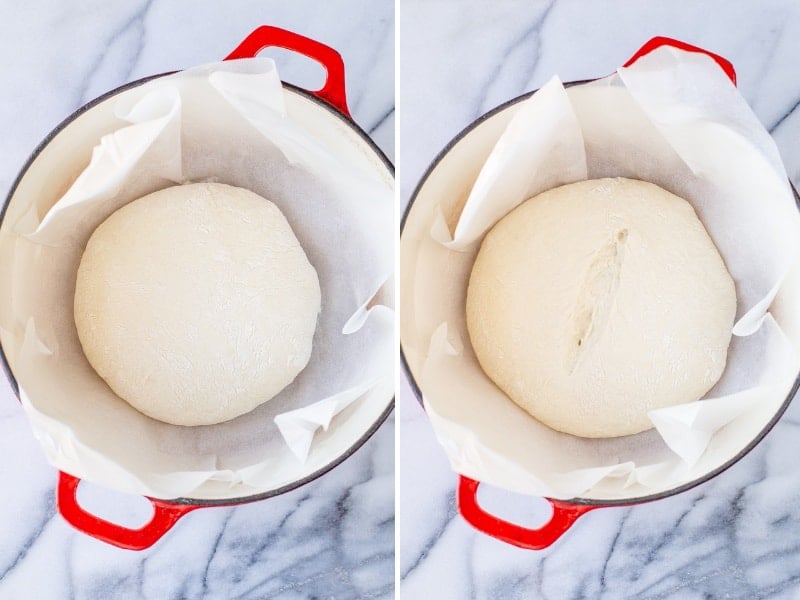
Instead of baking two loaves of Artisan Bread, you can easily make this dough into one boule.
After the first rise turn the dough out onto a lightly floured work surface. Fold the dough a few times using a bench scraper or lightly floured hands. Pull the sides up and pinch together in the center forming a round loaf. Turn the dough over, seam-side-down, onto a large sheet of parchment paper.
Ease the parchment and dough into a large cold Dutch oven. Cover with plastic wrap and let rise at room temperature for 30 to 45 minutes.
Remove and discard the plastic wrap. Score the loaf then cover the Dutch oven with a tight fitting lid. Place in a cold oven.
Immediately turn the oven to 450 degrees F. After 30 minutes remove the lid and continue baking until the bread is golden brown, about 30 minutes more.
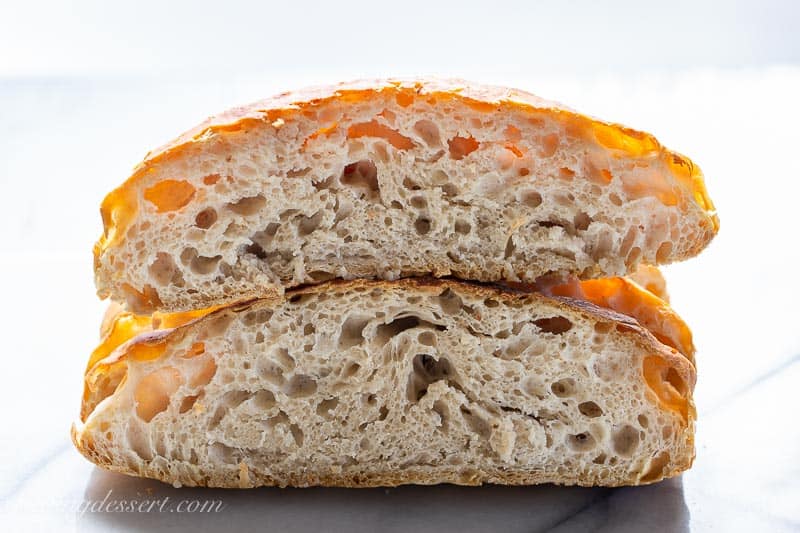
The Dutch oven traps moisture inside which takes the place of the water pan in the bottom of the oven, noted above. This humid environment gives the loaf a nice open crumb and crisp crust.
We enjoy making this bread both ways but if I had to pick a favorite, I think it would be making two loaves for more crusty surface.
There’s also a third way to bake this bread.
Carefully place the fully risen, scored dough round into a preheated Dutch oven and bake in a hot oven for 30 minutes. Remove the lid and bake for an additional 15 minutes or until golden brown.
For some reason I find the cold oven method works best for me.
How to store Artisan Bread
Fresh bread is always best served the day it’s made. However, this bread keeps very well for 3 to 4 days sealed in a zipper bag. The crust is softer but the flavor is still spot-on.
You can also freeze Artisan Bread well sealed in an airtight zipper bag. Thaw at room temperature and serve. It reheats well in the microwave and is perfect with a little butter.
I can’t count the number of times I’ve made this recipe over the last decade. It’s even doable for dinner parties and thrills my family when they smell the aroma lofting from the kitchen. Is there anything better or more soul satisfying than fresh baked homemade bread?!?!
How to serve Artisan Bread
Artisan bread is great with just about anything, especially something a little saucy like our Skillet Chicken and Mushroom Wine Sauce. It’s perfect as a dipper for soups like Minestrone and our earthy and delicious Wild Rice Mushroom Soup.
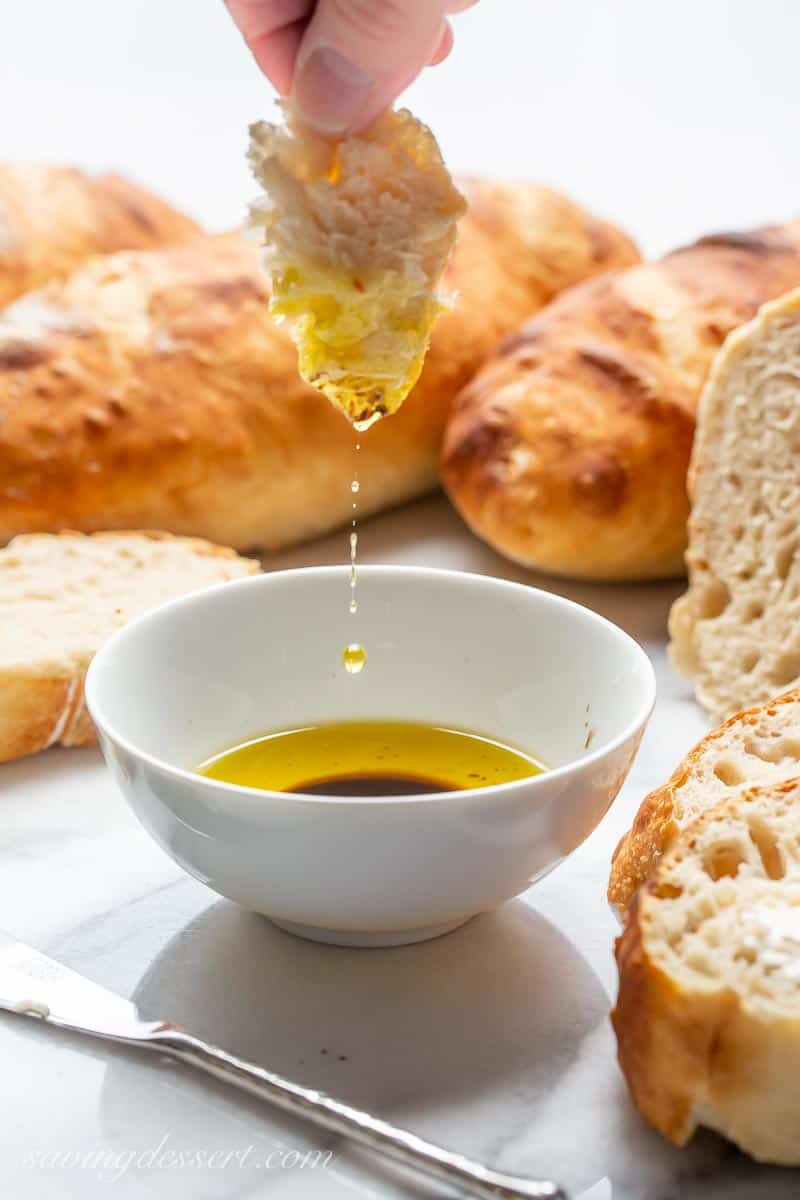
One of my favorite ways to enjoy this bread is dipped in a bowl of great quality olive oil with a little drizzle of balsamic vinegar. Add a little salt and pepper if desired and a few good spoonfuls of fresh grated Parmesan. I can make an entire meal out of this!
We’ve made sandwiches out of Artisan Bread with things like turkey, avocado, cheese, lettuce and tomato. Also we love this bread as the base for a grilled cheese sandwich. This bread has so much flavor and a dramatic open texture; it’s absolutely amazing.
Don’t forget to serve Artisan Bread with all your favorite Italian specialties. Shrimp Scampi, Spaghetti and Meatballs, Eggplant Parmesan and Stuffed Manicotti to name a few 🙂
Don’t let the idea of homemade bread scare you off – this rustic recipe is easy-peasy!
If you’ve always wanted to make homemade bread but never tried, let this recipe be your first. It’s a no-fail, simple and delicious way to step into the world of amazing homemade breads.
Can you add other ingredients to this dough?
Yes you can add a little cheese, olives, herbs or just about anything you might normally find in a savory bread. Just add the extras in while mixing the dough.
We turned this recipe into a Harvest Bread and loaded it up with fruits and nuts. It’s loaded with flavor from the dried cranberries, nuts, golden raisins, orange juice and orange zest. It’s not a sweet bread but you’ll enjoy little pops of chewy sweetness from the cranberries and raisins in every bite.
How to store yeast
Store unopened yeast well sealed in a dark, cool environment. You can also refrigerate yeast or freeze the entire package, well sealed, for up to 2 years. I usually use yeast straight from the freezer but some say it’s best for it to come to room temperature for 30 to 45 minutes before using.
Here are a few of our favorite homemade bread and roll recipes:
- English Muffins
- Pioneer Woman’s Cinnamon Rolls
- Chocolate Babka Recipe
- Chocolate Hazelnut Bread
- Lion House Rolls
Thanks for PINNING!
Let’s be baking friends! When you try our recipe please leave a comment on this post. If you loved this recipe we’d appreciate a 5-star rating! Sharing your experience, variations and insights will help all our readers, and it helps me too.
If you’re on Pinterest feel free to leave a comment and photo there if you have one. If you share on INSTAGRAM tag @savingroomfordessert so we can stop by and give your post some love.
FOLLOW Saving Room for Dessert on FACEBOOK| INSTAGRAM| PINTEREST | TWITTER and subscribe to our YOUTUBE channel for all the latest recipes, videos and updates.

Artisan Bread
Ingredients
- 3 ¼ cups bread flour plus extra for dusting (440g)
- ½ teaspoon instant or rapid rise yeast (SAF yeast is my favorite)
- 1 ½ teaspoons salt
- 1 ⅔ cup tepid water room temperature (about 13 oz)
Instructions
To make the dough:
- In a large bowl whisk together the flour and yeast. Add the salt and whisk to blend. Next add the water and stir with a wooden spoon or firm spatula until blended.
- Cover bowl tightly with plastic wrap. Let dough rest at room temperature for at least 12 hours or up to 20 hours.
The next day:
- Once risen, the dough will be swollen, bubbly, shaggy and sticky. Lightly sprinkle flour on a clean work surface. Turn the dough out onto the counter and lightly sprinkle the top with more flour. Using floured hands or a bench scraper, stretch one side of the dough up and over onto itself. Rotate the dough a quarter turn and repeat. Do this two more times taking care you don’t overwork the dough or add any more flour.
To bake two loaves:
- Line a large baking sheet with parchment paper, or dust with cornmeal. Set aside.
- To make two loaves cut the dough in half. Working with one half at a time, dust your hands with flour and shape the dough into a loaf about 9 to 10 inches long. Pull the sides of the dough up to the middle and pinch together to seal. Turn the loaf seam-side-down on the prepared baking sheet and tuck the ends under if needed. Repeat with remaining dough ball. Sprinkle the top of the loaves with flour then cover lightly with plastic wrap. Let the loaves rise for 30-45 minutes. Make sure the loaves are set far apart on the baking sheet to ensure proper baking. PRO TIP: Cut the parchment in half to easily separate the loaves.
- While the loaves are rising pre-heat the oven to 475°F. Fifteen minutes before baking place a cast iron skillet or aluminum baking pan on the lowest rack of the oven. Fill the pan ¾ full with boiling water. Quickly close the oven and leave it closed until ready to bake the bread. It's important that there's plenty of moisture in the oven before putting the loaves in to bake.
- PRO TIP: To ensure the loaves are risen properly, press a knuckle or finger into the dough. If a slight indentation remains, and doesn't fill in all the way, it’s ready.
- Once risen, remove the plastic wrap and cut three sideways slashes in the top of each loaf using a sharp knife or lame. The bread should split open a bit if properly risen. Quickly place the loaves in the hot oven. Bake on the middle rack for 20 to 25 minutes or until the bread is dark brown. Remove from the oven and place on a wire rack to cool. Serve slightly warm but not hot, if desired. Slice and enjoy!
To bake in a COLD Dutch oven:
- Prepare a large sheet of parchment paper.
- After the first rise (12 to 20 hours) turn the dough out onto a floured work surface. Dust the top lightly with flour. Using floured hands or a bench scraper, stretch one side of the dough up and over the top. Turn the dough ball a quarter turn and repeat three more times. Don't add flour as this will create large airy holes near the crust. Pull the edges of the dough towards the top, pinch together to seal and form a taught ball. Place the dough ball on the piece of parchment paper, seam-side-down. Gently ease the parchment into a cold Dutch oven. Cover with plastic wrap and let rise for about 45 minutes. (See PRO TIP above)
- Once risen, cut a slash or X into the top of the dough using a sharp knife or lame. Place the lid on the Dutch oven and put on the center rack of a cold oven. Immediately turn the oven to 450°F and leave for 30 minutes. Remove the lid and continue baking until the loaf is golden brown, about 25 to 30 minutes more. Remove the loaf to a wire rack and cool.
Recipe Notes
- Bread is best served the day it's made but will keep at room temperature for up to 3 days. The baked loaves also freeze very well.
Nutrition
Originally published May 2011 updated April 2021
Saving Room for Dessert is a participant in the Amazon Services LLC Associates Program. As an Amazon Associate we earn a small commission from qualifying purchases, at no additional cost to you.

Katy
One of my husband’s favorite boules I have made it in a cold pan and a hot pan both work great.
Tricia Buice
Thanks Katy! I’m so glad you’re enjoying this recipe. There’s nothing like fresh baked bread!
Kylee Chavez
If you use instant yeast do you use the same amount?
Tricia Buice
Yes Kylee – instant or rapid rise are both fine!
Ardith Wilkins
Could you make this into round loaves?
Tricia Buice
Hi Ardith. I’ve added instructions for making this dough into round boules. Let us know how it turns out for you. Thanks 🙂
Jeremy Lamb
The dough comes out a little wet for me to fold, but it ends up tasting delicious so I’m not complaining.
Tricia Buice
Thanks Jeremy. We appreciate you taking the time to comment and for trying the recipe! Fresh bread is the best!
June
Can this be done in a mixer with a dough hook?
Tricia Buice
Hi June. You can combine the ingredients with a dough hook but the bread does not need to be kneaded. It’s soft enough to mix with a wooden spoon. Enjoy!
June
Also, how come such a small amount of yeast. The packet of yeast has 2 1/4 tsp but the recipe only calls for 1/2 tsp.
Tricia Buice
Since the dough sits overnight it has plenty of time to do its magic. You only need larger amounts of yeast for breads with shorter time for the first rise.
A SPICY PERSPECTIVE
Look at the pores in that loaf! Brilliant. There's nothing like good homemade bread!