This post may contain affiliate links. Please read my disclosure policy.
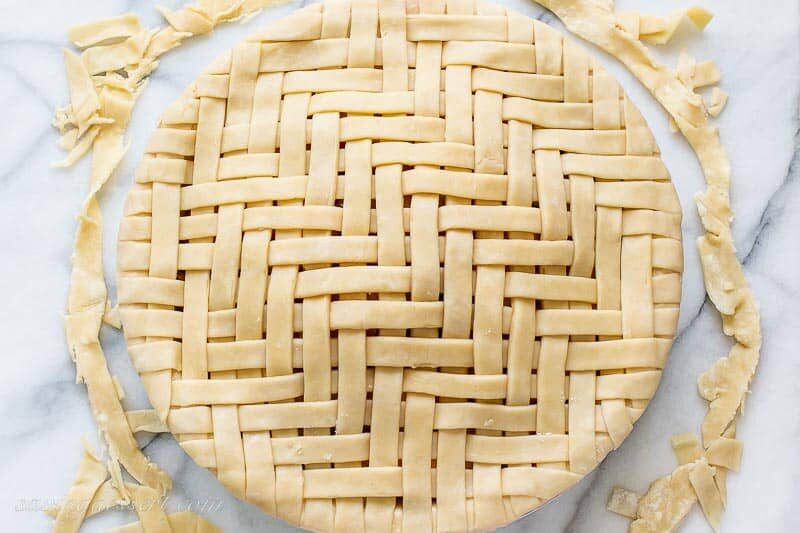
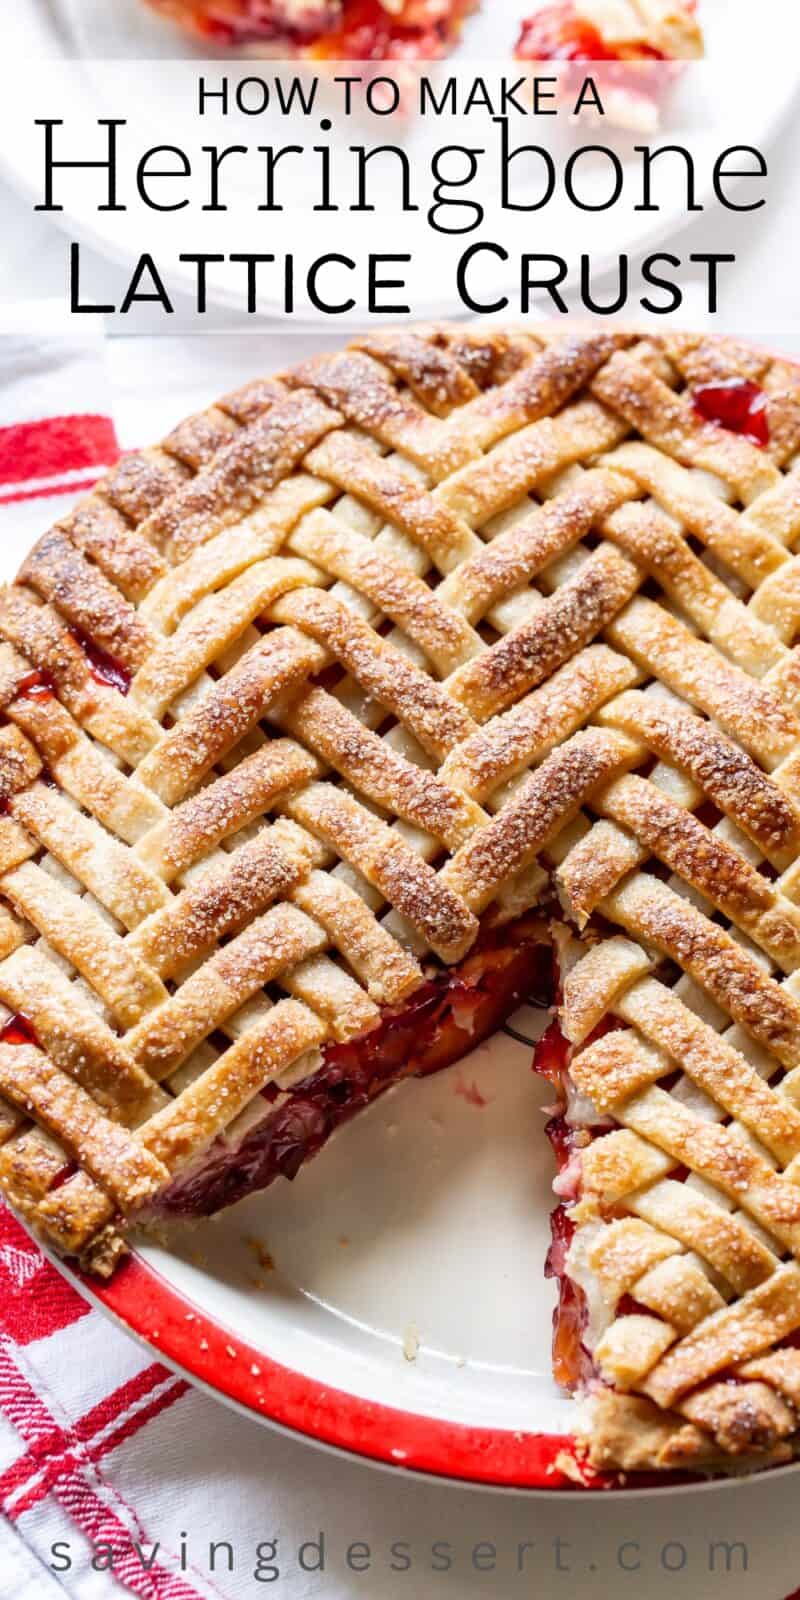
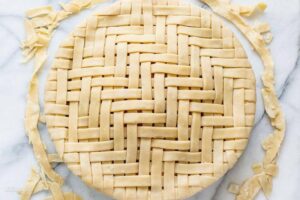
Make a gorgeous Herringbone Lattice Pie Crust
There are some seriously talented bakers in this world and kudos to the one who came up with a Herringbone Lattice Pie Crust. I’ve studied many posts about how to make this gorgeous crust but found instructions on Cook’s Illustrated by far the best.
I’ve translated those instructions into an easy to read, printable recipe card that you can use as a checklist as you go along. Read on for tips and notes and plenty of how-to photos!
Ingredients overview
1. First make a double pie crust pastry 🥧
We highly recommend trying our Perfect Pie Crust in 3 Easy Steps for this pattern. It’s easy to work with and makes the perfect amount of pastry.
If you don’t want to make homemade feel free to use refrigerated or frozen store-bought pie crust.
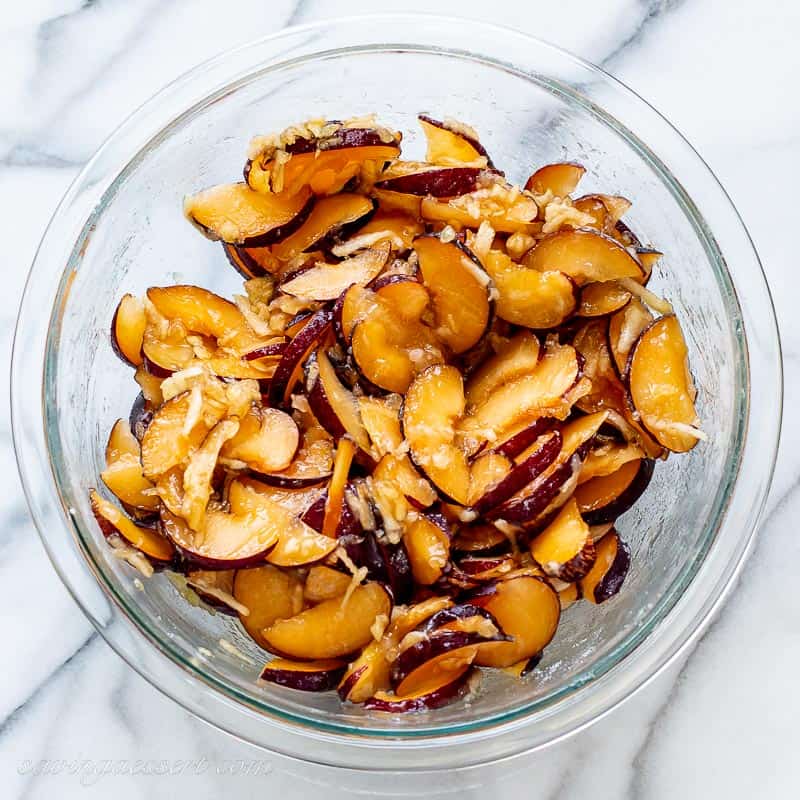
2. Next pick your pie filling 🍎🫐
Any pie made with a double crust works for this pattern. However, we recommend using a cool, chilled or cold filling. The weave takes a minute to assemble. If you have a hot or warm filling the pastry will get too soft to fold back and will melt and fall apart.
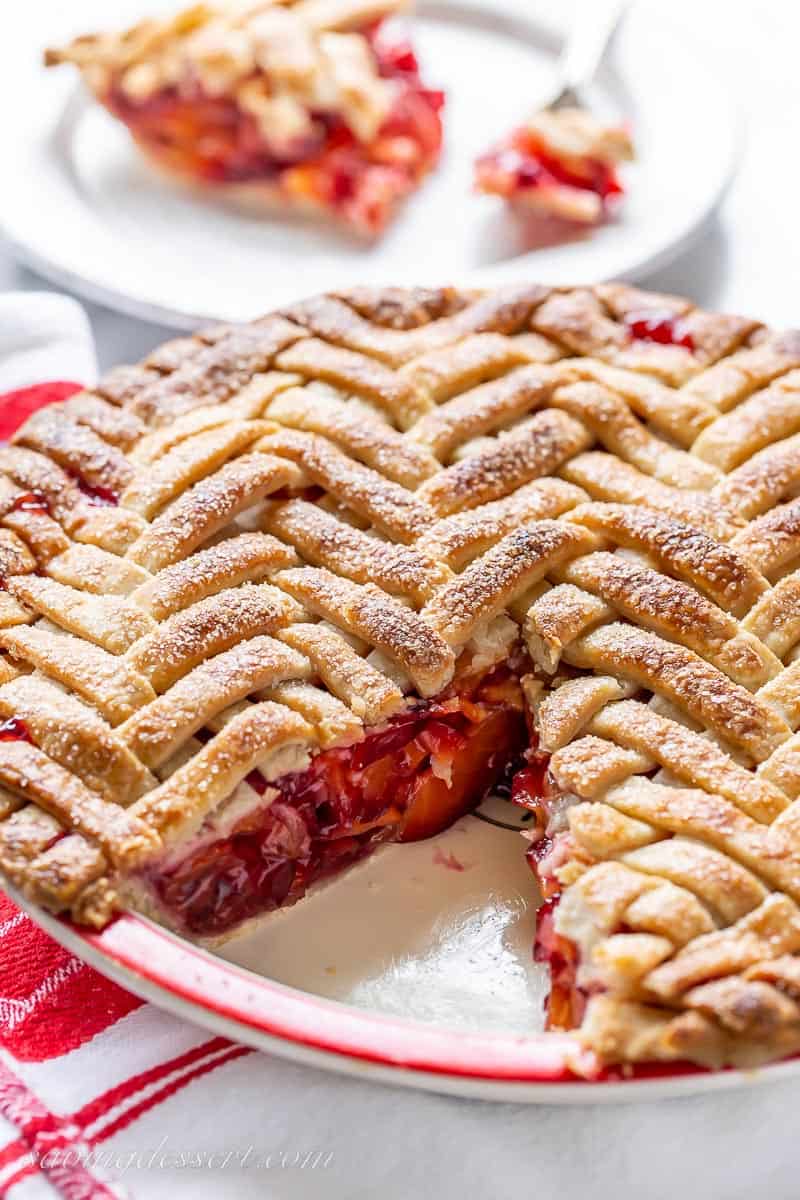
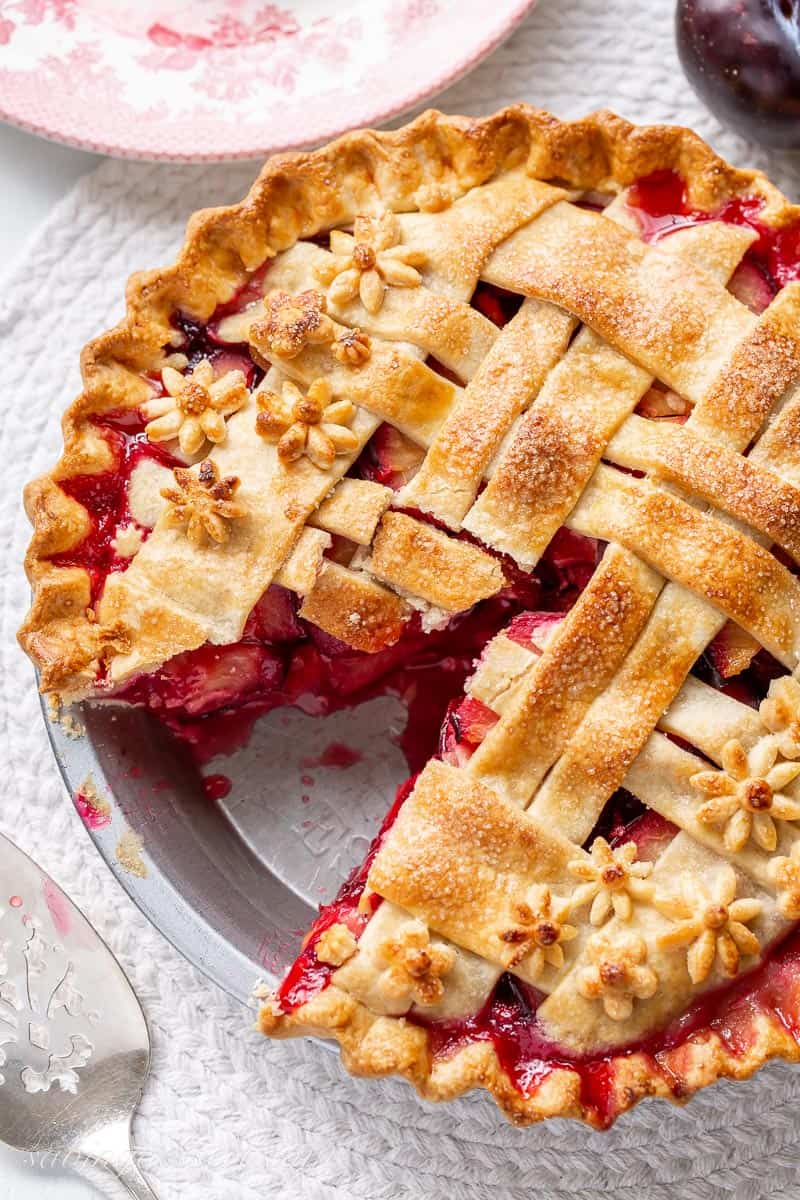
For this example we used our simple Plum Pie Recipe. But as you probably guessed, cherry, apple, blueberry or nectarine pies all work well too.
3. You’ll also need:
- An egg wash for brushing on the finished pastry
- Coarse sugar for sprinkling on top (optional)
Tools overview
- Rolling pin
- A ruler, preferably at least 16-inches long
- Pizza wheel or sharp knife for cutting the dough strips
- 9-inch deep dish pie plate
- Parchment paper
- Large baking sheet
- Aluminum foil
- A pencil, pen or marker
We participate in the Amazon Services LLC Associates Program, an affiliate advertising program designed to provide a means for us to earn fees by linking to Amazon.com and affiliated sites
How to make a Herringbone Lattice Pie Crust
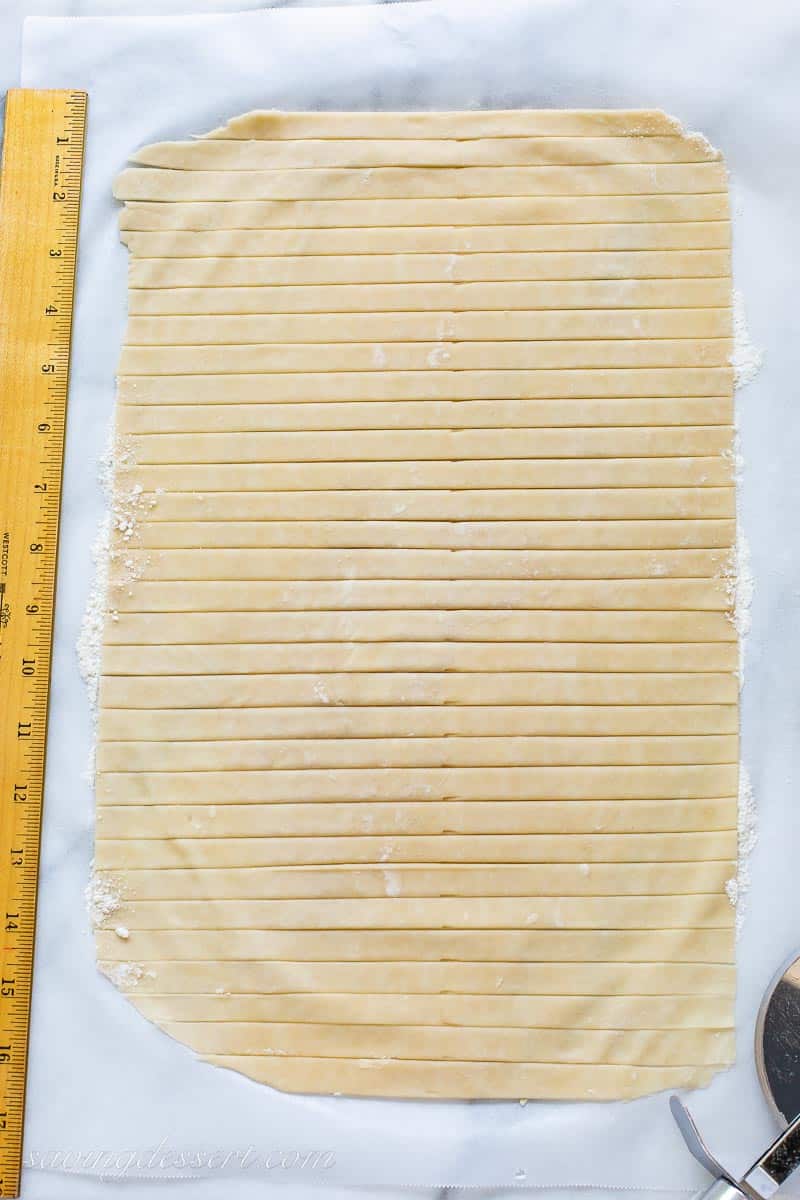
1. First, roll the dough
Line a clean work surface with a large piece of parchment paper. Lightly dust the parchment with flour. Using a rolling pin, roll half the prepared pastry into a 16×10-inch rectangle.
Mark and then cut the dough into 32 (1/2-inch by 10-inch wide) strips. Slide the parchment with pastry strips onto a large baking sheet and refrigerate for 30 minutes.
2. Roll out the bottom crust
While the strips of dough are chilling, roll the second pastry disk into a 12-inch circle on a lightly floured work surface. Ease the dough into the 9-inch deep-dish pie plate. Trim the edges to a 1/2-inch overhang.
Cover the dough lightly with plastic wrap and refrigerate while preparing the filling.
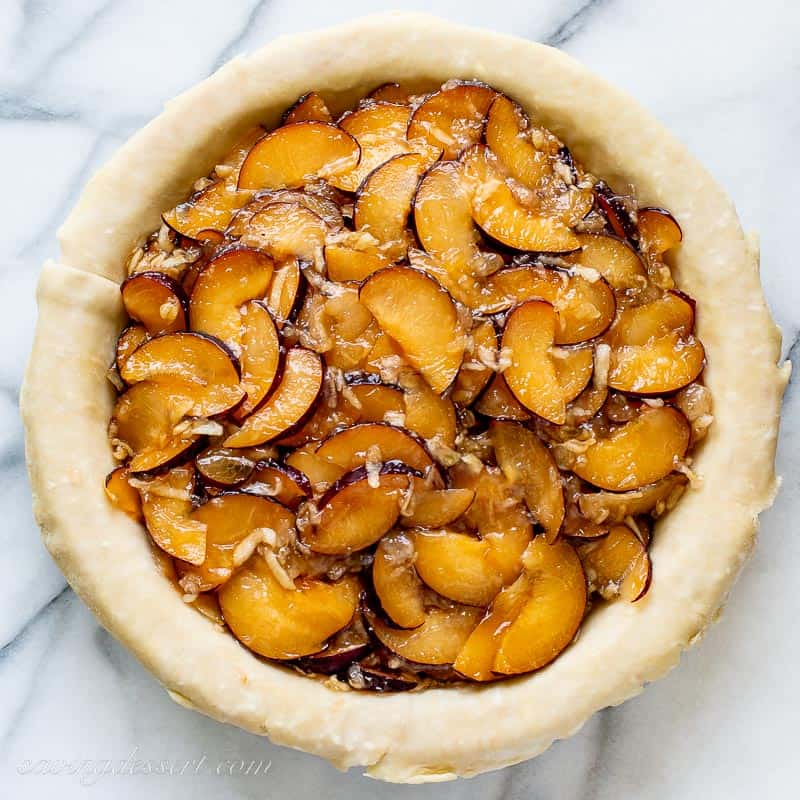
3. Fill the chilled pastry with pie filling
Prepare the filling and pour into the refrigerated bottom crust. Smooth the filling until level.
Preheat oven per your pie recipe directions. Line a baking stone or baking sheet with foil and place in the oven to preheat while preparing the lattice crust.
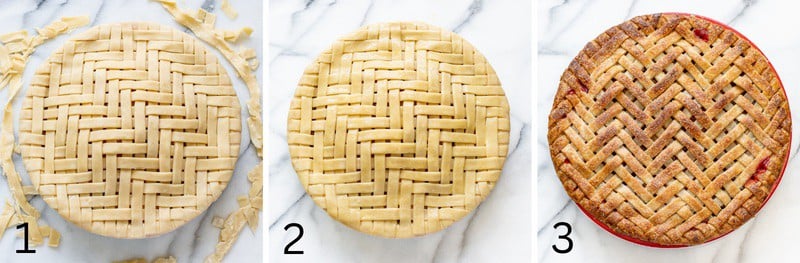
4. Assemble the herringbone lattice pie crust as noted below
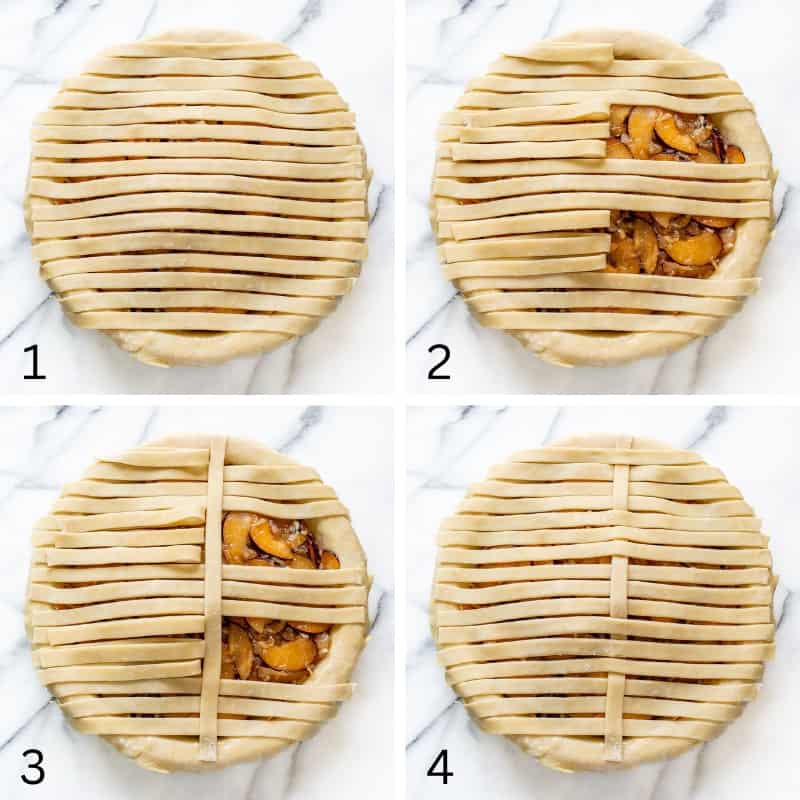
- First, select every other strip of dough (16 total) and place across the pie.
- Starting with the dough strip farthest from the edge of the counter, fold back the first strip halfway from right to left. Skip the next three strips then fold back the following three. Repeat until you reach the bottom of the pie.
- Lay one of the remaining strips of dough perpendicular to the unfolded strips just slightly off center keeping it snug to the edge of the folded dough.
- Unfold the strips of dough over the perpendicular strip.
(Not pictured) Next fold back 2 strips at the top, skip three and continue repeating with folding back three, skipping three, etc.
PRO TIP: This pattern is all about working in threes. With each new addition you’ll start at the top with a different strip or strips then continue with the pattern of skipping three, folding back three, etc.
I’ve created a detailed list in the printable recipe card to help you keep track.
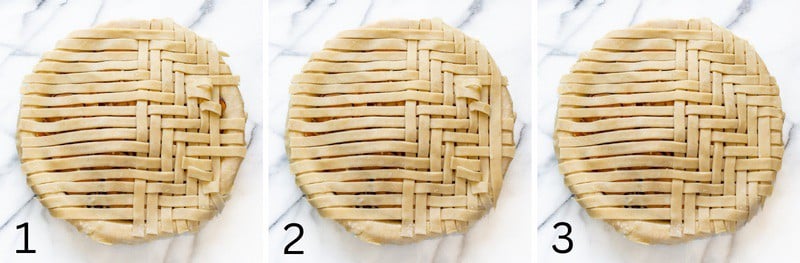
Tips for finishing the first half of the design
- Once you reach the edge of the pie take extra care when counting from the top. Make sure you are including all horizontal strips in your math. For instance, in Photo #1 above, the directions state to fold back the top two strips then skip the next three. Since the top two strips are already covered and off the edge of the pie you may not be able to fold them back. However, they must be included in the math.
- Each half of the pie will include 8 vertical strips. This photo shows the last vertical strip added at the edge of the pie.
- Unfold the strips and press gently to seal.
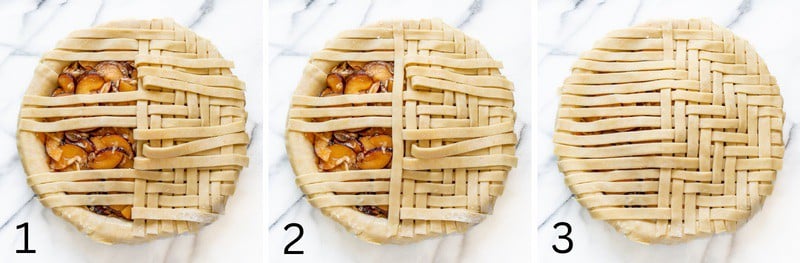
Starting on the second half
- For the left side, or second half of the pie, start by skipping the top three strips, then fold back three, skip three, fold back three, skip three and fold back the last strip.
- Add a perpendicular strip
- Unfold dough strips over the top.
Repeat until you reach the edge of the pie.
Trim, brush and bake
- Pinch the bottom crust and lattice strips together firmly to seal. Using a sharp paring knife, trim any excess dough flush to the edge of the plate.
- Brush the crust with an egg wash and sprinkle with coarse sugar, if using.
- Bake until golden brown tenting with foil if needed to prevent over browning.
TIPS for success
Have a pencil on hand to mark the steps off the list as you go. If you get lost, simply count the number of strips that have been added and do the same with the directions. It’s easier to just keep track so you start in the right place at each new addition.
Level the filling so the pie browns more evenly.
Use a cool, cold or chilled pie filling.
If at any time the crust becomes soft, refrigerate any remaining strips for 5 to 10 minutes. You can also refrigerate the unfinished pie for a few minutes to ensure it doesn’t get too warm.
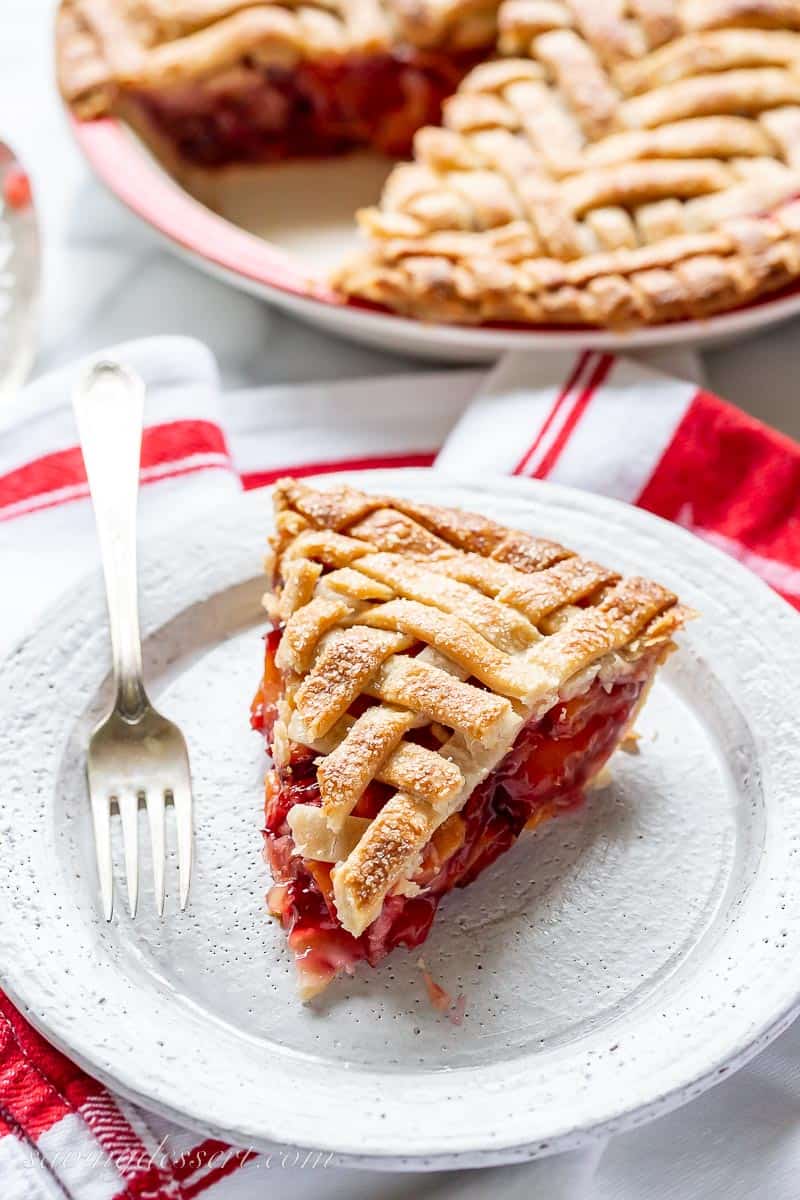
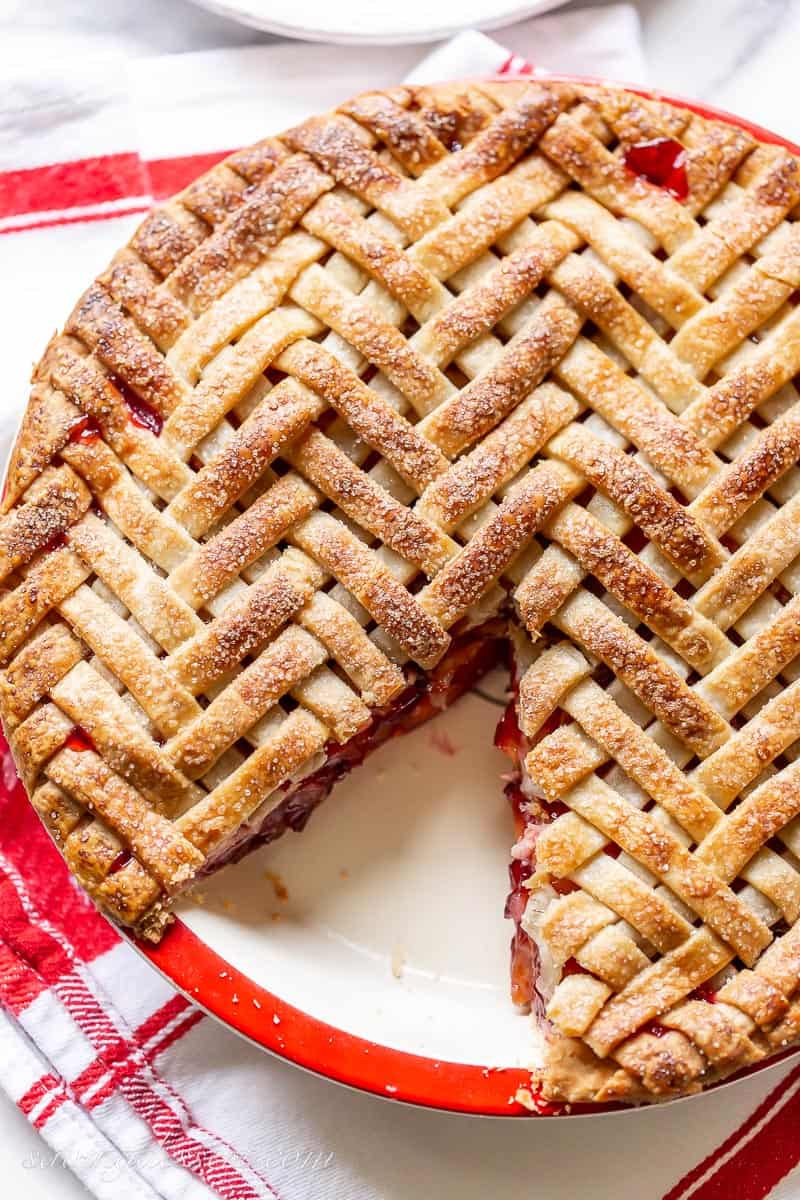
This Herringbone Lattice Pie creates a crispy crust
All our taste testers agreed that this crust is phenomenal not only in appearance but in crispiness. Since the dough is rolled thinner than a typical double crust, it bakes up beautifully and turns out light and flaky.
Don’t be tempted to use two single crusts to make the top lattice. It will be too heavy and doughy and won’t bake to crispy perfection.
Herringbone Lattice Pie Crust is not difficult to make
This lovely pattern is not hard to make if you follow the directions and keep distractions to a minimum. As stated above, we highly recommend using a pencil to check off the completed steps as you go.
Each step is very similar so it’s easy to get lost for a minute. If needed, count the number of vertical strips that have been added and verify each step with the directions. No worries!
Thanks for PINNING
Herringbone Lattice Pie Crust
Equipment
- rolling pin
- Ruler (preferably 16-inches long)
- Pizza wheel or sharp knife for cutting the dough
- 9-inch deep dish pie plate
- parchment paper
- Large baking sheet
- Aluminum Foil
- A pencil, pen or marker
Ingredients
- 1 Double Crust Pie Pastry
- 1 Recipe of cool, cold or chilled pie filling (like our Plum Pie)
- 1 Egg wash for brushing on lattice before baking
- 1 tablespoon Coarse sugar for topping
Instructions
Prepare the dough
- Make a double crust pie pastry and form into two disks. Refrigerate for at least one hour or as directed for your recipe.
- Line a clean work surface with a large piece of parchment paper. Lightly dust the parchment with flour.
- Working with one disk of pie dough roll the dough out into a 16×10-inch rectangle. Using a ruler mark the dough to create thirty-two 10-inch long by 1/2-inch wide strips. Cut the strips using a sharp knife or pizza cutter. Slide the parchment with pastry strips onto a large baking sheet and refrigerate for 30 minutes.
- While the strips of dough chill, roll the second pastry disk into a 12-inch circle on a lightly floured work surface. Ease the dough into the 9-inch deep-dish pie plate. Trim the edges to a 1/2-inch overhang.
- Lightly cover the dough with plastic wrap and refrigerate while preparing the filling.
Prepare the pie filling
- Prepare the filling and pour into the refrigerated bottom crust. Smooth the filling until level.
- Preheat oven per your pie recipe directions. Line a baking stone or baking sheet with foil and place in the oven to preheat while preparing the lattice crust.
Assemble the Herringbone Lattice Crust
- Place 16 strips across the top of the pie parallel to the edge of the counter (horizontally – see photos) leaving no large space between the strips. TIP: It's best to select every other one from the cut strips so any smaller pieces can be used on the outside edges of the pan.
RIGHT side A
- STRIP #1: Starting with the strip farthest from the edge of the countertop, FOLD BACK THE FIRST STRIP halfway from right to left.
- SKIP THE NEXT 3 STRIPS then fold back the following 3 strips halfway from right to left. Continue alternating by skipping 3 and folding back 3 until you reach the bottom of the pie.
- Lay one strip across the pie, just right of center, perpendicular to the unfolded dough strips keeping it snug to the edge of the folded dough strips.
- Unfold the folded dough strips over the top of the perpendicular strip.
- STRIP #2: Starting at the top, FOLD BACK THE TOP 2 STRIPS. Repeat skipping and folding back every 3 dough strips until you reach the bottom of the pie. Add a strip perpendicular and unfold the folded dough strips over the top.
- STRIP #3: Starting at the top FOLD BACK THE TOP 3 STRIPS. Skip 3 then fold back 3 and repeat. Add a perpendicular strip and unfold the folded dough.
- STRIP #4: Starting at the top SKIP THE FIRST STRIP, then repeat the pattern, add a perpendicular strip and unfold the dough strips over the top.
- STRIP #5: Starting at the top SKIP THE TOP 2 STRIPS, then repeat the pattern, add a perpendicular strip and unfold the dough strips over the top.
- STRIP #6: Starting at the top SKIP THE TOP 3 STRIPS, then repeat the pattern, add a perpendicular strip and unfold the dough strips over the top.
- STRIP #7: Starting at the top FOLD BACK THE TOP STRIP, then repeat the pattern, add a perpendicular strip and unfold the dough strips over the top.
- STRIP #8: Starting at the top FOLD BACK THE TOP 2 STRIPS. As this new strip will sit at the far right edge of the pie you may not be able to fold the first strips back which will already be covered. However they must be included in the math. Skip 3 strips and repeat the pattern adding the final perpendicular strip at the edge of the pan. (See photos for assistance) Unfold the dough strips over the top.
LEFT Side B
- You should now move to the left side of the pie to create the pattern.
- STRIP #9: Starting from the top SKIP THE TOP 3 STRIPS. Repeat pattern adding a perpendicular strip and unfold the dough strips over the top.
- STRIP #10: Starting at the top, SKIP THE TOP 2 STRIPS then repeat the pattern, add a perpendicular strip and unfold the dough strips over the top.
- STRIP #11: Starting at the top, SKIP THE FIRST STRIP then repeat the pattern, add a perpendicular strip and unfold the dough strips over the top.
- STRIP #12: Starting at the top, FOLD BACK THE TOP 3 STRIPS. Repeat the pattern, then add a perpendicular strip and unfold the dough strips over the top.
- STRIP #13: Starting from the top, FOLD BACK THE TOP 2 STRIPS. Repeat the pattern, then add a perpendicular strip and unfold the dough strips over the top.
- STRIP #14: Starting from the top, FOLD BACK THE TOP STRIP. Repeat the pattern, then add a perpendicular strip and unfold the dough strips over the top.
- STRIP #15: Starting from the top, SKIP THE TOP 3 STRIPS. Repeat the pattern, then add a perpendicular strip and unfold the dough strips over the top.
- STRIP #16: Starting from the top, SKIP THE TOP 2 STRIPS. This strip will sit on the far edge of the pie. You may not be able to fold back all of the following 3 strips but they must be included in the math. Repeat the pattern, then add the last perpendicular strip and unfold the dough strips over the top.
- Pinch the bottom crust and lattice strips together to seal. Using a sharp paring knife, trim the excess dough flush with the edge of the pie plate. Brush the crust with a beaten egg, then sprinkle with coarse sugar.
- Bake as directed on the aluminum foil lined preheated baking sheet.
Recipe Notes
Nutrition
More Lovely Pie Crust Designs 🥧
Playing with dough and creating beautiful pie crusts is very therapeutic for me. While I’m not an artist when it comes to designing pies, I really enjoy the accomplishment of a well baked, delicious pastry.
Here are a few more crust design ideas for your favorite pies
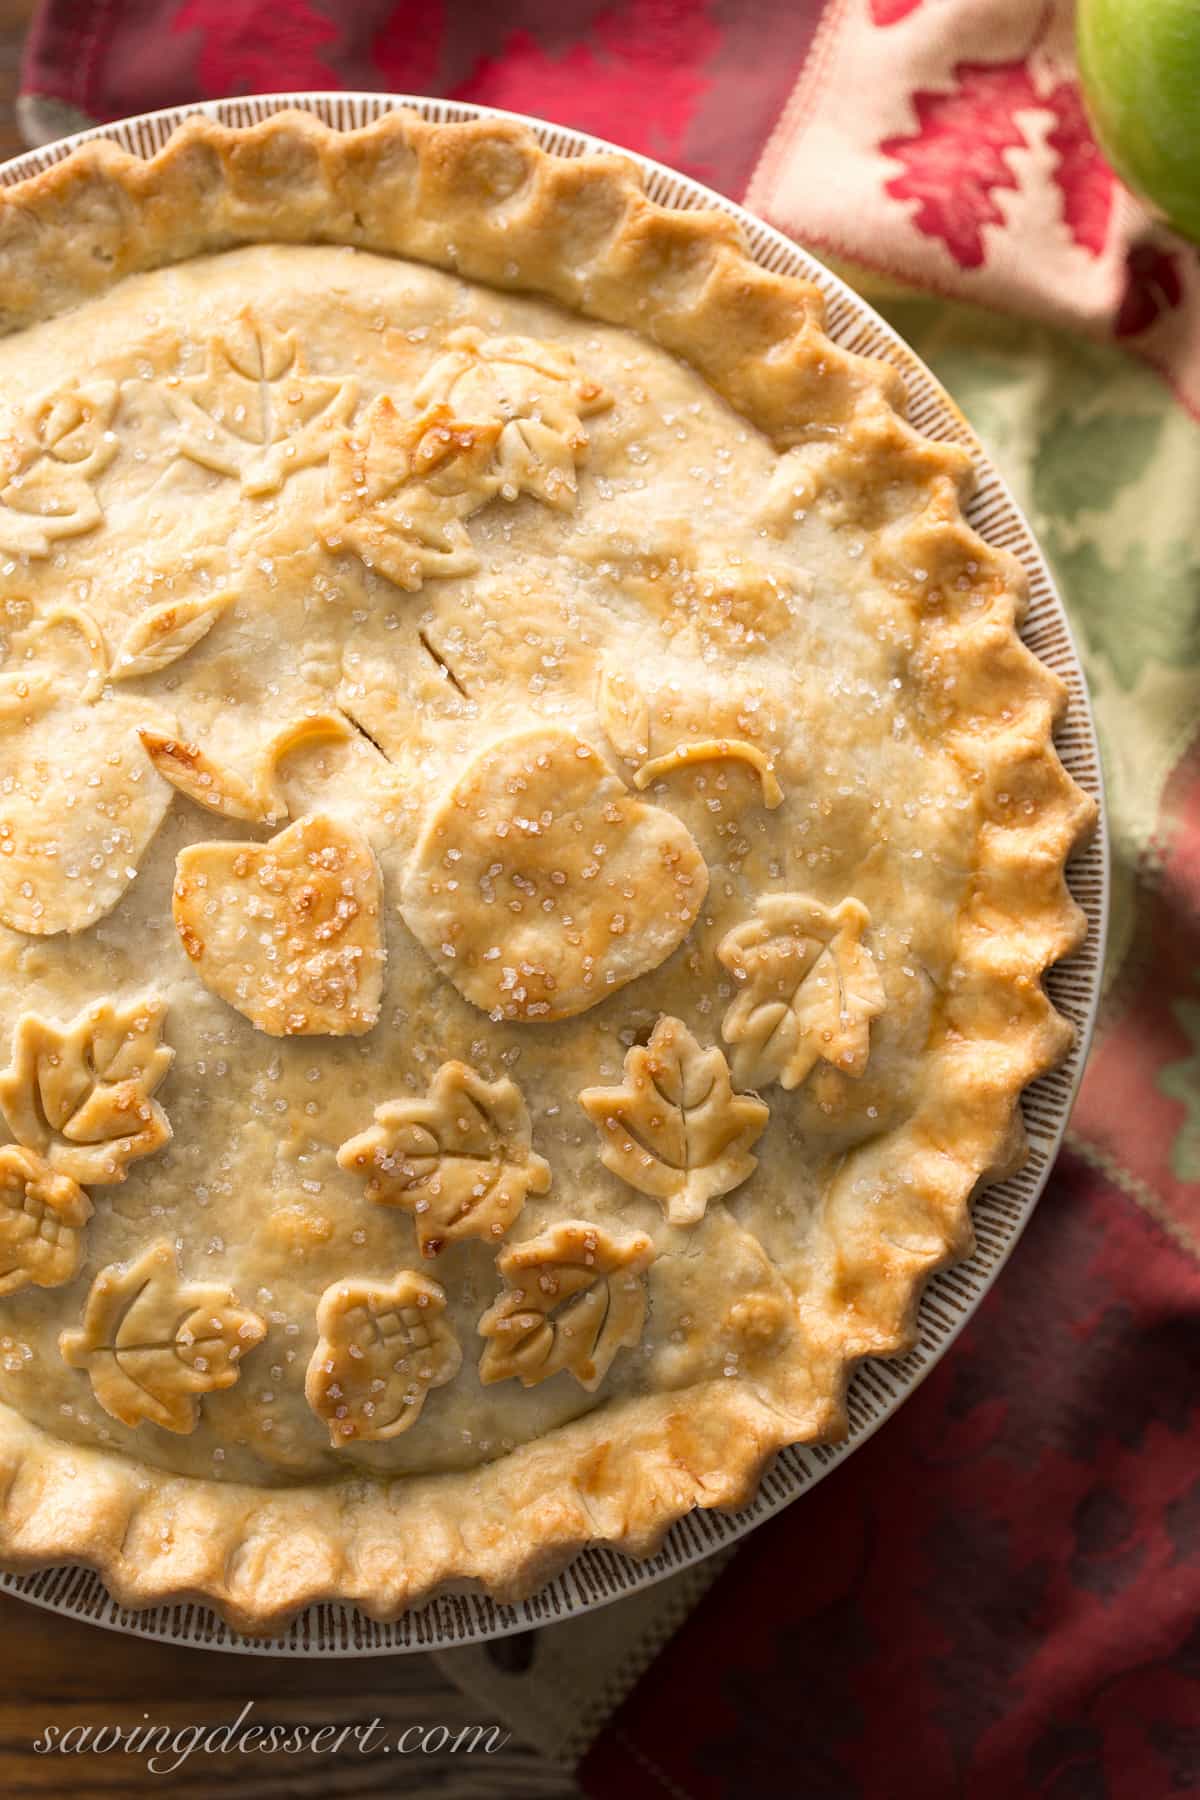
We use cookie cutters to create designs on this Class Double Crust Apple Pie. We also cut out apples using a small paring knife. 🍏
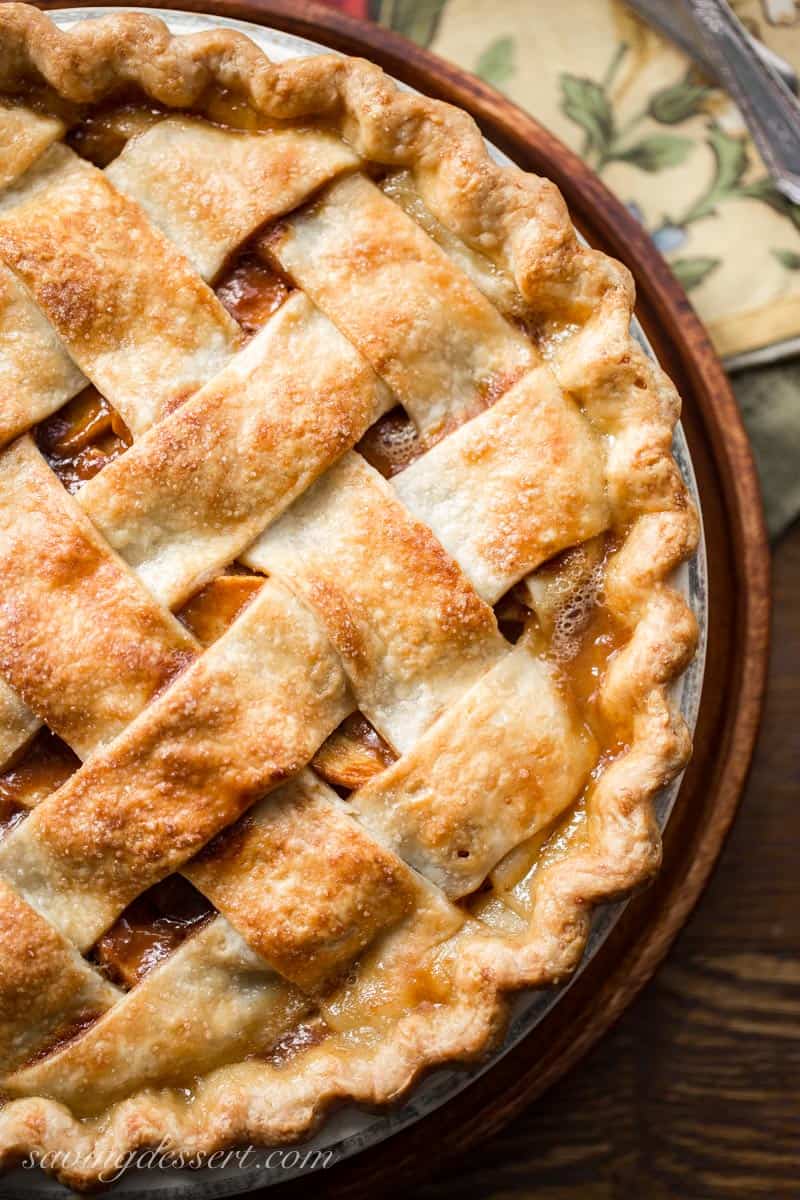
Weaving a traditional lattice crust was a simple addition to this delicious Caramel Apple Pie. 🍎
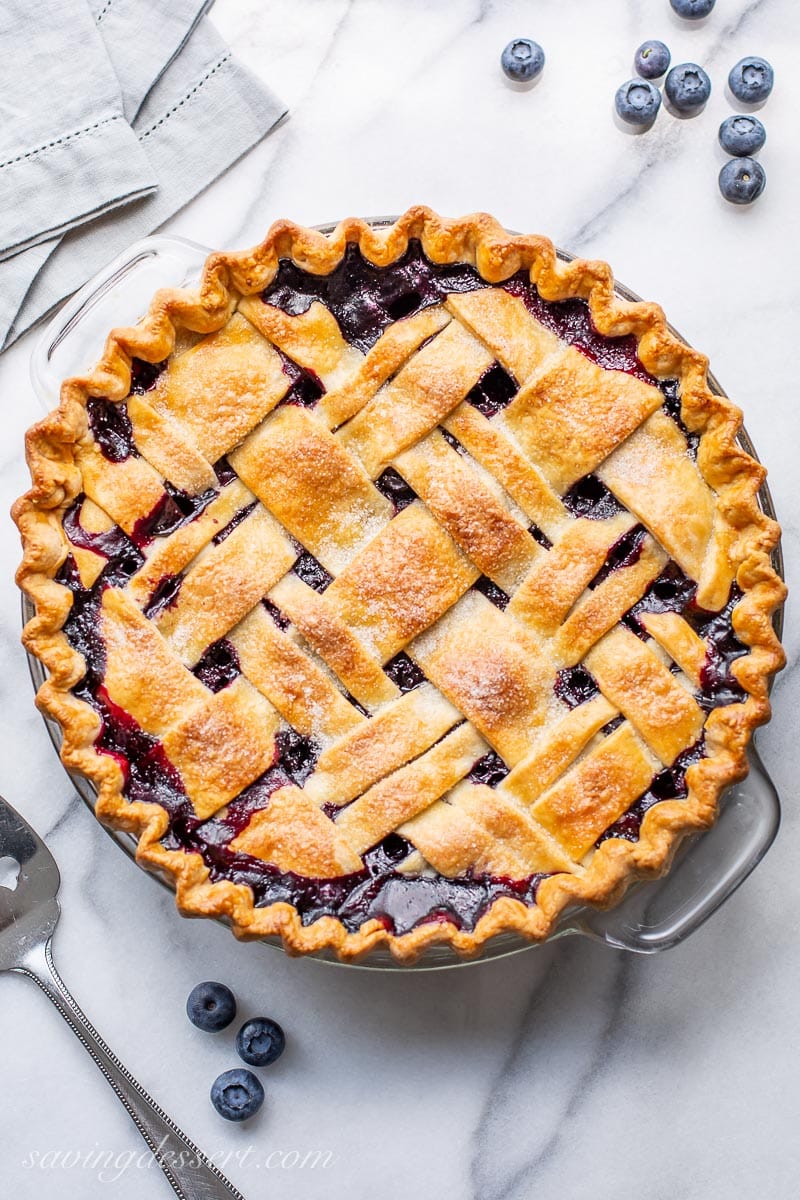
Put a pretty spin on the traditional lattice weave by cutting four the strips in half and keeping them as one when weaving the crust over our Blueberry Pie. 🫐
Here’s another example of a simple lattice weave over our Plum Pie. We added some flower cutouts which are so cute! 🌼
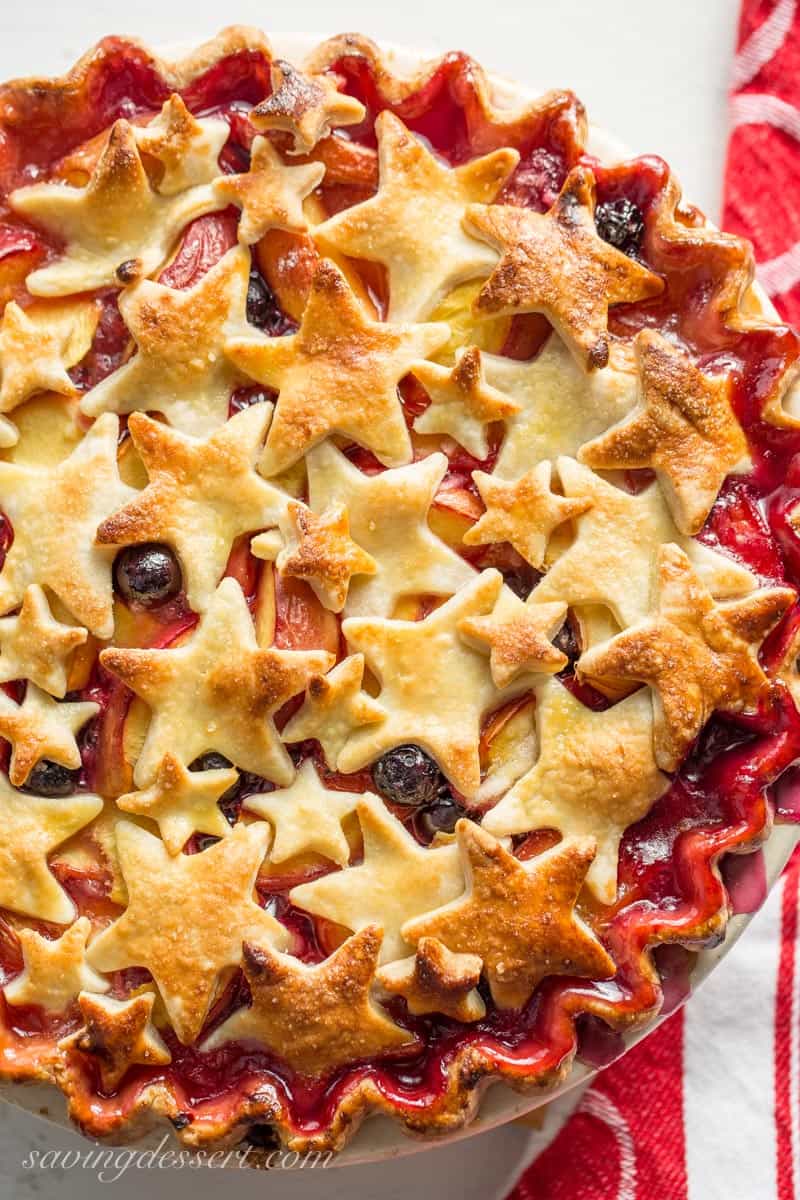
Using cookie cutters is a brilliant and simple way to decorate a seasonal pie. Our Nectarine Blueberry Pie is all dressed up for a patriotic holiday with two different star cookie cutters. 🇺🇸
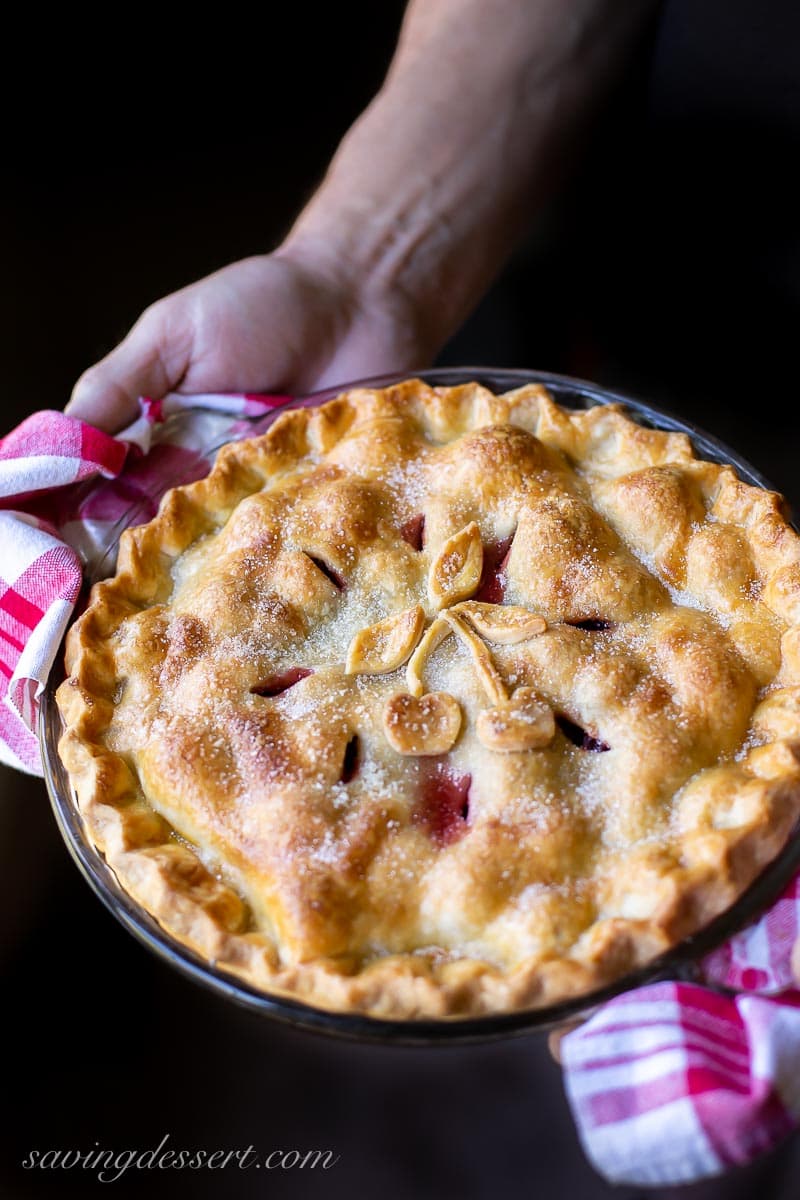
On the right you’ll find a simple double crust Cherry Pie with cuts out to look like cherries and leaves. If taking this pie to an event guests will immediately know what kind of filling is inside! 🍒
You can even decorate single crusts pie like this super popular Turkey Crust Pumpkin Pie Recipe.
I can’t wait to see how this crust turns out for you. Be sure to tag us and post your photos on Instagram!

Christine J Walsh
Excellent directions! Thank you!
Tricia Buice
Thanks Christine!
Kate
Gorgeous, gorgeous, gorgeous! Bravo!
Tricia Buice
Thank you Kate! It’s fun to make too.